Contents
- Kaspersky Endpoint Security 11.2.0 for Linux
- What's new
- Installing the application
- Installing Kaspersky Endpoint Security using the command line
- Initial configuration of the application in interactive mode
- Selecting the locale
- Viewing the End User License Agreement and the Privacy Policy
- Accepting the End User License Agreement
- Accepting the Privacy Policy
- Using Kaspersky Security Network
- Assigning the Administrator role to a user
- Determining the file operation interceptor type
- Configuring the update source
- Configuring proxy server settings
- Downloading application databases
- Enabling automatic application database update
- Application activation
- Initial configuration of the application in automatic mode
- Settings of the Kaspersky Endpoint Security initial setup configuration file
- Installing Network Agent using the command line
- Initial configuration of the Network Agent using the command line
- About Kaspersky Endpoint Security administration web plug-in
- Installing Kaspersky Endpoint Security via Kaspersky Security Center
- Installing Kaspersky Endpoint Security using the Web Console
- Getting started using Kaspersky Security Center
- Activating the application using Kaspersky Security Center
- Running the application on Astra Linux in closed software environment mode
- Configuring permissive rules in the SELinux system
- Updating the application from a previous version
- Uninstalling the application
- Application licensing
- About providing and processing data
- Managing the application using the command line
- Starting and stopping the application
- Displaying Help on the commands
- Enabling the display of events
- Viewing information about the application
- Description of the application commands
- Using filters to limit query results
- Exporting and importing application settings
- Setting the application memory usage limit
- Application components integrity check
- General application settings
- Encrypted connections scan
- User roles
- Managing application tasks using the command line
- View the list of tasks
- Creating a new task
- Editing task settings using a configuration file
- Editing task settings using the command line
- Resetting task settings to their default values
- Starting and stopping a task
- Managing scan scopes from the command line
- Managing exclusion scopes from the command line
- Viewing a task state
- Scheduling a task
- Deleting a task
- File Threat Protection task (File_Threat_Protection, ID:1)
- Virus Scan task (Scan_My_Computer, ID:2)
- Custom Scan task (Scan_File, ID:3)
- Critical Areas Scan task (Critical_Areas_Scan, ID:4)
- Update task (Update, ID:6)
- Rollback task (Rollback, ID:7)
- Licensing task (License, ID:9)
- Storage management task (Backup, ID:10)
- System Integrity Monitoring task (System_Integrity_Monitoring, ID:11)
- Firewall Management task (Firewall_Management, ID:12)
- About network packet rules
- About dynamic rules
- About the predefined network zone names
- Firewall Management task settings
- Adding a network packet rule
- Deleting a network packet rule
- Changing the execution priority of a network packet rule
- Adding a network address to a zone section
- Deleting a network address from a zone section
- Anti-Cryptor task (Anti_Cryptor, ID:13)
- Web Threat Protection task (Web_Threat_Protection, ID:14)
- Device Control task (Device_Control, ID:15)
- Removable Drives Scan task (Removable_Drives_Scan, ID:16)
- Network Threat Protection task (Network_Threat_Protection, ID:17)
- Container Scan task (Container_Scan, ID:18)
- Custom Container Scan task (Custom_Container_Scan, ID:19)
- Behavior Detection task (Behavior_Detection, ID:20)
- Application Control task (Application_Control, ID:21)
- Inventory Scan task (Inventory_Scan, ID:22)
- Participating in Kaspersky Security Network
- Integration with Kaspersky Managed Detection and Response
- KESL container
- Events and reports
- Managing the application using Kaspersky Security Center Administration Console
- Starting and stopping the application on a client device
- Viewing the protection status of a device
- Viewing application settings
- Updating application databases and modules
- Managing policies in the Administration Console
- Policy settings
- File Threat Protection
- Exclusion scopes
- Firewall Management
- Web Threat Protection
- Network Threat Protection
- Kaspersky Security Network
- Application Control
- Anti-Cryptor
- System Integrity Monitoring
- Device Control
- Behavior Detection
- Task management
- Removable Drives Scan
- Proxy server settings
- Application settings
- Container Scan settings
- Managed Detection and Response
- Network settings
- Global exclusions
- Storage settings
- Managing tasks in the Administration Console
- Task settings
- Configuring integration with Kaspersky Managed Detection and Response
- Configuring KESL container settings
- Manually checking the connection with the Administration Server. Klnagchk utility
- Manually connecting to the Administration Server. Klmover utility
- Remote application administration using Kaspersky Security Center Web Console and Kaspersky Security Center Cloud Console
- Logging in and out of the Web Console and Cloud Console
- Starting and stopping the application on a client device
- Updating application databases and modules
- Viewing the protection status of a device
- Managing policies in the Web Console
- Policy settings
- Application settings tab
- File Threat Protection
- Scan exclusions
- Firewall Management
- Web Threat Protection
- Network Threat Protection
- Kaspersky Security Network
- Anti-Cryptor
- System Integrity Monitoring
- Application Control
- Device Control
- Behavior Detection
- Task management
- Removable Drives Scan
- Proxy server settings
- Application settings
- Container Scan settings
- Managed Detection and Response
- Network settings
- Global exclusions
- Storage settings
- Managing tasks in the Web Console
- Task settings
- Virus Scan. Scan settings section
- Virus Scan. Scan scopes section
- Virus Scan. Exclusion scopes section
- Critical Areas Scan. Scan settings section
- Critical Areas Scan. Scan scopes section
- Critical Areas Scan. Exclusion scopes section
- System Integrity Check. Scan settings section
- System Integrity Check. Exclusion scopes section
- Container Scan. Scan settings section
- Container Scan. Exclusion scopes section
- Add Key
- Update. Database update source section
- Update. Settings section
- Rollback
- Inventory. Scan settings section
- Inventory. Exclusion scopes section
- Configuring integration with Kaspersky Managed Detection and Response
- Configuring KESL container settings
- Managing application using graphical user interface
- Contact Technical Support
- Appendices
- Appendix 1. Resource consumption optimization
- Appendix 2. Default task configuration files
- Rules for editing application task configuration files
- File Threat Protection task configuration file
- Virus Scan task configuration file
- Custom Scan task configuration file
- Critical Areas Scan task configuration file
- Update task configuration file
- Storage management task configuration file
- System Integrity Monitoring task configuration file
- Firewall Management task configuration file
- Anti-Cryptor task configuration file
- Web Threat Protection task configuration file
- Device Control task configuration file
- Removable Drives Scan task configuration file
- Network Threat Protection task configuration file
- Container Scan task configuration file
- Inventory Scan task configuration file
- Application Control task configuration file
- Appendix 3. Command line return codes
- Appendix 4. Managing KESL container using REST API
- Appendix 5. Configuring interaction with Kaspersky Anti-Virus for Linux Mail Server
- Sources of information about the application
- Glossary
- Active key
- Active policy
- Administration group
- Administration Server
- Application activation
- Application databases
- Application settings
- Backup
- Database of malicious web addresses
- Database of phishing web addresses
- Exclusion
- False positive
- File mask
- Group policy
- Group task
- Infected object
- Kaspersky update servers
- License
- License certificate
- Object disinfection
- Policy
- Proxy server
- Reserve key
- Startup objects
- Subscription
- Trusted device
- Trusted zone
- Information about third-party code
- Trademark notices
Kaspersky Endpoint Security 11.2.0 for Linux
Kaspersky Endpoint Security 11.2.0 for Linux (hereinafter also referred to as Kaspersky Endpoint Security) protects computers running the Linux operating systems against malware. Threats can enter the system via network data links or from removable drives.
The application lets you:
- Scan file system objects located on local disks of the computer, as well as mounted and shared resources, which are accessed via SMB and NFS protocols.
- Scan objects in the file system both in real time using the File Threat Protection task and on demand using virus scan tasks.
- Scan startup objects, boot sectors, process memory, and kernel memory.
- Detect infected objects and neutralize detected threats.
- Automatically select an action to neutralize the threat.
- Save backup copies of files before disinfection or deletion and restore files from backups.
- Manage tasks and configure their parameters.
- Add keys and activate the program using activation codes.
- Update the program with service packs.
- Update application databases from Kaspersky update servers, via the Administration Server, or from a user-defined source by schedule or on demand.
- Use application databases to detect and disinfect infected files. During the scan process, the program analyzes each file for the presence of a threat: it compares the file code with the code of a specific threat and looks for possible matches.
- Monitor the integrity of the system or specified files and report changes. System Integrity Monitoring can be performed in continuous monitoring mode and in on-demand scan mode.
- Manage the operating system firewall and, if necessary, restore the set of firewall rules that have been changed.
- Protect files in local directories with network access via SMB / NFS from remote malicious encryption.
- Analyze traffic sent to users' computers via HTTP / HTTPS and FTP and check if web addresses are malicious or phishing.
- Configure flexible restrictions on access to data storage devices (hard disks, removable disks, CD / DVD drives), data transfer equipment (modems), data conversion devices (printers) and interfaces for connecting devices to computers (USB, FireWire).
- Check removable drives when connected to a computer.
- Check incoming network traffic for activity typical of network attacks.
- Scan containers, images and namespaces, as well as use Kaspersky Endpoint Security as a container application (hereinafter referred to as KESL container).
- Receive information about the actions of programs on the computer.
- Configure encrypted connections scan settings.
- Control the launch of programs on users' computers, which reduces the risk of computer infection by restricting access to programs.
- Get information about all executable files of the applications installed on computers using the Inventory task, which can be useful, for example, for creating application control rules.
- Participate in Kaspersky Security Network. The use of data from Kaspersky Security Network ensures faster responses by Kaspersky Endpoint Security to various threats, improves the performance of some protection components, and reduces the likelihood of false positives.
- Configure integration between Kaspersky Endpoint Security and Kaspersky Managed Detection and Response (MDR) to enable continuous search, detection and elimination of threats aimed at your organization.
- Allow users without root permissions to manage the application functions.
- Notify the administrator about events that occurred while the program was running.
- Check the integrity of program components using the Integrity Checker utility.
You can manage Kaspersky Endpoint Security using the following methods:
- Using application control commands from the command line.
- Using Kaspersky Security Center Administration Console.
- Using Kaspersky Security Center Web Console and Kaspersky Security Center Cloud Console.
- Using a graphical user interface.
In the territory of the USA, the update functionality (including anti-virus signature updates and code base updates), as well as the KSN functionality will no longer be available in the application starting 12:00 AM Eastern Daylight Time (EDT) September 10, 2024 in compliance with trade restrictions.
Distribution kit
The distribution kit includes Kaspersky Endpoint Security installation package containing the following files:
- kesl-11.2.0-<build number>.i386.rpm, kesl_11.2.0-<build number>_i386.deb
Contain the main application files. Packages can be installed to 32-bit operating systems based on the type of package manager.
- kesl-11.2.0-<build number>.x86_64.rpm, kesl_11.2.0-<build number>_amd64.deb
Contain the main application files. Packages can be installed to 64-bit operating systems based on the type of package manager.
- kesl-astra_11.2.0-<build number>_amd64.deb
Contains the main application files. The package can be installed on Astra Linux Special Edition operating systems.
When launched in the Astra Linux Special Edition operating system, Kaspersky Endpoint Security uses the
execapscommand with PARSEC privileges (flags) PARSEC_CAP_PRIV_SOCK (0x00100) and PARSEC_CAP_READSEARCH (0x00200) to be able to work with user sessions of any mandatory level and integrity level. - kesl-gui-11.2.0-<build number>.i386.rpm, kesl-gui_11.2.0-<build number>_i386.deb
Contain the files of the application graphical user interface. Packages can be installed to 32-bit operating systems based on the type of package manager.
- kesl-gui-11.2.0-<build number>.x86_64.rpm, kesl-gui_11.2.0-<build number>_amd64.deb
Contain the files of the application graphical user interface. Packages can be installed to 64-bit operating systems based on the type of package manager.
- kesl-gui-astra_11.2.0-<build number>_amd64.deb
Contains the files of the application graphical user interface. The package can be installed in the Astra Linux Special Edition operating systems.
- kesl-11.2.0.<build number>.zip
Contains the files used for remote application installation using Kaspersky Security Center, including license.<language ID> and ksn_license.<language ID> files.
- kesl-astra-11.2.0.<build number>.zip
Contains the files used for remote application installation on Astra Linux Special Edition operating systems using Kaspersky Security Center, including the license.<language ID> and ksn_license.<language ID> files.
- klnagent-<build number>.i386.rpm, klnagent_<build number>_i386.deb, klnagent64-<build number>.x86_64.rpm, klnagent64_<build number>_amd64.deb, klnagent64-astra_<build number>_amd64.deb
Contains Network Agent (a Kaspersky Security Center component that enables interaction between the Kaspersky Security Center Administration Server and Kaspersky Endpoint Security).
- klnagent-i386-<build number>-i386-rpm.tgz, klnagent-i386-<build number>-i386-deb.tgz, klnagent-x86_64-<build number>-x86_64-rpm.tgz, klnagent-x86_64-<build number>-amd64-deb.tgz, klnagent-x86_64-<build number>-astra-amd64-deb.tgz
Contains the klnagent.kpd and akinstall.sh files used in the procedure for remote installation of Network Agent using Kaspersky Security Center.
- docker-service-kesl64-11.2.0-<build number>.tgz
Contains files for creating an image of a KESL container application.
- ksn_license. <language ID>
Contains the text of the Statement on Kaspersky Security Network.
- license. <language ID>
Contains the text of the License Agreement. The License Agreement specifies the terms for using the program.
Hardware and software requirements
Kaspersky Endpoint Security has the following hardware and software requirements:
Minimum hardware requirements:
- Core 2 Duo 1.86 GHz or faster processor
- swap partition at least 1 GB
- 1 GB of RAM for 32-bit operating systems, 2 GB of RAM for 64-bit operating systems;
- 4 GB of free hard disk space for program installation and storage of temporary and log files.
Software requirements:
- Supported 32-bit operating systems:
- CentOS 6.7 and later.
- Debian GNU / Linux 9.4 and later.
- Debian GNU / Linux 10.1 and later.
- Debian GNU / Linux 11.1 and later.
- Linux Mint 19 and up.
- Mageia 4.
- Red Hat Enterprise Linux 6.7 and later.
- ALT 8 SP Workstation.
- ALT 8 SP Server.
- ALT Education 9.
- ALT Education 10.
- ALT Workstation 9.
- ALT Workstation 10.
- Supported 64-bit operating systems:
- AlmaLinux OS 8.4.
- AlmaLinux OS 8.5.
- AlterOS 7.5 and higher.
- Amazon Linux 2.
- Astra Linux Common Edition (operational update 2.12).
- Astra Linux Special Edition RUSB.10015-01 (operational update 1.5).
- Astra Linux Special Edition RUSB.10015-01 (operational update 1.6).
- Astra Linux Special Edition RUSB.10015-01 (operational update 1.7).
- Astra Linux Special Edition RUSB.10015-16 (release 1) (operational update 1.6).
- CentOS 6.7 and later.
- CentOS 7.2 and later.
- CentOS 8.0 and later.
- Debian GNU / Linux 9.4 and later.
- Debian GNU / Linux 10.1 and later.
- Debian GNU / Linux 11.1 and later.
- EulerOS V2.0SP2 2.2.17.
- EulerOS V2.0SP5 2.5.6.
- Linux Mint 19 and up.
- Linux Mint 20.1 and later.
- openSUSE Leap 15.0 and later.
- Oracle Linux 7.3 and later.
- Oracle Linux 8.0 and later.
- Pardus OS 19.1.
- Red Hat Enterprise Linux 6.7 and later.
- Red Hat Enterprise Linux 7.2 and later.
- Red Hat Enterprise Linux 8.0 or later.
- SUSE Linux Enterprise Server 12 SP5 and later.
- SUSE Linux Enterprise Server 15 or later.
- Ubuntu 18.04 LTS and later.
- Ubuntu 20.04 LTS.
- ALT 8 SP Workstation.
- ALT 8 SP Server.
- ALT Education 9.
- ALT Education 10.
- ALT Workstation 9.
- ALT Workstation 10.
- ALT Workstation K 8
- ALT Server 9.
- ALT Server 10.
- Atlant, Alcyone build, version 2022.02.
- GosLinux 7.2.
- RED OS 7.3.
- GPOS "OSnova" (5.4.0-0.bpo.4.2-amd64 kernel support with limitations: memory scan not supported, closed software environment mode not supported).
- Perl language interpreter version 5.10 or later.
- Packages installed for compiling applications and running tasks (gcc, binutils, glibc, glibc-devel, make, ld) in the operating systems that do not support the fanotify technology.
- Header files of the operating system kernel for compiling Kaspersky Endpoint Security modules in the operating systems that do not support the fanotify technology.
Prior to installing Kaspersky Endpoint Security and Network Agent on SUSE Linux Enterprise Server 15 operating system, the insserv-compat package must be installed.
For Red Hat Enterprise Linux 8 and CentOS 8, the perl-Getopt-Long package must be installed.
For Kaspersky Endpoint Security administration plug-in operation, Microsoft Visual C ++ 2015 Redistributable Update 3 RC must be installed (https://www.microsoft.com/en-us/download/details.aspx?id=52685).
Kaspersky Endpoint Security is compatible with the following Kaspersky Security Center versions:
- Kaspersky Security Center 10 Service Pack 3.
- Kaspersky Security Center 11.
- Kaspersky Security Center 12.
- Kaspersky Security Center 13.
- Kaspersky Security Center 13.1.
What's new
Kaspersky Endpoint Security now boasts the following features and improvements:
Kaspersky Endpoint Security 11.2.1 for Linux
- Kaspersky Security Center Web Console and Kaspersky Security Center Cloud Console.
Implemented the capability to manage devices with Kaspersky Endpoint Security installed via Kaspersky Security Center Web Console or Kaspersky Security Center Cloud Console.
Kaspersky Endpoint Security 11.2.0 for Linux
- Application Control.
The ability to control the launch of programs on users' computers has been implemented.
- Inventory.
A task has been implemented that allows you to get information about all executable program files stored on computers.
- Container scan.
Support for integration with the CRI-O environment, the Podman and runc utilities is implemented.
- KESL container.
The application distribution kit includes files for building a container application (hereinafter referred to as KESL container) with the REST API for embedding into external systems.
- Integration with Kaspersky Managed Detection and Response.
The ability to interact with the Kaspersky Managed Detection and Response (MDR) solution has been implemented, which provides continuous search, detection and elimination of threats aimed at your organization.
- Critical Areas Scan.
The Boot Sector Scan (Boot_Scan) and Kernel and Process Memory Scan (Memory_Scan) tasks have been moved to the new Critical Areas scan task (Critical_Areas_Scan), which allows you to scan startup objects, boot sectors, process memory, and kernel memory. The separate Boot Sector Scan (Boot_Scan) and Kernel and Process Memory Scan (Memory_Scan) tasks have been removed.
- Task priority.
The ability to specify one of three priorities for executing anti-virus scan, custom scan, inventory, and ContainerScan tasks has been implemented.
- Options for creating trace files.
Added the ability to enable creation of trace files at the application startup.
- Policy profiles.
Added support for working with policy profiles in Kaspersky Security Center.
- Update task settings.
The proxy server settings used to connect to Kaspersky update servers and custom update sources have been removed.
- Updated list of supported operating systems.
Installing the application
This scenario describes how to install and perform initial configuration of Kaspersky Endpoint Security, how to install and configure Kaspersky Security Center Network Agent and how to install Kaspersky Endpoint Security administration plug-ins.
The installation and initial configuration of Kaspersky Endpoint Security and Kaspersky Security Center proceeds in stages:
- Removing third-party anti-virus software
Before installing Kaspersky Endpoint Security, make sure no other third-party anti-virus software is installed on your computer. Uninstall these programs if necessary.
- Installing application packages and the graphical user interface
Kaspersky Endpoint Security and the graphical user interface are distributed in DEB and RPM format packages. Install Kaspersky Endpoint Security and the graphical user interface from the appropriate format packages.
You can install Kaspersky Endpoint Security using the command line or using Kaspersky Security Center by means of the Administration Console or Kaspersky Security Center Web Console.
- Initial configuration of Kaspersky Endpoint Security
The initial configuration must be performed in order to protect the computer.
If you installed Kaspersky Endpoint Security using the command line, run the initial configuration script or perform the initial configuration in automatic mode.
If you installed Kaspersky Endpoint Security using Kaspersky Security Center, go through the Getting started procedure and activate the application.
- Installation and initial configuration of the Network Agent
If you plan to manage Kaspersky Endpoint Security using Kaspersky Security Center, install Kaspersky Security Center Network Agent and configure its settings.
- Installing Kaspersky Endpoint Security administration plug-ins
If you plan to manage Kaspersky Endpoint Security using Kaspersky Security Center, install the following Kaspersky Endpoint Security administration plug-ins depending on the administration console you plan to use for interaction with Kaspersky Security Center:
- MMC administration plug-in for Kaspersky Endpoint Security allows you to manage the application operation using Kaspersky Security Center Administration Console.
- Kaspersky Endpoint Security administration web plug-in allows you to manage the application operation using Kaspersky Security Center Cloud Console and Kaspersky Security Center Web Console.
To run the application, the root account must be the owner of the following directories and only the owner must have write access to them: /var, /var/opt, /var/opt/kaspersky, /var/log/kaspersky, /opt, /opt/kaspersky, /usr/bin, /usr/lib, /usr/lib64.
Installing Kaspersky Endpoint Security using the command line
Kaspersky Endpoint Security is distributed in the DEB and RPM packages. There are separate packages for the application and for the graphical user interface.
You can perform the following actions when installing the application:
- Install the application package and the graphical user interface package at the same time.
- Install only the application package, without a graphical user interface.
- Install only the graphical user interface package, if the application package is already installed.
It is not possible to install the graphical user interface package on a computer that does not have the application package installed.
If the version of the apt package manager is lower than 1.1.X, use the dpkg/rpm package manager (depending on the operating system) for installation.
Installing the application package and the graphical user interface package
To install Kaspersky Endpoint Security and the graphical user interface from the RPM packages to a 32-bit operating system, execute the following command:
# rpm -i kesl-11.2.0-<build number>.i386.rpm kesl-gui-11.2.0-<build number>.i386.rpm
To install Kaspersky Endpoint Security and the graphical user interface from RPM packages to a 64-bit operating system, execute the following command:
# rpm -i kesl-11.2.0-<build number>.x86_64.rpm kesl-gui-11.2.0-<build number>.x86_64.rpm
To install Kaspersky Endpoint Security and the graphical user interface from DEB packages to a 32-bit operating system, execute the following command:
# apt-get install ./kesl_11.2.0-<build number>_i386.deb ./kesl-gui_11.2.0-<build number>_i386.deb
To install Kaspersky Endpoint Security and the graphical user interface from DEB packages to a 64-bit operating system, execute the following command:
# apt-get install ./kesl_11.2.0-<build number>_amd64.deb ./kesl-gui_11.2.0-<build number>_amd64.deb
Installing the application package without the graphical user interface package
To install Kaspersky Endpoint Security without the graphical user interface from the RPM package to a 32-bit operating system, execute the following command:
# rpm -i kesl-11.2.0-<build number>.i386.rpm
To install Kaspersky Endpoint Security without the graphical user interface from an RPM package to a 64-bit operating system, execute the following command:
# rpm -i kesl-11.2.0-<build number>.x86_64.rpm
To install Kaspersky Endpoint Security without the graphical user interface from a DEB package to a 32-bit operating system, execute the following command:
# apt-get install ./kesl_11.2.0-<build number>_i386.deb
To install Kaspersky Endpoint Security without the graphical user interface from a DEB package to a 64-bit operating system, execute the following command:
# apt-get install ./kesl_11.2.0-<build number>_amd64.deb
Installing the graphical user interface package
To install the graphical user interface from the RPM package to a 32-bit operating system, execute the following command:
# rpm -i kesl-gui-11.2.0-<build number>.i386.rpm
To install the graphical user interface from the RPM package to a 64-bit operating system, execute the following command:
# rpm -i kesl-gui-11.2.0-<build number>.x86_64.rpm
To install the graphical user interface from the DEB package to a 32-bit operating system, execute the following command:
# apt-get install ./kesl-gui_11.2.0-<build number>_i386.deb
To install the graphical user interface from the DEB package to a 64-bit operating system, execute the following command:
# apt-get install ./kesl-gui_11.2.0-<build number>_amd64.deb
Installing the application in the Astra Linux Special Edition operating system
To install Kaspersky Endpoint Security and the graphical user interface to the Astra Linux Special Edition operating system, execute the following command:
# apt-get install ./kesl-astra_11.2.0-<build number>_amd64.deb ./kesl-gui-astra_11.2.0-<build number>_amd64.deb
To install Kaspersky Endpoint Security without the graphical user interface to the Astra Linux Special Edition operating system, execute the following command:
# apt-get install ./kesl-astra_11.2.0-<build number>_amd64.deb
To install the graphical user interface to the Astra Linux Special Edition operating system, execute the following command:
# apt-get install ./kesl-gui-astra_11.2.0-<build number>_amd64.deb
To install Kaspersky Endpoint Security and the graphical user interface in the Astra Linux Special Edition operating system, using the dpkg package manager execute the following commands:
# dpkg -i kesl-astra_11.2.0-<build number>_amd64.deb; dpkg -i kesl-gui-astra_11.2.0-<build number>_amd64.deb
After installation of Kaspersky Endpoint Security using the command line is completed, perform initial configuration of the application by running the initial configuration script or in automatic mode.
Page top
Initial configuration of the application in interactive mode
After installing Kaspersky Endpoint Security using the command line, perform the initial application setup by running the initial configuration script. The initial configuration script is included in the Kaspersky Endpoint Security distribution kit.
Performing the initial setup after installing the application using the command line is required to enable the protection of the client device.
To run Kaspersky Endpoint Security initial configuration script, execute the following command:
# /opt/kaspersky/kesl/bin/kesl-setup.pl
The initial configuration script must be run with the root privileges after the installation of Kaspersky Endpoint Security package is finished. The script requests the values of Kaspersky Endpoint Security settings step-by-step. Script execution completion and the console release indicate that the initial application setup is completed.
To check the return code, execute the following command:
echo $?
If the command returns code 0, the initial application setup is finished successfully.
Kaspersky Endpoint Security protects the device only after the application databases are updated.
Selecting the locale
At this step, the application displays the list of supported locale identifiers in RFC 3066 format.
Specify the locale in the format as identified in this list. This locale will be used for application events sent to Kaspersky Security Center, as well as for the texts of the License Agreement, Privacy Policy, and Kaspersky Security Network Statement.
The locale of the graphical interface and the application command line depends on the value of the LANG environment variable. If the locale that is not supported by Kaspersky Endpoint Security is specified as the value of the LANG environment variable, the graphical interface and the command line are displayed in English.
Viewing the End User License Agreement and the Privacy Policy
At this step, read the End User License Agreement concluded between you and Kaspersky, and the Privacy Policy describing the handling and transmission of data.
Accepting the End User License Agreement
At this step, you must either accept or decline the terms of the End User License Agreement.
After exiting viewing mode, enter one of the following values:
yes(ory), if you accept the terms of the End User License Agreement.no(orn), if you do not accept the terms of the End User License Agreement.
If you do not accept the terms of the End User License Agreement, the application terminates Kaspersky Endpoint Security setup process.
Accepting the Privacy Policy
At this step, you must either accept or decline the terms of the Privacy Policy.
After exiting viewing mode, enter one of the following values:
yes(ory), if you accept the terms of the Privacy Policy.no(orn), if you do not accept the terms of the Privacy Policy.
If you do not accept the terms of the Privacy Policy, the application terminates Kaspersky Endpoint Security setup process.
Page top
Using Kaspersky Security Network
At this step, you must either accept or decline the terms of use of the Kaspersky Security Network Statement. The file ksn_license.<language ID> containing the text of the Kaspersky Security Network Statement is located in the directory /opt/kaspersky/kesl/doc/.
Enter one of the following values:
yes(ory), if you accept the terms of the Kaspersky Security Network Statement. KSN with statistics sharing (extended KSN mode) will be enabled.no(orn), if you do not accept the terms of the Kaspersky Security Network Statement.
Refusing to use Kaspersky Security Network will not halt the Kaspersky Endpoint Security installation process. You can enable, disable, or change the Kaspersky Security Network mode at any time.
Assigning the Administrator role to a user
At this step, you can grant the administrator (admin) role to the user.
Enter the name of the user to whom you want to grant the administrator role.
You can grant the administrator role to the user later at any time.
Determining the file operation interceptor type
At this step, the file operation interceptor type for the utilized operating system is determined. For operating systems that do not support fanotify technology, kernel module compilation will begin.
If the necessary packages are not detected during the kernel module compilation process, Kaspersky Endpoint Security will prompt you to install them. If the package download fails, an error message will be displayed.
If all the required packages are available, the kernel module will be automatically compiled when the File Threat Protection task starts.
You can compile the kernel module later after the Kaspersky Endpoint Security initial configuration is complete.
Configuring the update source
At this step, specify the update sources for databases and application modules.
Enter one of the following values:
KLServers: the application receives updates from one of the Kaspersky update servers.SCServer: the application downloads updates to the protected device from Kaspersky Security Center Administration Server installed in your organization. You can select this update source if you use Kaspersky Security Center for centralized administration of device protection in your organization.<URL>: the application downloads updates from a custom source. You can specify the address of the custom source of updates in the local area network or on the Internet.<path>– the application receives updates from the specified directory.
Configuring proxy server settings
At this step, you must specify the proxy server settings if you are using a proxy server to access the Internet. Internet connection is required to download the application databases from the update servers.
To configure proxy server settings, perform one of the following actions:
- If you use a proxy server to connect to the Internet, specify the address of the proxy server using one of the following formats:
<IP address of the proxy server>:<port number>, if the proxy server connection does not require authentication;<user name>:<password>@<IP address of the proxy server>:<port number>, if the proxy server connection requires authentication.When connecting via an HTTP proxy, we recommend to use a separate account that is not used to sign in to other systems. An HTTP proxy uses an insecure connection, and the account may be compromised.
- If you do not use a proxy server to connect to the Internet, enter no as your answer.
By default, the application suggests no.
You can configure the proxy server settings later without using the initial configuration script.
Page top
Downloading application databases
At this step, you can download the application databases to the client device. The application databases contain descriptions of the threat signatures and methods of countering them. The application uses these records when searching and neutralizing threats. Kaspersky virus analysts regularly add new records about threats.
To download the application databases to the device, enter yes.
If you do not want to immediately download the application databases, enter no.
By default, the application suggests yes.
Kaspersky Endpoint Security protects the device only after the application databases are downloaded.
You can start the Update task without using the initial configuration script.
Page top
Enabling automatic application database update
At this step, you can enable automatic update of the application databases.
Enter yes to enable automatic application database update. By default, the application checks for available database updates every 60 minutes. If updates are available, the application downloads the updated databases.
Enter no if you do not want the application to automatically update the databases.
You can enable automatic database update later without using the initial configuration script by configuring the update task schedule.
Page top
Application activation
At this step, you can activate the application using an activation code or a key file.
To activate the application using an activation code, enter the activation code.
To activate the application using a key file, specify the full path to the key file.
If no activation code or key file is specified, the application is activated using a trial key for one month.
You can activate the application without using the initial configuration script.
Page top
Initial configuration of the application in automatic mode
You can perform initial application setup in the automatic mode.
To launch the automatic initial setup of the application, carry out the following command:
# /opt/kaspersky/kesl/bin/kesl-setup.pl --autoinstall=<initial configuration file>
where <post-installation configuration file> is the path to the configuration file that contains the initial configuration settings. You can create this file or copy the necessary structure from the autoinstall.ini configuration file used for remote installation of the application using Kaspersky Security Center.
When the initial setup script is finished and releases the console, the initial setup of the application is complete.
To check the return code, execute the following command:
echo $?
If the command returns code 0, the initial application setup is finished successfully.
Kaspersky Endpoint Security protects the device only after the application databases are updated.
To correctly update application modules after the script has finished, you may need to restart the application. Check the status of updates for the application using the kesl-control --app-info command.
Settings of the Kaspersky Endpoint Security initial setup configuration file
Kaspersky Endpoint Security initial configuration file contains the settings shown in the table below.
Settings in the initial configuration file of the application
Setting |
Description |
Values |
|---|---|---|
EULA_AGREED |
Required setting. Acceptance of the terms of the End User License Agreement. |
|
PRIVACY_POLICY_AGREED |
Required setting. Acceptance of the Privacy Policy. |
|
USE_KSN |
Acceptance of Kaspersky Security Network Statement. |
|
LOCALE |
Optional setting. The locale used for the application events sent to Kaspersky Security Center. |
The locale in the format specified by RFC 3066. If the The locale of the graphical interface and the application command line depends on the value of the LANG environment variable. If the locale that is not supported by Kaspersky Endpoint Security is specified as the value of the LANG environment variable, the graphical interface and the command line are displayed in English. |
INSTALL_LICENSE |
Activation code or key file. |
No |
UPDATER_SOURCE |
Update source. |
Update source address |
PROXY_SERVER |
Address of the proxy server used to connect to the Internet. |
Proxy server address |
UPDATE_EXECUTE |
Start database update task during setup. |
|
KERNEL_SRCS_INSTALL |
Automatic start of kernel module compilation. |
|
ADMIN_USER |
A user to whom you can grant the administrator role (admin). |
No |
If you want to change the settings in the application initial configuration file, specify the values of the settings in the following format: <setting_name>=<setting_value> (the application does not process spaces between a setting name and its value).
Installing Network Agent using the command line
The Network Agent installation process must be started with root privileges.
To install Network Agent from an RPM package to a 32-bit operating system, execute the following command:
# rpm -i klnagent-<build number>.i386.rpm
To install Network Agent from an RPM package to a 64-bit operating system, execute the following command:
# rpm -i klnagent64-<build number>.x86_64.rpm
To install Network Agent from a DEB package to a 32-bit operating system, execute the following command:
# dpkg -i klnagent_<build number>_i386.deb
To install Network Agent from a DEB package to a 64-bit operating system, execute the following command:
# dpkg -i klnagent64_<build number>_amd64.deb
After installing the package, perform initial configuration of the Network Agent.
Page top
Initial configuration of the Network Agent using the command line
To configure Network Agent settings:
- Execute the command:
- for a 32-bit operating system:
# /opt/kaspersky/klnagent/lib/bin/setup/postinstall.pl - for a 64-bit operating system:
# /opt/kaspersky/klnagent64/lib/bin/setup/postinstall.pl
- for a 32-bit operating system:
- Accept the End User License Agreement.
- Specify the DNS name or IP address of the Administration Server.
- Specify the port number of the Administration Server.
Port 14000 is used by default.
- If you want to use an SSL connection, specify the SSL port number of the Administration Server.
Port 13000 is used by default.
- Do one of the following:
- Enter
yesif you want to use an SSL connection. - Enter
noif you do not want to use an SSL connection.
By default, SSL connection is enabled.
- Enter
- If necessary, specify the connection gateway usage mode:
1—Do not configure a connection gateway.2—Do not use a connection gateway.3—Connect to the Administration Server using a connection gateway.4—Use the Network Agent as a connection gateway.
The default value is the first option.
For more detailed information about configuring Network Agent, please refer to the Kaspersky Security Center documentation.
About Kaspersky Endpoint Security administration web plug-in
Kaspersky Endpoint Security management web plug-in (hereinafter also referred to as web plug-in) facilitates interaction between Kaspersky Endpoint Security and Kaspersky Security Center using Kaspersky Security Center Web Console and Kaspersky Security Center Cloud Console. The web plug-in allows you to manage Kaspersky Endpoint Security using policies and tasks.
The web plug-in must be installed on the client device that has Kaspersky Security Center Web Console installed. The functionality of the web plug-in is available to all administrators who have access to Kaspersky Security Center Web Console in a browser.
You can view the list of installed web plug-ins in Kaspersky Security Center Web Console interface: Console settings → Web plug-ins. For more information about compatibility of the web plug-in and Kaspersky Security Center Web Console versions, refer to Kaspersky Security Center documentation.
If you select a language that is not included in Kaspersky Endpoint Security distribution package in the properties of Kaspersky Security Center Administration Server, the License Agreement and the entire Kaspersky Security Center Web Console interface will be displayed in English.
Installing the web plug-in
You can install the web plug-in as follows:
- Using the Initial Configuration Wizard for Kaspersky Security Center Web Console.
Kaspersky Security Center Web Console automatically prompts you to run the Initial Configuration Wizard when connecting Web Console to the Administration Server for the first time. You can also run the Initial Configuration Wizard in the Web Console interface (Device discovery and deployment → Deployment and assignment → Initial Configuration Wizard). The Initial Configuration Wizard can also check if the installed web plug-ins are up to date and download the necessary updates. For more information on the Initial Configuration Wizard for Kaspersky Security Center Web Console, please refer to Kaspersky Security Center documentation.
- From the list of available distribution kits in Kaspersky Security Center Web Console.
To install the web plug-in, select the web plug-in distribution kit in the Web Console interface: Console settings → Web plug-ins. The list of available distribution packages is updated automatically after new versions of Kaspersky applications are released.
- Download the distribution kit to Kaspersky Security Center Web Console from an external source.
To install the web plug-in, add the ZIP-archive of the web plug-in distribution kit in the Web Console interface: Console settings → Web plug-ins. The distribution kit of the web plug-in can be downloaded on the Kaspersky website, for example. For a local version of the application, additionally upload a text file that contains a signature.
Updating the web plug-in
If a new version of the web plug-in becomes available, Kaspersky Security Center Web Console displays the Updates are available for utilized plug-ins notification. You can proceed to update the web plug-in version from this Web Console notification. You can also manually check for new web plug-in updates in the Web Console interface (Console settings → Web plug-ins). The previous version of the web plug-in will be automatically removed during the update.
When the web plug-in is updated, already existing components (for example, policies or tasks) are saved. The new settings of components implementing new functions of Kaspersky Endpoint Security will appear in existing components and will have the default values.
You can update the web plug-in as follows:
- In the list of web plug-ins in online mode.
To update the web plug-in, select the distribution package of Kaspersky Endpoint Security web plug-in in the Kaspersky Security Center Web Console interface (Console settings → Web plug-ins) and run the update. Web Console checks for available updates on Kaspersky servers and downloads the relevant updates.
- From a file.
To update the web plug-in, select the ZIP-archive of the distribution package of Kaspersky Endpoint Security web plug-in in the Kaspersky Security Center Web Console interface: Console settings → Web plug-ins. The distribution kit of the web plug-in can be downloaded on the Kaspersky website, for example. For a local version of the application, additionally upload a text file that contains a signature.
You can only update the web plug-in to a more recent version. The web plug-in cannot be updated to an older version.
If any component is opened (such as a policy or task), the web plug-in checks its compatibility information. If the version of the web plug-in is equal to or later than the version specified in the compatibility information, you can change the settings of this component. Otherwise, you cannot use the web plug-in to change the settings of the selected component. It is recommended to update the web plug-in.
Page top
Installing Kaspersky Endpoint Security via Kaspersky Security Center
You can install Kaspersky Endpoint Security on a computer remotely using Kaspersky Security Center, by means of the Administration Console or Kaspersky Security Center Web Console.
Kaspersky Endpoint Security can be deployed on the computers within the corporate network in several ways:
- Installing the application using the Protection Deployment Wizard.
This installation method is recommended if you are satisfied with the default application settings and your organization has a simple infrastructure that does not require special configuration.
- Installing the application using the remote installation task.
The universal installation method allows you to configure the application settings and flexibly manage remote installation tasks.
For remote installation, Kaspersky Endpoint Security installation package is used. An installation package is a set of files created for remote installation of a Kaspersky applications using Kaspersky Security Center. The installation package contains a range of settings needed to install the application and get it running immediately after installation. The installation package is created using files with the .kpd and .kud extensions included in the application distribution kit. Kaspersky Endpoint Security installation package is common for all supported operating systems and processor architecture types.
Kaspersky Security Center also supports other methods for installing Kaspersky Endpoint Security, such as deployment within an operating system image. You can choose the most suitable deployment scenario for your organization or combine several deployment scenarios at the same time. For details about other deployment methods, refer to Kaspersky Security Center documentation.
To manage the operation of Kaspersky Endpoint Security installed on computers using Kaspersky Security Center, assign these computers to the
. Before starting Kaspersky Endpoint Security installation, you can create Kaspersky Security Center administration groups to which you want to move the computers with Kaspersky Endpoint Security installed, and configure the rules to automatically move computers to these administration groups. If the rules for moving computers to administration groups are not configured, Kaspersky Security Center moves the computers detected in the network after Kaspersky Endpoint Security installation to the Unassigned devices list. In this case, you need to manually move computers to the administration groups (refer to Kaspersky Security Center documentation for details).
Creating the application installation package
To create Kaspersky Endpoint Security installation package:
- Download the kesl.zip archive from the application download page. It is located in the Kaspersky Endpoint Security section, in the Files for Product remote installation subsection.
- Unpack the files from the kesl.zip archive to a folder accessible by Kaspersky Security Center Administration Server. Place the distribution files, that correspond to the type of operating system where you want to install the application and the type of its package manager, to the same folder:
- To install Kaspersky Endpoint Security:
- kesl-11.2.0-<build number>.i386.rpm (for 32-bit operating systems with rpm).
- kesl_11.2.0-<build number>_i386.deb (for 32-bit operating systems with dpkg).
- kesl-11.2.0-<build number>.x86_64.rpm (for 64-bit operating systems with rpm).
- kesl_11.2.0-<build number>_amd64.deb (for 64-bit operating systems with dpkg).
- to install the GUI:
- kesl-gui-11.2.0-<build number>.i386.rpm (for 32-bit operating systems with rpm).
- kesl-gui_11.2.0-<build number>_i386.deb (for 32-bit operating systems with dpkg).
- kesl-gui-11.2.0-<build number>.x86_64.rpm (for 64-bit operating systems with rpm).
- kesl-gui_11.2.0-<build number>_amd64.deb (for 64-bit operating systems with dpkg).
If you do not want to install a graphical user interface, do not use these files; this will make the installation package smaller.
If the graphical user interface will not be used, the next step requires you to set the parameter-value pair
USE_GUI=Noin the autoinstall.ini configuration file. Otherwise, the installation will fail.If you want to use the created installation package to install the application on several types of operating systems or package managers, place the files for all the required types of operating systems and package managers in the folder.
- To install Kaspersky Endpoint Security:
- If necessary, configure the application installation settings using the autoinstall.ini configuration file.
- Open the Administration Console of Kaspersky Security Center.
- In the console tree, select Additional → Remote installation → Installation packages.
- Click the Create installation package button.
The wizard for creating an installation package will start.
- In the wizard window that opens, click the Create an installation package for Kaspersky application button.
- Enter the name of the new installation package and proceed to the next step.
- Select Kaspersky Endpoint Security distribution package. To do this, open a standard browsing window using the Browse button and specify the path to the kesl.kud file.
The application name will be displayed in the wizard window.
Proceed to the next step.
- Read the End User License Agreement concluded between you and Kaspersky, and the Privacy Policy describing the handling and transmission of data.
To continue creating the installation package, you must confirm that you have fully read and accept the terms of the License Agreement and the Privacy Policy. To confirm, in the window that opens, select both check boxes.
Proceed to the next step.
- The wizard downloads the files required to install the application to Kaspersky Security Center Administration Server. Wait for the download to finish.
- Complete the wizard.
The created installation package is located in the tree of the Administration Console of Kaspersky Security Center in the Additional → Remote installation → Installation packages folder. You can use the same installation package many times.
Page top
Autoinstall.ini configuration file settings
The autoinstall.ini configuration file contains the settings described in the following table.
Autoinstall.ini configuration file settings
Setting |
Description |
Values |
|---|---|---|
EULA_AGREED |
Required setting. Acceptance of the terms of the End User License Agreement. |
|
PRIVACY_POLICY_AGREED |
Required setting. Acceptance of the terms of the Privacy Policy. |
|
USE_KSN |
Acceptance of the Kaspersky Security Network Statement. |
|
LOCALE |
Optional setting. The locale used for the application events sent to Kaspersky Security Center. |
The locale in the format specified by RFC 3066. If the The locale of the graphical interface and the application command line depends on the value of the LANG environment variable. If the locale that is not supported by Kaspersky Endpoint Security is specified as the value of the LANG environment variable, the graphical interface and the command line are displayed in English. |
INSTALL_LICENSE |
Activation code or key file. |
No |
UPDATER_SOURCE |
Update source. |
Update source address |
PROXY_SERVER |
Address of the proxy server used to connect to the Internet. |
Proxy server address |
UPDATE_EXECUTE |
Start database update task during setup. |
|
KERNEL_SRCS_INSTALL |
Automatic start of kernel module compilation. |
|
ADMIN_USER |
A user assigned the administrator role (admin). |
No |
If you want to change the settings in the autoinstall.ini configuration file, specify the values of settings in the following format: <setting_name>=<setting_value> (the application does not process spaces between the name of a setting and its value).
Installing Kaspersky Endpoint Security using the Web Console
Kaspersky Security Center Web Console supports the following main deployment methods:
- Installing the application using the Protection Deployment Wizard.
- Installing the application using the remote installation task.
Installation process consists of the following steps:
- Creating an . The Protection Deployment Wizard creates the package automatically if it has not already been created. The installation package is located in the list of installation packages downloaded into the Kaspersky Security Center Web Console: Device discovery and deployment → Deployment and assignment → Installation packages. You can also create an installation package and configure its settings manually.
- Creating a remote installation task. The Protection Deployment Wizard creates and runs the remote installation task automatically. You can also create and run the task manually.
Installation using the Protection Deployment Wizard
The TCP ports 139 and 445, and the UDP ports 137 and 138 must be opened on a client device.
To deploy Kaspersky Endpoint Security:
- In Web Console main window, select Device discovery and deployment → Deployment and assignment → Protection Deployment Wizard.
The Protection Deployment Wizard starts.
- Follow the instructions of the Protection Deployment Wizard.
Step 1. Selecting an installation package
At this step, select the Kaspersky Endpoint Security installation package from the list of installation packages. If the package is not available in the list, click Add and select the Kaspersky Endpoint Security distribution kit from the list. The installation package is created automatically.
You can configure the installation package settings using the Web Console.
Step 2. Application activation
At this step, you can add a license key to the installation package to activate the application. This step is optional. If the Administration Server contains a license key with automatic distribution functionality, the key will be automatically added later. You can also activate the application later using the Add Key task.
Step 3. Selecting a Network Agent
At this step, select the version of the Network Agent that will be installed together with Kaspersky Endpoint Security. The Network Agent facilitates interaction between the Administration Server and client devices. If the Network Agent is already installed on the device, it is not installed again.
Step 4. Selecting devices to install the application
At this step, select the devices to install the application. The following options are available:
- Specify an administration group. The task is assigned to the devices included in a previously created administration group.
- Specify a device selection. The task is assigned to devices included in the device selection. You can specify one of the existing device selections.
Step 5. Configuring advanced installation settings
At this step, configure the following advanced application installation settings:
- Force installation package download. Selecting the application installation method:
- Using the Network Agent. If the Network Agent is not installed on the device, first the Network Agent is installed using the operating system tools. Then, Kaspersky Endpoint Security is installed by means of the Network Agent.
- Using operating system resources through distribution points. The installation package is delivered to the client devices using the operating system tools via the distribution points. You can select this option if there is at least one distribution point in the network. A distribution point is a device with Network Agent installed that is used for update distribution, remote installation of applications, and retrieval of information about devices in the network. For more details about distribution points, refer to Kaspersky Security Center documentation.
- Using operating system resources through Administration Server. Files are delivered to the client devices by means of the operating system tools using the Administration Server. You can select this option if the Network Agent is not installed on the client device, but this device belongs to the same network as the Administration Server.
- Do not re-install the application if it is already installed. Clear this check box if you want to install an earlier version of the application, for example.
- Assign package installation in the Active Directory group policies. Kaspersky Endpoint Security is installed by means of the Network Agent or manually by means of Active Directory. To install Network Agent, the remote installation task must be run with domain administrator privileges.
Step 6. Device restart management
At this step, you can select an action to be performed if the device restart is required. When installing the application, device restart is not required. Restart is required only if you have to remove incompatible applications before installation. Restart may also be required when updating the application version.
Step 7. Removing incompatible applications
This step is displayed if applications incompatible with Kaspersky Endpoint Security are installed on the client device.
At this step, carefully review the list of incompatible applications and allow the removal of these applications. If incompatible applications are installed on the client device, Kaspersky Endpoint Security installation finishes with an error.
Step 8. Assigning to an administration group
At this step, select an administration group where to move the client devices after the Network Agent installation. Moving devices to the administration group is necessary for applying policies and group tasks. If a device is already assigned to an administration group, it will not be re-assigned. If you do not select an administration group, the devices are added to the Unassigned devices group.
Step 9. Selecting an account for accessing the client devices
At this step, select the account used for installing Network Agent using the tools of the operating system. In this case, administrator rights are required for accessing the client device. You can add multiple accounts. If an account does not have sufficient rights, the Installation Wizard uses the next account. If you install Kaspersky Endpoint Security by means of the Network Agent, you do not have to select an account.
Step 10. Starting installation
Exiting the Wizard. The remote application installation task is started automatically. You can monitor the task execution progress in the task properties in the Results section.
Page top
Creating an installation package
To create an installation package:
- In Web Console main window, select Device discovery and deployment → Deployment and assignment → Installation packages.
This opens a list of installation packages downloaded to Web Console.
- Click Add.
The wizard for creating an installation package will start. Follow the instructions of the Wizard.
- At the first page of the Wizard, select Create installation package for Kaspersky application.
The Wizard will create an installation package from the distribution kit residing on Kaspersky servers. The list is updated automatically as new versions of applications are released. It is recommended to select this option for installation of Kaspersky Endpoint Security.
You can also create an installation package from a file.
Kaspersky Security Center Cloud Console does not allow creation of installation packages from a file.
- Select Kaspersky Endpoint Security distribution package. Information about the distribution kit will be displayed on the right.
- Read the information and click the Download and create installation package button. The installation package creation process starts.
- During creation of the installation package, accept the terms of the End User License Agreement and Privacy Policy. When prompted by the Wizard, read the License Agreement between you and Kaspersky and the Privacy Policy that describes the processing and transmission of data. To continue creating the installation package, you must confirm that you have fully read and accept the terms of the License Agreement and the Privacy Policy.
The installation package will be created and added to the Web Console. Using the installation package, you can install the application on corporate network computers or update the application version.
In the installation package settings, you can also configure the application installation settings (see the table below).
Installation package settings
Section |
Description |
|---|---|
Application settings |
Specify the locale. Select this check box to specify the locale used during the application operation. The locale in the format specified by RFC 3066. If this setting is not specified, the default locale is used. Activate application. Select this check box to specify the activation code or the license key to activate the application. |
Update source |
You can specify the update source:
|
Installation options |
Run update task after installation. Select this check box to run the Update task after the application is installed. Specify proxy settings. Select this check box to specify the address of the proxy server used to connect to the Internet. Install kernel source. Select this check box to automatically start of kernel module compilation. Use GUI. Select this check box to enable the use of the graphical user interface. |
Updating databases in the installation package
The installation package contains the databases from the Administration Server repository that are up to date when the installation package is created. After creating the installation package, you can update the databases in the installation package. It allows you to reduce traffic consumption when updating the databases after the application is installed.
To update the databases in the Administration Server repository, use the Download updates to the Administration Server repository task of the Administration Server. For more information about updating the databases in the Administration Server repository, refer to Kaspersky Security Center documentation.
Kaspersky Security Center Cloud Console does not support updating the databases in an installation package.
To update the databases in the installation package:
- In Web Console main window, select Device discovery and deployment → Deployment and assignment → Installation packages.
This opens a list of installation packages downloaded to Web Console.
- Click the name of Kaspersky Endpoint Security installation package for which you want to update the databases.
The installation package properties window opens.
- On the General information tab, click the Update databases link.
The databases in the installation package will be updated from Administration Server repository. The bases.cab file that is included in the distribution kit will be replaced by the bases directory. The update package files will be inside the directory.
Page top
Creating a remote installation task
To create a remote installation task:
- In the main window of Web Console, select Devices → Tasks.
The list of tasks opens.
- Click Add.
The Task Wizard starts.
- Follow the Task wizard instructions.
Step 1. Configuring general task settings
At this step, configure the general settings of the task:
- In the Application drop-down list, select Kaspersky Security Center.
- In the Task type drop-down list, select Install application remotely.
- In the Task name field, enter a short description.
- In the Select devices to which the task will be assigned section, select the task scope.
Step 2. Selecting devices to install the application
At this step, select the devices where to install Kaspersky Endpoint Security according to the selected task scope.
Step 3. Configuring an installation package
At this step, configure the settings of the installation package:
- Select Kaspersky Endpoint Security 11.2.0 for Linux installation package.
- Select the Network Agent installation package.
The selected version of the Network Agent will be installed together with Kaspersky Endpoint Security. The Network Agent facilitates interaction between the Administration Server and client devices. If the Network Agent is already installed on the device, it is not installed again.
- In the Force installation package download section, select the application installation method:
- Using the Network Agent. If the Network Agent is not installed on the device, first the Network Agent is installed using the operating system tools. Then Kaspersky Endpoint Security is installed by means of the Network Agent.
- Using operating system resources through distribution points. The installation package is delivered to the client devices using the operating system tools via the distribution points. You can select this option if there is at least one distribution point in the network. For more details about distribution points, refer to Kaspersky Security Center documentation.
- Using operating system resources through Administration Server. Files are delivered to the client devices by means of the operating system tools using the Administration Server. You can select this option if the Network Agent is not installed on the client device, but the client device belongs to the same network as the Administration Server.
- In the Maximum number of concurrent downloads field, set a limit on the number of installation package download requests sent to the Administration Server. The limit on the number of requests allows avoiding network overload.
- In the Maximum number of installation attempts field, specify the limit on the number of attempts to install the application. If the application installation finishes with an error, the task will automatically start installation again.
- If necessary, clear the Do not install application if it is already installed check box. It allows, for example, to install one of the previous versions of the application.
- If necessary, select the Assign package installation in Active Directory group policies check box. The application is installed by means of the Network Agent or manually by means of Active Directory. To install Network Agent, the remote installation task must be run with domain administrator privileges.
- If necessary, select the Prompt users to close running applications check box. Application installation requires device resources. For the convenience of the user, the Installation Wizard prompts you to close running applications before starting the installation. This helps prevent disruptions in the operation of other applications and prevents possible malfunctions of the device.
- In the Behavior of devices managed by other Administration Servers section, select Kaspersky Endpoint Security installation method. If the network has more than one Administration Server installed, these Administration Servers may see the same client devices. This may cause, for example, an application to be installed remotely on the same client device several times through different Administration Servers, or other conflicts.
- If necessary, in the Device moving mode section, specify a group for moving unassigned devices.
Step 4. Device restart management
At this step, you can select an action to be performed if the device restart is required.
Step 5. Selecting an account to access the device
At this step, select the account used for installing Network Agent using the tools of the operating system. In this case, administrator rights are required for accessing the device. You can add multiple accounts. If an account does not have sufficient rights, the Installation Wizard uses the next account. If you install Kaspersky Endpoint Security by means of the Network Agent, you do not have to select an account.
Step 6. Completing task creation
Complete wizard operations by clicking the Create button. A new task will be displayed in the list of tasks. To run a task, select the check box next to the task and click the Start button. The application will be installed in silent mode.
Page top
Getting started using Kaspersky Security Center
To work with Kaspersky Endpoint Security using Kaspersky Security Center, perform the following steps after deploying the application:
- Activate the application. You can create and execute an activation task using the Administration Console or Kaspersky Security Center Web Console, as well as distribute the license key to the devices from the Kaspersky Security Center key storage.
- Update application databases and modules using the Administration Console or Kaspersky Security Center Web Console.
Kaspersky Endpoint Security protects the device only after the application databases are updated.
- Create and configure a for centralized application management on client devices. You can use the Administration Console or the Web Console to work with policies.
You can also configure the application management tasks using the Administration Console or the Web Console.
Activating the application using Kaspersky Security Center
Activation is the process of activating an application under a license that allows you to use a fully functional version of the application until the license expires. The application activation process involves adding a license key.
You can activate the application remotely using Kaspersky Security Center in the following ways:
- Using the application activation task.
This method allows you to add a license key to a specific device or the devices included in an administration group. You can create and run an activation task using the Administration Console or Kaspersky Security Center Web Console.
- By distributing a license key stored on Kaspersky Security Center Administration Server to the client devices.
This method lets you automatically add a key to the client devices that are already connected to Kaspersky Security Center, and to new client devices. To use this method, first add the key to the key storage on Kaspersky Security Center Administration Server.
You can use Kaspersky Security Center Administration Console or Kaspersky Security Center Web Console to create the tasks for application activation, adding a key to the key storage, and distributing the key to the client devices.
Activation using Kaspersky Security Center Web Console
Before creating an activation task or a key distribution task, add the key to Kaspersky Security Center Administration Server key storage.
To add a key to Kaspersky Security Center key storage using the Web Console:
- In the Web Console main window, select the Operations → Licensing → Kaspersky Licenses.
- Click Add.
- In the window that opens, select how to add the key to the repository:
- Enter the activation code to add a key using an activation code.
- Add a key file to add a key using a key file.
- Depending on the key adding method you selected at the previous step, do one of the following:
- Enter the activation code and click Submit.
- Click the Select key file button and in the window that opens, select the file with the key extension.
- Click Close.
The added key will appear in the list of keys.
To activate the application using the Web Console by means of the Add Key task:
- In the main window of Web Console, select Devices → Tasks.
The list of tasks opens.
- Click Add.
The Task Wizard starts.
- Configure the task settings:
- In the Application drop-down list, select the application name: Kaspersky Endpoint Security.
- In the Task type drop-down list, select Add Key.
- In the Task name field, enter a brief description, such as
Activation of Kaspersky Endpoint Security. - In the Select devices to which the task will be assigned section, select the task scope. Click Next.
- Select devices according to the selected task scope option. Click Next.
The Kaspersky Security Center key storage window opens.
- If you have previously added a key to Kaspersky Security Center key storage, select the key from in the list and click Next.
- If the required key cannot be found in the key storage, click the Add key button.
- In the window that opens, select how to add the key to the repository:
- Enter the activation code to add a key using an activation code.
- Add a key file to add a key using a key file.
- Depending on the key adding method you selected at the previous step, do one of the following:
- Enter the activation code and click Submit.
- Click the Select key file button and in the window that opens, select the file with the key extension.
- Read the information about the key and click Close.
- The added key will appear in the list of keys. Select it from the list and click Next.
- In the window that opens, select how to add the key to the repository:
- Read the information about the license and click Next.
- Finish the wizard by clicking the Finish button.
A new task will be displayed in the list of tasks.
- Select the check box next to the task. Click the Start button.
In the properties of the Add Key task, you can add a reserve key to the device. The reserve key becomes active when the license associated with the active key expires or when the active key is deleted. Availability of a reserve key allows you to avoid application functionality limitation when your license expires.
To activate the application using the Web Console by distributing a key stored on Kaspersky Security Center Administration Server to the devices:
- In the Web Console main window, select the Operations → Licensing → Kaspersky Licenses.
- Open the key properties using the link with the name of the application for that the key is intended to.
- On the General tab, select the Automatically distribute a license key to managed devices check box.
- Click Save.
The license key is automatically distributed to the appropriate client devices. During the automatic distribution of a key as an active or a reserve key, the licensing limit on the number of devices (set in the key properties) is taken into account. If the licensing limit is reached, distribution of this key to the devices stops automatically. You can view the number of devices to which the key has been added and other information in the key properties on the Devices tab.
You can control license usage using Web Console in the following ways:
- View the Key usage report for the organization infrastructure (Monitoring and reports → Reports).
- View the statuses of the managed devices (Devices → Managed devices). If the application is not activated, the device will have the
 status and the Protection disabled status description.
 - View the key properties (Operations → Licensing → Kaspersky licenses).
Special considerations for the activation process in Kaspersky Security Center Cloud Console
A trial version is provided for the Kaspersky Security Center Cloud Console. The trial version is a special version of Kaspersky Security Center Cloud Console designed to familiarize a user with the features of the application. In this version, you can perform actions in a workspace for a period of 30 days. All managed applications, including Kaspersky Endpoint Security, are automatically activated under Kaspersky Security Center Cloud Console trial license. However, you cannot activate Kaspersky Endpoint Security using its own trial license when the trial license for the Kaspersky Security Center Cloud Console expires. For detailed information about Kaspersky Security Center Cloud Console, please refer to the Kaspersky Security Center Cloud Console documentation.
The trial version of Kaspersky Security Center Cloud Console does not allow you to subsequently switch to a commercial version. Any trial workspace will be automatically deleted with all its contents after the 30-day period expires.
Running the application on Astra Linux in closed software environment mode
This section describes how to start the application in the Astra Linux Special Edition operating system.
For Astra Linux Special Edition (operational update 1.7) and Astra Linux Special Edition (operational update 1.6)
To start the application on the Astra Linux Special Edition (operational update 1.7) and Astra Linux Special Edition (operational update 1.6) operating system, do the following:
- Specify the following setting in the /etc/digsig/digsig_initramfs.conf file:
DIGSIG_ELF_MODE=1 - Install the compatibility package:
apt install astra-digsig-oldkeys - Create a directory for the application key:
mkdir -p /etc/digsig/keys/legacy/kaspersky/ - Locate the application key (/opt/kaspersky/kesl/shared/kaspersky_astra_pub_key.gpg) in the directory created in the previous step:
cp kaspersky_astra_pub_key.gpg /etc/digsig/keys/legacy/kaspersky/ - Update RAM disks:
update-initramfs -u -k all
For Astra Linux Special Edition (operational update 1.5)
To run the application in the Astra Linux Special Edition (operational update 1.5) operating system, do the following:
- Specify the following setting in the /etc/digsig/digsig_initramfs.conf file:
DIGSIG_LOAD_KEYS=1DIGSIG_ENFORCE=1 - Create a directory for the application key:
mkdir -p /etc/digsig/keys/legacy/kaspersky/ - Locate the application key (/opt/kaspersky/kesl/shared/kaspersky_astra_pub_key.gpg) in the directory created in the previous step:
cp kaspersky_astra_pub_key.gpg /etc/digsig/keys/legacy/kaspersky/ - Update RAM disks:
sudo update-initramfs -u -k all
The application's graphical user interface can be used for mandatory access control sessions.
Page top
Configuring permissive rules in the SELinux system
To configure SELinux to work with Kaspersky Endpoint Security:
- Switch SELinux to permissive mode:
- If SELinux has been activated, run the following command:
# setenforce Permissive - If SELinux was disabled, set the
SELINUX=permissivesetting in the configuration file / etc / selinux / config and restart the operating system.
- If SELinux has been activated, run the following command:
- Make sure the semanage utility is installed on the system. If the utility is not installed, install the policycoreutils-python* package.
- Install the Kaspersky Endpoint Security package.
Once the package is installed, the source executables will be automatically labelled.
- If you use a custom SELinux policy rather than the default targeted policy, assign a label for the following Kaspersky Endpoint Security source executable files in accordance with the SELinux policy used:
- /var/opt/kaspersky/kesl/11.2.0.<build number>_<installation timestamp>/opt/kaspersky/kesl/libexec/kesl
- /var/opt/kaspersky/kesl/11.2.0.<build number>_<installation timestamp>/opt/kaspersky/kesl/bin/kesl-control
- /var/opt/kaspersky/kesl/11.2.0.<build number>_<installation timestamp>/opt/kaspersky/kesl/libexec/kesl-gui
- /var/opt/kaspersky/kesl/11.2.0.<build number>_<installation timestamp>/opt/kaspersky/kesl/shared/kesl-supervisor
- Run the Kaspersky Endpoint Security configuration script:
# /opt/kaspersky/kesl/bin/kesl-setup.pl - Run the following tasks:
- File Threat Protection task:
kesl-control --start-task 1 - Critical Areas Scan task:
kesl-control --start-task 4 -W
It is recommended to run all the tasks that you plan to run while using Kaspersky Endpoint Security.
- File Threat Protection task:
- Ensure that there are no errors in the audit.log file:
grep kesl /var/log/audit/audit.log - If there are errors in the audit.log file, create and download a new rule module based on the blocking records in order to fix the errors, and then relaunch all the tasks that you plan to run while using Kaspersky Endpoint Security.
If new audit messages related to Kaspersky Endpoint Security appear, the file with the rule module file must be updated.
- Switch SELinux to enforcing mode:
# setenforce Enforcing
If you use a custom SELinux policy, then you will need to manually assign a label to Kaspersky Endpoint Security source executable files after installing the application updates (follow steps 1, 4, 6, 7, 8, and 9).
You can find more information in the documentation for your operating system.
Updating the application from a previous version
You can update only Kaspersky Endpoint Security 11 for Linux or Kaspersky Endpoint Security 11.1.0 for Linux to Kaspersky Endpoint Security 11.2.0 for Linux.
You can update Kaspersky Endpoint Security 10 Service Pack 1 Maintenance Release 1 for Linux to Kaspersky Endpoint Security 11 for Linux, and then update it to Kaspersky Endpoint Security 11.1.0 for Linux or to Kaspersky Endpoint Security 11.2.0 for Linux.
Kaspersky Anti-Virus 8.0 for Linux File Server, Kaspersky Endpoint Security 10 for Linux, and Kaspersky Endpoint Security 10 Service Pack 1 cannot be updated to Kaspersky Endpoint Security 11.2.0 for Linux. The previous version of the application must be uninstalled before you install Kaspersky Endpoint Security 11.2.0 for Linux.
You can update the old version of the application as follows:
Regardless of whether Kaspersky Endpoint Security was launched before the update process start, if the update is completed successfully, a new application version is launched. If the update fails, the previous application version is launched.
We recommend quitting all active applications before updating a previous application version.
Updating the application from the command line
You can locally update Kaspersky Endpoint Security 11 for Linux or Kaspersky Endpoint Security 11.1.0 for Linux to Kaspersky Endpoint Security 11.2.0 for Linux by performing the actions described in this section.
Before updating the application, accept the End User License Agreement (/opt/kaspersky/kesl/doc/license.<language ID>) and Privacy Policy (/opt/kaspersky/kesl/doc/license.<language ID>). If you do not agree to the End User License Agreement and / or Privacy Policy, the application will not be updated.
After the update procedure is completed, you may need to restart the application or the operating system.
To update the application:
- If you want to update the application and enable the graphical user interface, run the required Kaspersky Endpoint Security 11.2.0 for Linux installation packages.
- RPM package:
# rpm -U --replacefiles --replacepkgs kesl-11.2.0-<build number>.i386.rpm kesl-gui-11.2.0-<build number>.i386.rpmfor 32-bit operating systems.# rpm -U --replacefiles --replacepkgs kesl-11.2.0-<build number>.x86_64.rpm kesl-gui-11.2.0-<build number>.x86_64.rpmfor 64-bit operating systems. - DEB package:
# apt-get install ./kesl_11.2.0-<build number>_i386.deb ./kesl-gui_11.2.0-<build number>_i386.debfor 32-bit operating systems.# apt-get install ./kesl_11.2.0-<build number>_amd64.deb ./kesl-gui_11.2.0-<build number>_amd64.debfor 64-bit operating systems. - Astra Linux Special Edition package:
# apt-get install ./kesl-astra_11.2.0-<build number>_amd64.deb ./kesl-gui-astra_11.2.0-<build number>_amd64.deb
If the End User License Agreement, the Privacy Policy, or the Kaspersky Security Network Statement were updated, the application installation completes with error. The application unpacks the files that contain the new versions of these documents in all available for this version languages to the home directory of the current user (~/.kesl/<application version>/).
- RPM package:
- If you want to update the application, but not to enable the graphical user interface, run the required Kaspersky Endpoint Security 11.2.0 for Linux installation package.
- RPM package:
# rpm -U --replacefiles --replacepkgs kesl-11.2.0-<build number>.i386.rpmfor 32-bit operating systems.# rpm -U --replacefiles --replacepkgs kesl-11.2.0-<build number>.x86_64.rpmfor 64-bit operating systems. - DEB package:
# apt-get install ./kesl_11.2.0-<build number>_i386.debfor 32-bit operating systems.# apt-get install ./kesl_11.2.0-<build number>_amd64.debfor 64-bit operating systems. - Astra Linux Special Edition package:
# apt-get install ./kesl-astra_11.2.0-<build number>_amd64.deb
If the End User License Agreement, the Privacy Policy, or the Kaspersky Security Network Statement were updated, the application installation completes with error. The application unpacks the files that contain the new versions of these documents in all available for this version languages to the home directory of the current user (~/.kesl/<application version>/).
- RPM package:
- If the End User License Agreement was updated, read the new version of the document located in your home directory (~/.kesl/<application version>/license.<language ID>).
If you agree with the text of the End User License Agreement, specify the environment variable by executing one of the following commands:
# KESL_EULA_AGREED=yes rpm -U --replacefiles --replacepkgs kesl-11.2.0-<build number>.i386.rpm [kesl-gui-11.2.0-<build number>.i386.rpm]for 32-bit operating systems and RPM package.# KESL_EULA_AGREED=yes rpm -U --replacefiles --replacepkgs kesl-11.2.0-<build number>.x86_64.rpm [kesl-gui-11.2.0-<build number>.x86_64.rpm]for 64-bit operating systems and RPM package.# KESL_EULA_AGREED=yes apt-get install ./kesl_11.2.0-<build number>_i386.deb [./kesl-gui_11.2.0-<build number>_i386.deb]for 32-bit operating systems and DEB package.# KESL_EULA_AGREED=yes apt-get install ./kesl_11.2.0-<build number>_amd64.deb [./kesl-gui_11.2.0-<build number>_amd64.deb]for 64-bit operating systems and DEB package.# KESL_EULA_AGREED=yes apt-get install ./kesl-astra_11.2.0-<build number>_amd64.deb [./kesl-gui-astra_11.2.0-<build number>_amd64.deb]for Astra Linux Special Edition operating system.
- If the Privacy Policy was updated, read the new version of the document located in your home directory (~/.kesl/<application version>/license.<language ID>).
If you are agree with the text of the Privacy Policy, specify the environment variable by executing the following command:
# KESL_PRIVACY_POLICY_AGREED=yes rpm -U --replacefiles --replacepkgs kesl-11.2.0-<build number>.i386.rpm [kesl-gui-11.2.0-<build number>.i386.rpm]for 32-bit operating systems and RPM package.# KESL_PRIVACY_POLICY_AGREED=yes rpm -U --replacefiles --replacepkgs kesl-11.2.0-<build number>.x86_64.rpm [kesl-gui-11.2.0-<build number>.x86_64.rpm]for 64-bit operating systems and RPM package.# KESL_PRIVACY_POLICY_AGREED=yes apt-get install ./kesl_11.2.0-<build number>_i386.deb [./kesl-gui_11.2.0-<build number>_i386.deb]for 32-bit operating systems and DEB package.# KESL_PRIVACY_POLICY_AGREED=yes apt-get install ./kesl_11.2.0-<build number>_amd64.deb [./kesl-gui_11.2.0-<build number>_amd64.deb]for 64-bit operating systems and DEB package.# KESL_PRIVACY_POLICY_AGREED=yes apt-get install ./kesl-astra_11.2.0-<build number>_amd64.deb [./kesl-gui-astra_11.2.0-<build number>_amd64.deb]for Astra Linux Special Edition operating system.
- If the Kaspersky Security Network Statement was updated, read the new version of the document located in your home directory (~/.kesl/<application version>/ksn_license.<language ID>).
If you are agree with the text of the Kaspersky Security Network Statement, specify the environment variable:
# KESL_USE_KSN=yes rpm -U --replacefiles --replacepkgs kesl-11.2.0-<build number>.i386.rpm [kesl-gui-11.2.0-<build number>.i386.rpm]for 32-bit operating systems and RPM package.# KESL_USE_KSN=yes rpm -U --replacefiles --replacepkgs kesl-11.2.0-<build number>.x86_64.rpm [kesl-gui-11.2.0-<build number>.x86_64.rpm]for 64-bit operating systems and RPM package.# KESL_USE_KSN=yes apt-get install ./kesl_11.2.0-<build number>_i386.deb [./kesl-gui_11.2.0-<build number>_i386.deb]for 32-bit operating systems and DEB package.# KESL_USE_KSN=yes apt-get install ./kesl_11.2.0-<build number>_amd64.deb [./kesl-gui_11.2.0-<build number>_amd64.deb]for 64-bit operating systems and DEB package.# KESL_USE_KSN=yes apt-get install ./kesl-astra_11.2.0-<build number>_amd64.deb [./kesl-gui-astra_11.2.0-<build number>_amd64.deb]for Astra Linux Special Edition operating system.
If you do not agree with the text of the Kaspersky Security Network Statement, specify the environment variable:
# KESL_USE_KSN=no rpm -U --replacefiles --replacepkgs kesl-11.2.0-<build number>.i386.rpm [kesl-gui-11.2.0-<build number>.i386.rpm]for 32-bit operating systems and RPM package.# KESL_USE_KSN=no rpm -U --replacefiles --replacepkgs kesl-11.2.0-<build number>.x86_64.rpm [kesl-gui-11.2.0-<build number>.x86_64.rpm]for 64-bit operating systems and RPM package.# KESL_USE_KSN=no apt-get install ./kesl_11.2.0-<build number>_i386.deb [./kesl-gui_11.2.0-<build number>_i386.deb]for 32-bit operating systems and DEB package.# KESL_USE_KSN=no apt-get install ./kesl_11.2.0-<build number>_amd64.deb [./kesl-gui_11.2.0-<build number>_amd64.deb]for 64-bit operating systems and DEB package.# KESL_USE_KSN=no apt-get install ./kesl-astra_11.2.0-<build number>_amd64.deb [./kesl-gui-astra_11.2.0-<build number>_amd64.deb]for Astra Linux Special Edition operating system.
Refusal to participate in Kaspersky Security Network does not interrupt the Kaspersky Endpoint Security update process. You can enable, disable, or change the Kaspersky Security Network mode at any time.
Kaspersky Endpoint Security 11.2.0 for Linux settings and event log are exported.
- Restart the application.
- If necessary, restart the operating system.
If an error occurred while updating the application, the update will be rolled back and the previous version of the application will be started. An error message is displayed. However, a new version will be indicated in the package manager (rpm/dpkg).
If the transfer of application settings fails for any reason, the application is set to the default values.
Page top
Updating the application using Kaspersky Security Center
You can remotely update Kaspersky Endpoint Security 11 for Linux or Kaspersky Endpoint Security 11.1.0 for Linux to Kaspersky Endpoint Security 11.2.0 for Linux using Kaspersky Security Center by performing the actions described in this section.
To update the application managed by the Kaspersky Security Center policy:
- Update the Network Agent to the latest version (for details, refer to Kaspersky Security Center documentation).
If Network Agent is not updated, the application cannot be managed using Kaspersky Security Center.
The application continues working correctly during the Network Agent update.
- Install Kaspersky Endpoint Security 11.2.0 for Linux using Kaspersky Security Center.
If you want to update the application, but do not want to enable the graphical user interface, specify the
USE_GUI=Nosetting value in the autoinstall.ini configuration file.
If Kaspersky Endpoint Security needs to be restarted to complete the installation and the NeedToRestart event occurs, wait until the remote installation task is finished. After that, restart Kaspersky Endpoint Security by using Kaspersky Security Center. If the package is installed successfully, then a new version of the application is launched after restart. If the package installation completes with error, the application rolls the update back, and the previous application version is launched. However, a new version will be indicated in the package manager (rpm/dpkg).
Refer to Kaspersky Security Center documentation for more details about this type of application update.
Page top
Uninstalling the application
You can uninstall Kaspersky Endpoint Security locally or using Kaspersky Security Center by means of the Administration Console or Kaspersky Security Center Web Console.
While the application is being uninstalled, all Kaspersky Endpoint Security tasks are stopped.
You can perform the following actions when uninstalling the application:
- Uninstall the application package and the graphical user interface package at the same time.
- Uninstall only the application package if the graphical user interface package is not installed.
It is not possible to uninstall only the application package if the graphical user interface package is installed.
- Remove only the graphical user interface package.
After uninstalling the application, all information saved by the application is deleted, except for the license database. Installed application certificates are also removed. The license database is saved, and you can use it to reinstall the application.
If the application was installed in a systemd, the systemd settings are restored to their initial state after the application uninstallation.
Removing Kaspersky Endpoint Security using the command line
The application automatically performs the removal procedure. When completed, the application displays a message containing the results of removal.
Removing the application package and the graphical user interface package
To remove Kaspersky Endpoint Security and the graphical user interface that were installed from the RPM packages, execute the following command:
# rpm -e kesl kesl-gui
To remove Kaspersky Endpoint Security and the graphical user interface that were installed from the DEB packages, execute the following command:
# apt-get remove kesl kesl-gui
To remove Kaspersky Endpoint Security and the graphical user interface that were installed in the Astra Linux Special Edition operating system, execute the following command:
# apt-get remove kesl-astra kesl-gui-astra
Removing the application package without the graphical user interface package
To uninstall Kaspersky Endpoint Security that was installed from the RPM package without the graphical user interface, execute the following command:
# rpm -e kesl
To uninstall Kaspersky Endpoint Security that was installed from the DEB package without the graphical user interface, execute the following command:
# apt-get remove kesl
To uninstall Kaspersky Endpoint Security that was installed in the Astra Linux Special Edition operating system without the graphical user interface, execute the following command:
# apt-get remove kesl-astra
Removing the graphical user interface package
To remove the graphical user interface that was installed from the RPM package, execute the following command:
# rpm -e kesl-gui
To remove the graphical user interface that was installed from the DEB package, execute the following command:
# apt-get remove kesl-gui
To remove the graphical user interface that was installed in the Astra Linux Special Edition operating system, execute the following command:
# apt-get remove kesl-gui-astra
Removing Network Agent
To remove Network Agent that was installed from an RPM package to a 32-bit operating system, execute the following command:
# rpm -e klnagent
To remove Network Agent installed on a 64-bit operating system from an RPM package, execute the following command:
# rpm -e klnagent64
To remove Network Agent that was installed from a DEB package to a 32-bit operating system, execute the following command:
# apt-get remove klnagent
To remove Network Agent installed on a 64-bit operating system from a DEB package, execute the following command:
# apt-get remove klnagent64
Uninstalling the application using the Administration Console
You can uninstall Kaspersky Endpoint Security using Kaspersky Security Center Administration Console. To do this, create and run the uninstall application remotely task in Kaspersky Security Center.
If you want to remove only the graphical user interface without removing the application, specify the USE_GUI=No setting value in the autoinstall.ini configuration file and start the remote application installation task.
For more details about creating and running remote application installation and uninstall tasks, refer to the Kaspersky Security Center help file.
Page top
Uninstalling the application using Kaspersky Security Center Web Console
You can uninstall the application remotely using the Kaspersky Security Center Web Console by means of the uninstall application remotely task. When performing the task, Kaspersky Endpoint Security downloads the application uninstallation utility to the user device. After completing the application uninstallation, the utility is automatically removed.
To uninstall the application:
- In the main window of Web Console, select Devices → Tasks.
The list of tasks opens.
- Click Add.
The Task Wizard starts.
- Follow the Task wizard instructions.
Step 1. Configuring general task settings
At this step, configure the general settings of the task:
- In the Application drop-down list, select Kaspersky Security Center <version number>.
- In the Task type drop-down list, select Uninstall application remotely.
- In the Task name field, enter a brief description, for example,
Uninstall Kaspersky Endpoint Security from Technical Support devices. - In the Select devices to which the task will be assigned section, select the task scope.
Step 2. Selecting devices to uninstall the application
At this step, select the devices where to uninstall Kaspersky Endpoint Security according to the selected task scope.
Step 3. Configuring application uninstallation settings
At this step, configure the application uninstallation settings:
- Select Uninstall managed application.
- In the Application to be uninstalled drop-down list, select the Kaspersky Endpoint Security installation package.
- In the Force download of the uninstallation utility section, select the utility delivery method:
- Using the Network Agent. If the Network Agent is not installed on the device, first the Network Agent is installed using the operating system tools. Then Kaspersky Endpoint Security is uninstalled by means of the Network Agent.
- Using operating system resources through Administration Server. The utility is delivered to the client devices by means of the operating system tools using the Administration Server. You can select this option if the Network Agent is not installed on the client device, but the client device belongs to the same network as the Administration Server.
- Using operating system resources through distribution points. The utility is delivered to the client devices using the operating system tools via the distribution points. You can select this option if there is at least one distribution point in the network. For more details about distribution points, refer to Kaspersky Security Center documentation.
- In the Maximum number of concurrent downloads field, set a limit on the number of requests sent to the Administration Server to download the application uninstallation utility. A limit on the number of requests will help prevent the network from being overload.
- In the Maximum number of uninstallation attempts field, set a limit on the number of attempts to uninstall the application. If the application uninstallation finishes with an error, the task automatically starts the uninstallation again.
- If necessary, clear the Verify operating system type before downloading check box. It allows you to avoid downloading the uninstallation utility if the operating system of the client device does not meet the software requirements. If you are sure that the device operating system meets the software requirements, you can skip the verification.
Step 4. Selecting the application action when the operating system restart is required
At this step, you can select the action to be performed by the application if uninstallation requires the operating system restart.
Step 5. Selecting an account for accessing the client devices
At this step, select the account used for uninstalling the application using the tools of the operating system. In this case, administrator rights are required for accessing the client device. You can add multiple accounts. If an account does not have sufficient rights, the Installation Wizard uses the next account. If you uninstall Kaspersky Endpoint Security by means of the Network Agent, you do not have to select an account.
Step 6. Completing task creation
Complete the wizard. A new task will be displayed in the list of tasks.
To run a task, select the check box next to the task and click the Start button. The application will be uninstalled in silent mode. After the application uninstallation finishes, you will be prompted to restart the client device.
Page top
Application licensing
This section provides Kaspersky Endpoint Security license information.
About the End User License Agreement
The End User License Agreement is a binding agreement between you and AO Kaspersky Lab, stipulating the terms on which you may use the application.
Read through the terms of the License Agreement carefully before you start using the application.
You can view the terms of the License Agreement:
- During Kaspersky Endpoint Security installation.
- By reading the text in the license.<language ID> file. This file is included in the application distribution kit.
By confirming that you agree with the End User License Agreement during initial application setup, you accept the terms of the End User License Agreement. If you do not accept the terms of the End User License Agreement, do not use the application.
Page top
About the license
A license is a time-limited right to use Kaspersky Endpoint Security, granted under the End User License Agreement.
The list of available functions and the validity period of the application depend on the license under which the application is used.
The following license types are provided:
- Trial – a free license intended for trying out the application.
Trial licenses have a short validity period. When the trial license expires, all Kaspersky Endpoint Security features become disabled. To continue using the application, you need to purchase a commercial license.
You can use the application under a trial license for only one trial period.
- Commercial is a paid license.
The main functions of the application stop working when a commercial license expires. To continue using Kaspersky Endpoint Security, you need to renew the commercial license. After the license expires, you can no longer use the application and must uninstall it from the device.
It is recommended to renew the license before its expiration date to ensure continued protection of your device against security threats.
About the license certificate
The License Certificate is a document provided together with the key file or activation code.
A license certificate contains the following information about the license provided:
- License key or order number
- Information about the license user
- Information about the application that can be activated under the provided license
- Restrictions on the number of licensing units (for example, devices on which the application can be used under the license)
- License validity start date
- License expiration date or validity period
- License type
About the license key
The license key is a sequence of bits that can be used to activate the application for further usage in accordance with the terms of the End User License Agreement. License key is generated by Kaspersky experts.
You can add a license key to the application using one of the following methods: by applying a key file or by entering an activation code. After you add a key to the application, the license key is displayed in the application interface as a unique alphanumeric sequence.
The license key may be blocked by Kaspersky, if the terms of the End User License Agreement are violated. If the license key is blocked, add another license key for proper application operation.
A license key may be active or reserve.
Active license key is currently used to run the application. A license key for a trial or commercial license can be added as the active key. The application cannot have more than one active license key.
Reserve license key is a license key that entitles the user to use the application, but is not currently in use. The reserve license key automatically becomes active when the license associated with the current active license key expires. A reserve license key can be added only if an active license key is already added.
A trial license key can only be added as an active license key. A trial license key cannot be added as a reserve license key.
About the activation code
An activation code is a unique sequence of twenty Latin letters and numbers. You have to enter an activation code in order to add a license key for activating Kaspersky Endpoint Security. You receive the activation code at the email address that you provided when you bought Kaspersky Endpoint Security or requested the trial version of Kaspersky Endpoint Security.
To activate the application with an activation code, you need Internet access in order to connect to Kaspersky activation servers.
If you lost your activation code after activating the application, contact the Kaspersky partner from whom you purchased the license.
Page top
About the key file
A key file is a file with the .key extension that you receive from Kaspersky. Key files are intended to add a license key for activating the application.
You receive a key file at the email address that you provided when you bought Kaspersky Endpoint Security or ordered the trial version of Kaspersky Endpoint Security.
You do not need to connect to Kaspersky activation servers in order to activate the application with a key file.
You can restore a key file if it has been accidentally deleted. You may need a key file to register a Kaspersky CompanyAccount, for example.
To restore your key file, perform any of the following actions:
- Contact the license seller.
- Get the key file on the Kaspersky website when you have an activation code.
About subscription
Subscription for Kaspersky Endpoint Security is a purchase order for the application with specific settings (subscription expiry date, number of devices protected). You can order a subscription for Kaspersky Endpoint Security from your service provider (such as your internet service provider). You can renew or cancel your subscription. You can manage your subscription on the website of the service provider.
Subscription can be limited (for one year, for example) or unlimited (without an expiry date). To continue using the application after the limited subscription expires, you need to renew your subscription. Unlimited subscription is renewed automatically if the vendor's services have been prepaid on time.
Upon a limited subscription's expiry, you may be offered a grace period to renew the subscription. During this period the application retains its functionality. The service provider decides whether or not to grant a grace period and, if so, determines the duration of the grace period.
The set of options for managing your subscription may vary depending on your service provider. The service provider might not provide a grace period for renewing the subscription where the application retains its functionality.
To use Kaspersky Endpoint Security under a subscription, you need to use the activation code received from the service provider. After you apply the activation code, an active key corresponding to the license to use the application under subscription is added to the application. A reserve key can only be added when you use an activation code and cannot be added for a key file or subscription.
Activation codes purchased under subscription may not be used to activate previous versions of Kaspersky Endpoint Security.
Page top
About providing and processing data
Data provided when using an activation code
If the application is activated using an activation code, in order to verify if the application is legally used and to obtain statistical information on distribution and use of the application, you agree to provide the following information in automatic mode:
- ID of a regional activation center
- list of agreements presented to the user by the application
- Data compression type
- Operating system family
- Checksum type for the object being processed
- type of the license used to activate the application
- application ID derived from the license
- full version of the application
- Unique device ID
- application ID
- application license expiration date and time
- application license ID
- Application license key creation date and time
- Current status of the application license key
- application license header
- ID of the information model used to provide the application license
- set of IDs of applications that can be activated on the user's device
- Type of application license used
- application localization
- application installation ID (PCID)
- application rebranding ID
- size of the content of the request to Rightholder infrastructure
- format of the data in the request to Rightholder infrastructure
- type of legal agreement accepted by the user while using the application
- version of the legal agreement accepted by the user while using the application
- Protocol ID
- Accessed IPv4 address of the web service
Data provided when downloading updates from Kaspersky update servers
If you use Kaspersky update servers to download updates, in order to increase efficiency of the update procedure and to obtain statistical information on distribution and use of the application, you agree to provide the following information in automatic mode:
- application ID derived from the license
- full version of the application
- application license ID
- Type of application license used
- application installation ID (PCID)
- ID of the application update start
- Web address being processed
Data provided when following links in the application interface
When clicking the links in Kaspersky Endpoint Security interface, you agree to provide the following information in automatic mode:
- full version of the application
- application localization
- application group
- Link name
Data sent to Kaspersky Security Center
During operation, Kaspersky Endpoint Security saves and submits to Kaspersky Security Center the following information, which may contain personal and confidential data:
- Information about the bases used by the application:
- list of database categories required by the application
- date and time when the databases were released and loaded into the application
- date when the downloaded application database updates were released
- Application license information:
- License serial number and type
- License validity period in days
- Number of devices covered by the license
- license creation and expiration date
- License key status
- date and time of the last successful synchronization with activation servers if the application was activated using an activation code
- identifier of the application for which the license is provided
- Functionality available under the license
- Name of the organization for which the license is provided
- additional information if the application is used under subscription (subscription flag, subscription expiration date and the number of days available for renewing the subscription, subscription provider web address, current subscription status and the reason for this status), date and time when the application was activated on the device
- Expiration date and time of the application license on the device
- Information about application updates:
- List of updates to be installed or removed
- update release date and the sign of the Critical status
- Name, version, and short description of the update
- Link to the detailed description of the update
- identifier and text of the End User License Agreement and Privacy Policy for the application updates
- identifier and text of Kaspersky Security Network Statement for the application updates
- Indicator showing if the update can be removed
- application policy and administration plug-in versions
- web address for downloading the application administration plug-in
- names, version and installation dates of the installed application updates
- Error code and description if the update installation or removal completed with an error
- sign and reason for the device or application restart necessity because of the application update
- User agreement or disagreement with the terms and conditions of Kaspersky Security Network Statement, End User License Agreement and Privacy Policy
- List of tags assigned to the device
- List of device statuses and their reasons.
- General application status and the status of all its components; policy compliance information, real-time protection status of the device.
- Date and time of the last device scan; number of scanned objects; number of detected malicious objects; number of blocked, deleted and disinfected objects; number of objects that cannot be disinfected; number of scan errors; number of detected network attacks
- Data on the currently applied values of the application settings.
- The current status and execution results of the group and local tasks and the values of their settings
- Information about external devices connected to the client device (ID, name, class, manufacturer, description, serial number, VID/PID)
- Information about the files in the Backup storage (name, path, size and type of the object, description of the object, name of the detected threat, version of the application database which is used to detect the threat, date and time when the object was moved to the Backup storage), actions on the objects in the Backup storage (removed, restored), and the files by administrator request.
- Information about operation of each application component and execution of each task represented as events:
- Date and time of event
- Name and type of event
- Event severity level
- name of the task or the application component during operation of which the event occurred
- information about the application that triggered the event: application name, path to the file on the disk, process identifier, setting values if the event on the application launch or settings modification is triggered
- User ID
- name of the initiator (task scheduler, application, Kaspersky Security Center, or a user) whose actions triggered the event
- Name and identifier of the user who initiated access to the file
- object or action processing result (description, type, name, threat level and accuracy, file name and type of operation on the device, application decision on the operation)
- Information about the object (object name and type, path to the object on the disk, object version, size, information about the performed action, event trigger description, description of the reason for not processing and skipping the object)
- Device information (manufacturer name, device name, path, device type, bus type, identifier, VID/PID)
- Information about blocking and unblocking the device; information about blocked connections (name, description, device name, protocol, remote address and port, local address and port, packet rules, actions)
- Information about requested web address
- Information about detected objects
- Detection type and method
- Information about the performed action
- information about the application databases (date when the downloaded database updates are released, information on the database usage, database usage errors, information on canceling the installed database updates)
- Information about encryption detection (ransomware name; name of the device where encryption was detected; information about blocking and unblocking the device)
- application settings and network settings
- information about the triggered Application Control rule (name and type) and the result of its application
- Information about containers and container images, repository URL
- Information about active and blocked connections (name, description, and type)
- information about blocking and unblocking access to untrusted computers
- information about KSN (accepted agreements, operating modes, errors)
- Information about operation of the system integrity scan task (name, type, path) and information about the system baseline
- Information about network activity, packet rules, and network attacks
- User role information:
- Name and identifier of the user who initiated changing the user role
- User role
- Name of the user who has been assigned or revoked the role
- Information about executable files detected on the computer (name, path, type and hash of the file; list of categories to which the application belongs; information about the certificate by which the application is signed: serial number, fingerprint, publisher, subject, release date, expiration date, public key).
- Container information (names of containers or container images, paths to containers or container images, repository URL).
Data provided when using Kaspersky Security Network
If you participate in Kaspersky Security Network and use Extended KSN, you agree to automatically submit to Kaspersky all data listed in Kaspersky Security Network Statement. This includes sending files (or parts of them) which may be used by intruders to harm the computer and the data stored in the operating system to Kaspersky for scan.
Kaspersky protects any information thus received in accordance with law and the applicable rules of Kaspersky. Data is transmitted over encrypted channels.
For more information on statistical data obtained while using Kaspersky Security Network that is sent to Kaspersky, as well as about storing and destroying this information, refer to the End User License Agreement, Kaspersky Security Network Statement, and Privacy Policy on the Kaspersky website. The license.<language ID> and ksn_license.<language ID> files containing the End User License Agreement and Kaspersky Security Network Statement are included in the application distribution package.
Page top
Managing the application using the command line
You can manage Kaspersky Endpoint Security using the command line. All actions are available from the command line, including task management and configuring application settings.
Starting and stopping the application
By default, Kaspersky Endpoint Security starts automatically when the operating system is booted (at the default level of execution for each operating system). The application starts all service tasks as well as user tasks with starting mode set to PS in the schedule settings.
If you stop the application, all running tasks will be interrupted. After restarting the application, paused user tasks are not resumed automatically. Only user tasks with starting mode set to PS in the schedule settings are restarted.
To run the application, the root account must be the owner of the following directories and only the owner must have write access to them: /var, /var/opt, /var/opt/kaspersky, /var/log/kaspersky, /opt, /opt/kaspersky, /usr/bin, /usr/lib, /usr/lib64.
Starting, restarting, and stopping Kaspersky Endpoint Security
To start the application in systemd, execute the following command:
systemctl start kesl
To stop the application in systemd, execute the following command:
systemctl stop kesl
To restart the application in systemd, execute the following command:
systemctl restart kesl
To start the application in the system without systemd, execute the following command:
/etc/init.d/kesl start
To stop the application in the system without systemd, execute the following command:
/etc/init.d/kesl stop
To restart the application in the system without systemd, execute the following command:
/etc/init.d/kesl restart
Monitoring the status of Kaspersky Endpoint Security
The Kaspersky Endpoint Security status is monitored by the watchdog service. The watchdog service is automatically launched when the application starts.
In the event of an application crash, a dump file is generated and the application is restarted automatically.
To display the application status in systemd, execute the following command:
systemctl status kesl
To display the application status in the system without systemd, execute the following command:
/etc/init.d/kesl status
Displaying Help on the commands
The kesl-control --help <set of application commands> command displays help for the application commands.
Command syntax
kesl-control --help [<set of application commands>]
<set of application commands>
Available values:
-T – Commands for managing tasks and general application settings.
-C – Commands for managing general Container Scan settings.
-N – Commands for managing encrypted connections scan settings.
-L – Commands for managing the Licensing task and integration between Kaspersky Endpoint Security and Managed Detection and Response.
-E – Commands for managing application events.
-B – Commands for managing the Storage Management task.
-F – Commands for managing the Firewall Management task.
-H – Commands for managing the Anti-Cryptor task.
-D – Commands for managing the Device Control task.
-A – Commands for managing the Application Control task.
-U – Commands for managing users and user roles.
-S – Statistical commands.
-W – Display events.
Enabling the display of events
The kesl-control -W command enables display of the current application events. The command returns the name of the event and additional information about the event.
You can use this command either separately to display all current application events or together with the kesl-control --start-task command to display only events related to the running task.
You can also use the kesl-control -W command with the --query flag to specify filter conditions to display specific events.
Command syntax
kesl-control -W
Examples: Enable the display of current application events:
Enable display of the current events of the task with ID=1:
Enable display of the current events of the TaskStateChanged type:
|
Viewing information about the application
The kesl-control --app-info command displays information about the application.
Command syntax
kesl-control [-S] --app-info [--json]
Result of command execution:
- Name. Application name.
- Version. Current application version.
- Policy. Indicates whether the Kaspersky Security Center policy is applied.
- License information. License information or license key status.
- Subscription status. Subscription status. This field is displayed if the application is run under a subscription.
- License expiration date. Date and time when the license expires, in UTC.
- MDR BLOB file status. Status of the BLOB configuration file for integration with Managed Detection and Response.
- MDR BLOB license expiration date. Date and time when the Managed Detection and Response license expires, in UTC.
- Storage state. Storage state.
- Storage space usage. Storage size.
- Last run date of the Scan_My_Computer task. Date and time the Virus Scan task was last run.
- Date when the application databases were last released. Date and time the application databases were last released.
- Application databases downloaded. Displays whether the application databases have been downloaded.
- Kaspersky Security Network status. Information about participation in Kaspersky Security Network.
- Managed Detection and Response state. Managed Detection and Response status: active, inactive.
- File Threat Protection. Status of the File Threat Protection task.
- Container Monitoring. Displays information about Container Scan settings.
- System Integrity Monitoring. Status of the System Integrity Monitoring task.
- Firewall Management. Status of the Firewall Management task.
- Anti-Cryptor. Status of the Anti-Cryptor task.
- Web Threat Protection. Status of the Web Threat Protection task.
- Device Control. Status of the Device Control task.
- Removable Drives Scan. Status of the Removable Drives Scan task.
- Network Threat Protection. Status of the Network Threat Protection task.
- Behavior Detection. Status of the Behavior Detection task.
- Application Control. Status of the Application Control task.
- Application update status. Displays application update actions and the actions to be performed by the user.
- Unstable application operation. Information about application failure and dump file creation is displayed. This field is displayed if a failure occurred the last time the application was launched.
Description of the application commands
Displaying Help on application commands
--help – displays Help on application commands.
Displaying application events
-W – enables the display of application events.
Statistics commands
-S is a prefix indicating that the command belongs to the statistics command group.
[-S] --app-info – displays information about the application.
[-S] --omsinfo --file <file name and path> – creates a JSON file for integration with Microsoft Operations Management Suite.
Commands for managing application tasks and settings
-T is a prefix indicating that the command belongs to the group of commands for managing application settings and tasks.
[-T] --get-app-settings --file <file name and path> – displays the general application settings.
[-T] --set-app-settings --file <file name and path> – sets the general application settings.
[-T] --export-settings --file <full path to the configuration file> – exports the application settings to the configuration file.
[-T] --import-settings --file <full path to the configuration file> – imports the application settings from the configuration file.
[-T] --update-application – updates the application.
[-T] --get-task-list – displays a list of existing application tasks.
[-T] --get-task-state <task ID>|<task name> – displays the status of the specified task.
[-T] --create-task <task name> --type <task type> --file <file name and path> – creates a task of the specified type and imports the settings from the specified configuration file into the task.
[-T] --delete-task <task ID>|<task name> – deletes the task.
[-T] --start-task <task ID>|<task name> [-W] [--progress] – starts the task.
[-T] --stop-task <task ID>|<task name> – stops the task.
[-T] --suspend-task <task ID>|<task name> – pauses the task. The Update task cannot be paused.
[-T] --resume-task <task ID>|<task name> – resumes the task. The Update task cannot be resumed.
[-T] --scan-file <path> [--action <action>] – creates and starts a temporary Custom Scan task (task name: Scan_File, task ID – 3).
[-T] --scan-container <container|image[:tag]> – creates a temporary Custom Container Scan task (task name: Custom_Container_Scan, task ID – 19). After the scan is complete, the temporary task is automatically deleted.
[-T] --get-settings <task ID>|<task name> --file <file name and directory> – displays the task settings.
[-T] --set-settings <task ID>|<task name> [<parameters>] [--file <file name and directory>] [--add-path <path>] [--del-path <path>] [--add-exclusion <exclusion>] [--del-exclusion <exclusion>] – sets the task settings.
[-T] --set-settings [<task ID>|<task name>] set-to-default – restores the task settings to their default values.
[-T] --set-schedule <task ID>|<task name> --file <file name and path> – sets the task schedule settings or imports them into the task from the configuration file.
[-T] --get-schedule <task ID>|<task name> --file <file name and path> – displays the task schedule settings or saves them to the configuration file.
Commands for managing Container Scan settings
-C is a prefix indicating that the command belongs to the group of commands for managing Container Scan settings.
[-C] --get-container-settings --file <file name and path> – displays the general Container Scan settings.
[-C] --set-container-settings --file <file name and path> – sets the general Container Scan settings.
Commands for managing encrypted connections scan settings
-N is a prefix indicating that the command belongs to the group of commands for managing encrypted connections scan settings.
-N --query user – displays a list of encrypted connections scan exclusions added by the user.
-N --query auto – displays a list of encrypted connections scan exclusions added by the application.
-N --query kl – displays a list of encrypted connections scan exclusions received from Kaspersky databases.
-N --clear-web-auto-excluded – clears the list of domains that the application automatically excluded from encrypted connections scan.
[-N] {--get-net-settings} [--file <file name and path>] – saves encrypted connection scan settings to an INI file.
[-N] {--set-net-settings} [--file <file name and path>] – sets encrypted connection scan settings.
Commands for managing users and roles
-U is a prefix indicating that the command belongs to the group of commands for managing users and roles.
[-U] --get-user-list – displays a list of users and roles.
[-U] --grant-role <role> <user> – grants a role to a specified user.
[-U] --revoke-role <role> <user> – revokes a role from a specified user.
Licensing commands
-L is a prefix indicating that the command belongs to the group of commands used to manage license keys.
[-L] --add-active-key <activation code>|<key file> – adds an active key.
[-L] --add-reserve-key <activation code>|<key file> – adds a reserve key.
[-L] --remove-active-key – removes the active key.
[-L] --remove-reserve-key – removes the reserve key.
-L --query – displays information about the license key.
[-L] --load-mdr-blob <path to the BLOB configuration file> – downloads the BLOB configuration file.
[-L] --remove-mdr-blob – removes the BLOB configuration file.
Commands for managing the Firewall Management task
-F is a prefix indicating that the command belongs to the group of commands for managing the Firewall Management task.
[-F] --add-rule [--name <string>] [--action <action>] [--protocol <protocol>] [--direction <directory>] [--remote <remote>] [--local <local>] [--at <index>] – adds a new rule.
[-F] --del-rule [--name <string>] [--index <index>] – deletes a rule.
[-F] --move-rule [--name <string>] [--index <index>] [--at <index>] – changes the rule priority.
[-F] --add-zone [--zone <zone>] [--address <address>] – adds an IP address to the zone.
[-F] --del-zone [--zone <zone>] [--address <address>] [--index <index>] – deletes an IP address from the zone.
-F --query – displays information about the task.
Commands for managing the Anti-Cryptor task
-H is a prefix indicating that the command belongs to the group of commands for managing the Anti-Cryptor task.
[-H] --get-blocked-hosts – displays a list of blocked computers.
[-H] --allow-hosts – unblocks untrusted computers.
Commands for managing Device Control tasks
-D is a prefix indicating that the command belongs to the Device Control group of commands.
[-D] --get-device-list – displays a list of devices connected to the computer.
Commands for managing the Application Control task
-A is a prefix indicating that the command belongs to the Application Control group of commands.
[-A] --get-app-list – displays the list of applications detected on the computer while executing the Inventory task.
[-A] --get-categories – displays a list of created Application Control categories.
Commands for managing the Storage
-B is a prefix indicating that the command belongs to the group of commands used to manage the Storage.
[-B] --mass-remove --query – clears the Storage completely or selectively.
-B --query <filter> – displays information about the objects in the Storage that match the filter conditions.
[-B] --restore <object ID> --file <file name and path> – restores an object from Storage.
Commands used to manage the event log
-E is a prefix indicating that the command belongs to the group of commands used to manage the event log.
-E --query <filter> --db <database file> -n <number> --file <file name and path> – outputs information about events that match filter conditions from the event log database to the specified file.
where:
<number> – number of the latest events of the selection (number of records from the end of the selection) to be displayed.
<filter> – filter conditions to limit the query results.
<file name and path> – name and path of the file where you want to save the events.
<database file> – name and path to the event log database file.
Page top
Using filters to limit query results
You can use a filter to limit the query results for the following commands:
- Getting information about application events:
kesl-control -E --query "<logical expression>" - Displaying information about the objects in the Storage:
kesl-control -B --query "<logical expression>" - Removing the selected objects from the Storage:
kesl-control -B --mass-remove --query "<logical expression>"
You can use multiple logical expressions to specify a filter by combining them using the AND operator. Logical expressions must be enclosed in quotation marks.
Syntax
"<field> <comparison operator> '<value>'"
"<field> <comparison operator> '<value>' and <field> <comparison operator> '<value>'"
Comparison operator
Comparison operator |
Description |
|---|---|
|
Greater than |
|
Less than |
|
Matches the specified value (when specifying the value, you can use masks %, see the example below) |
|
Equal to |
|
Not equal to |
|
Greater than or equal to |
|
Less than or equal to |
Examples: Get information about files in the Storage that have the High severity level:
Get information about events that contain the text "etc" in the FileName field:
Get events of the ThreatDetected type:
Output ThreatDetected events generated by ODS tasks:
Get events generated after the date specified in the UNIX time stamp system (the number of seconds that have elapsed since 00:00:00 (UTC), 1 January 1970):
Get events generated after the date specified in YYYY-MM-DD hh:mm:ss format:
|
Exporting and importing application settings
Kaspersky Endpoint Security allows you to export and import all application settings for troubleshooting, verifying settings, or simplifying the application's configuration on other computers.
When you export settings, all application and task settings are saved to a configuration file. This configuration file is used to import the application's configuration settings.
The application must be launched when settings are imported or exported. After the settings are imported, the application must be restarted.
If the application is managed via Kaspersky Security Center, importing settings is not supported.
When importing or exporting settings from an older application version, new settings are set to default values. Importing settings to an older application version is not supported.
When you import application settings, the UseKSN setting is set to No. To start or resume participation in Kaspersky Security Network, specify UseKSN=Basic or UseKSN=Extended.
After importing application settings, internal task IDs can be changed. It is recommended to use task names to manage them.
To export the application settings to the configuration file, execute the following command:
kesl-control --export-settings --file <full path to configuration file>
To configure the application with settings from a configuration file (import settings), execute the following command:
kesl-control --import-settings --file <full path to configuration file>
Setting the application memory usage limit
You can specify the memory usage limit for Kaspersky Endpoint Security during scan tasks (ODS and OAS), in megabytes.
This setting limits only the amount of memory used when scanning files. That means that the total amount of memory required by the application can be more than the value of this setting.
The minimum value is 2 MB. Default value is 8192 MB. If the specified value is less than 2 MB, then the application uses the minimum value (2 MB). If the specified value is greater than the amount of RAM, then the application will use only 25% of the RAM. This value cannot be changed.
To specify a limit on memory use when scanning files:
- Stop Kaspersky Endpoint Security.
- Open the /var/opt/kaspersky/kesl/common/kesl.ini file for editing.
- Add the following setting to the [General] section:
ScanMemoryLimit=<amount of memory in megabytes> - Start Kaspersky Endpoint Security.
The new memory usage limit for scanning files will be in effect after the application starts.
Page top
Application components integrity check
Kaspersky Endpoint Security contains many various binary modules in the form of dynamic linked libraries, executable files, configuration files, and interface files. Intruders can replace one or more application executable modules or files with other files containing malicious code. To prevent the replacement of modules and files, Kaspersky Endpoint Security can check integrity of the application components. The application checks modules and files for unauthorized changes or corruption. If an application module or file has an incorrect checksum, it is considered to be corrupted.
Integrity check is performed for the following application components:
- Application package
- Graphical user interface package
- Kaspersky Security Center Network Agent package
- Kaspersky Endpoint Security administration plug-in
The application checks integrity of the files in the special lists called manifest files. Each application component has its own manifest file (integrity_check_manifest.xml) that contains a list of application files whose integrity is important for correct operation of this application component. The name of the manifest file is the same for each component, but the content of the manifest files differs. The manifest files are digitally signed and their integrity is checked as well.
The integrity check of the application components is performed using the integrity_check_tool utility.
The integrity check utility must be run under the account with root privileges.
To check integrity, you can use either the utility installed with the application or the utility distributed on a certified CD.
It is recommended to run the integrity check utility from a certified CD to ensure integrity of the utility. When running the utility from the CD, specify the full path to the manifest file.
The integrity check utility installed with the application is located at the following paths:
- To check the application package, graphical user interface package and the Network Agent – /opt/kaspersky/kesl/bin/integrity_check_tool.
- To check Kaspersky Endpoint Security administration plug-in – the directory where the executable modules (DLL) of the administration plug-in are located:
- C:\Program Files\Kaspersky Lab\Kaspersky Security Center\Plugins\<plug-in version>.linux.plg\integrity_check_tool.exe – for 32-bit operating systems.
- C:\Program Files (x86)\Kaspersky Lab\Kaspersky Security Center\Plugins\<plug-in version>.linux.plg\integrity_check_tool.exe – for 64-bit operating systems.
The manifest files are located at the following paths:
- /opt/kaspersky/kesl/bin/integrity_check.xml – to check integrity of the application package.
- /opt/kaspersky/kesl/bin/gui_integrity_check.xml – to check integrity of the graphical user interface package.
- /opt/kaspersky/klnagent/bin/integrity_check.xml – to check the Network Agent in 32-bit operating systems.
- /opt/kaspersky/klnagent64/bin/integrity_check.xml – to check the Network Agent in 64-bit operating systems.
To check integrity of the application components, run the following command:
integrity_check_tool -v[|--verify] -m[|--manifest] <path to the manifest file>
By default, the path to the integrity_check.xml file is used. This file is located in the directory from which the integrity check utility is run.
You can run the utility with the following optional settings:
-V,--verbose– display detailed information about performed actions and their results. If you do not specify this setting, only errors, objects that did not pass the check, and scan statistics summary will be displayed.-L,--log-file <file>, where<file>– the name of the file used for logging events that occur during integrity check. By default, events are passed to the standard stdout stream.-l,--log-level <0-1000>, where<0-1000>is the level of event output details. The default level of detail is0.
You can view description of all available integrity check utility settings in the help on the utility options by running the integrity_check_tool -h [--help] command.
The result of checking the manifest files is displayed as follows:
SUCCEEDED— integrity of the files has been confirmed (return code0).FAILED– integrity of the files has not been confirmed (return code is not0).
If violation of integrity of the application, graphical user interface, or the Network Agent is detected when the application starts, Kaspersky Endpoint Security registers the IntegrityCheckFailed event in the event log and in Kaspersky Security Center.
Page top
General application settings
This section contains information about commands for managing general application settings and Container Scan settings.
Description of the general application settings
This section describes the values of the general settings of Kaspersky Endpoint Security configuration file (see the table below).
General application settings
Setting |
Description |
Values |
|---|---|---|
|
Directory that stores the Samba configuration file. The Samba configuration file is required to ensure that the |
The standard directory of the SAMBA configuration file on the computer is specified by default. Default value: /etc/samba/smb.conf. The application must be restarted after this setting is changed. |
|
The directory where the NFS configuration file is stored. The NFS configuration file is required to ensure that the |
The standard directory of the NFS configuration file on the computer is specified by default. Default value: /etc/exports. The application must be restarted after this setting is changed. |
|
Enables creation of a dump file when application failure occurs. |
|
|
Enables generation of trace files at application startup. |
|
|
Enables trace file generation and specifies the level of detail of the trace file. |
|
|
The directory that stores the application's trace files. Trace files contain information about the operating system, and may also contain personal data.
|
Default value: /var/log/kaspersky/kesl. If you specify a different directory, make sure that the account under which Kaspersky Endpoint Security is running has read/write permissions for this directory. Root privileges are required to access the default trace files directory. The application must be restarted after this setting is changed. |
|
Specifies the maximum number of application trace files.
|
The default value is The application must be restarted after this setting is changed. |
|
Specifies the maximum size of an application trace file (in megabytes). |
The default value is The application must be restarted after this setting is changed. |
|
Blocks access to files for which the full path length exceeds the defined settings value specified in bytes. If the length of the full path to the scanned file exceeds the value of this setting, virus scan tasks skip this file during scanning. This setting is not available for operating systems that use the fanotify technology. |
The default value is |
|
Enable detection of legitimate software that could be used by intruders to harm computers or user data. |
|
|
Enable scanning of namespaces and containers. |
|
|
Mode for intercepting files when the File Threat Protection task is running. This setting also affects the operation of the Anti-Cryptor, Device Control and Removable Drive Scan. |
If the |
|
|
|
|
Enables Managed Detection and Response. |
|
|
Enable the use of proxy servers for Kaspersky Security Network, activation of the application, and updates. |
|
|
Proxy server settings in the format |
— |
|
The maximum number of events stored by the application. When the specified number of events is exceeded, the application deletes the oldest events. |
The default value is If |
|
The maximum number of Scan_File tasks that a non-privileged user can simultaneously start on a computer. This setting does not limit the number of tasks that a user with root privileges can start. |
The default value is If If you installed the graphical user interface package when installing the application, the default value of the |
|
Enable logging of information about events to syslog Root privileges are required to access syslog. |
|
|
The database directory where the application saves information about events. Root privileges are required to access the default event database. |
Default value: /var/opt/kaspersky/kesl/private/storage/events.db. |
|
The mount point to be excluded from the scan scope for the tasks that use a file operation interceptor (File Threat Protection and Anti-Cryptor). You can specify several mount points to be excluded from scans. Mount points must be specified in the same way as they are displayed in the The |
|
Editing general application settings
Editing general application settings
Root privileges are required to change application settings.
To edit the general application settings:
- Save the general application settings to the configuration file using the --get-app-settings command:
kesl-control [-T] --get-app-settings --file <configuration file name> - Open the created configuration file, edit the necessary application settings, and save the changes.
- Import the settings from the configuration file to the application using the --set-app-settings command:
kesl-control [-T] --set-app-settings --file <configuration file name>
The application will apply the new values of the settings after being restarted.
You can use the created configuration file to import the settings to the application installed on another computer.
The kesl-control --get-app-settings command
The kesl-control --get-app-settings command displays the general application settings. You can also use this command to export the general application settings to a configuration file.
Command syntax
kesl-control [-T] --get-app-settings [--file <configuration file name>]
Arguments and keys
--file <configuration file name> – name of the configuration file where the application settings will be saved.
If you specify the name of a file without specifying its path, the file will be created in the current directory. If a file with the specified name already exists in the specified path, it will be overwritten. If the specified directory cannot be found on the disk, the configuration file will not be created.
Example: Export the general application settings to a file named kesl_config.ini. Save the created file in the current directory:
|
The kesl-control --set-app-settings command
The kesl-control --set-app-settings command sets the general application settings using the command keys or imports the general application settings from the specified configuration file.
Command syntax
kesl-control [-T] --set-app-settings --file <configuration file name>
kesl-control [-T] --set-app-settings <setting name>=<setting value> <setting name>=<setting value>
Arguments and keys
--file <configuration file name> – name of the configuration file, including the full path to the file; the settings from this file will be imported into the application.
Examples: Import the general settings from the configuration file named /home/test/kesl_config.ini into the application:
Set the detail level for the trace log to low:
Add a mount point to be excluded from scan scope by tasks that use a file operation interceptor (File Threat Protection and Anti-Cryptor):
|
Description of general Container Scan settings
This section describes the values of the general container and namespace scan settings (see the table below). Integration with Docker container management system, CRI-O framework, and Podman and runc utilities is supported.
Namespace and container scans can be enabled using the NamespaceMonitoring setting described in the general application settings.
General container and namespace scan settings
Setting |
Description |
Values |
|---|---|---|
|
Action to be performed on a container when an infected object is detected. This setting is only available if the application is activated under Kaspersky Hybrid Cloud Security Enterprise license. The action performed on a container when an infected object is detected also depends on the File Threat Protection task settings (see the table below). Actions on an infected object inside a container are described in the Container Scan task settings. |
|
|
Use the Docker environment. |
|
|
Docker socket path or URI (Universal Resource Identifier). |
Default value: /var/run/docker.sock. |
|
Use the CRI-O environment. |
|
|
Path to the CRI-O configuration file. |
Default value: /etc/crio/crio.conf. |
|
Use the Podman utility. |
|
|
Path to the Podman utility executable file. |
Default value: /usr/bin/podman. |
|
Path to the root directory of the container storage. |
Default value: /var/lib/containers/storage. |
|
Use the runc utility. |
|
|
Path to the runc utility executable file. |
Default value: /usr/bin/runc. |
|
Path to the root directory of the container state storage. |
Default value: /run/runc-ctrs. |
Actions performed on a container when an infected object is detected may vary depending on the specified values of the FirstAction / SecondAction settings of the File Threat Protection task and on the value of the InterceptorProtectionMode setting, one of the general application settings (see the table below).
Dependence of actions performed on containers on the specified actions performed on infected objects
Value of the FirstAction / SecondAction or the InterceptorProtectionMode setting |
Action that the application performs on the container when the StopContainerIfFailed action is selected |
|---|---|
|
Stop the container if disinfection of an infected object fails. |
|
Stop the container if an infected object removal fails. |
|
Do not perform any action on containers when an infected object is detected. |
|
Do not perform any action on containers when an infected object is detected. |
Editing general Container Scan settings
Editing general Container Scan settings
Root privileges are required to change application settings.
To edit the general Container Scan settings:
- Save the general Container Scan settings to the configuration file using the --get-container-settings command:
kesl-control [-C] --get-container-settings --file <configuration file name> - Open the created configuration file, edit the necessary Container Scan settings and save the changes.
- Import the Container Scan settings from the configuration file into the application using the --set-container-settings command:
kesl-control [-C] --set-container-settings --file <configuration file name>
Kaspersky Endpoint Security will apply the new values of the settings after you restart it.
The kesl-control --get-container-settings command
The kesl-control --get-container-settings command displays the general Container Scan settings. You can also use this command to export the general container scan setting to the configuration file.
Command syntax
kesl-control [-C] --get-container-settings [--file <configuration file name>]
Arguments and keys
--file <configuration file name> – name of the configuration file where the Container Scan settings are saved.
If you specify the name of a file without specifying its path, the file will be created in the current directory. If a file with the specified name already exists in the specified path, it will be overwritten. If the specified directory cannot be found on the disk, the configuration file will not be created.
The kesl-control --set-container-settings command
The kesl-control --set-container-settings command sets the general Container Scan settings using the command keys, or imports the general Container Scan settings from the specified configuration file.
Command syntax
kesl-control [-C] --set-container-settings --file <configuration file name>
kesl-control [-C] --set-container-settings <setting name>=<setting value> <setting name>=<setting value>
Arguments and keys
--file <configuration file name> – name of the configuration file, including the full path to the file; the Container Scan settings from this file will be imported into the application.
Encrypted connections scan
This section contains information about the encrypted connections scan settings. These settings apply to the Web Threat Protection and Network Threat Protection tasks.
Encrypted connections scan settings
All available values and default values for each setting are described in the table below.
When the encrypted connection scan settings are changed, the application records a NetworkSettingsChanged event in the log file.
Encrypted connections scan settings
Setting |
Description |
Values |
|---|---|---|
|
Enables or disables encrypted traffic scan. For the FTP protocol, encrypted connections scan is disabled by default. |
|
|
Specifies the action to perform when an encrypted connection scan error occurs on a website. |
|
|
Specifies the way Kaspersky Endpoint Security checks certificates. If a certificate is self-signed, the application does not perform the additional verification. |
|
|
Specifies the action to perform when an encrypted connection scan error occurs on a website. |
|
|
Enables or disables the use of the encrypted connection scan exclusions. |
|
|
Specifies the way Kaspersky Endpoint Security monitors network ports. |
|
The [Exclusions.item_#] section contains domains excluded from scans. The application does not scan encrypted connections established when visiting specified domains. |
||
|
Specifies the domain name. You can use masks to specify the domain. |
The default value is not defined. |
The [NetworkPorts.item_#] section contains the network ports monitored by the application. |
||
|
Network port description. |
The default value is not defined. |
|
Network port numbers to be monitored by the application. |
The default value is not defined. |
Managing encrypted connections scan settings
You can manage encrypted connections scan settings from the command line.
To view the list of encrypted connection scan exclusions added by a user, execute the following command:
kesl-control -N --query user
To view the list of encrypted connection scan exclusions added by a user, execute the following command:
kesl-control -N --query auto
To view the list of encrypted connection scan exclusions received from the application databases, execute the following command:
kesl-control -N --query kl
To clear a list of domains that the application automatically excluded from scan, execute the following command:
kesl-control -N --clear-web-auto-excluded
To view encrypted connection scan settings, execute the following command:
kesl-control [-N] --get-net-settings [--file <file path and name>]
The output format is INI.
To set encrypted connection scan settings, execute the following command:
kesl-control [-N] --set-net-settings [--file <file path and name>]
User roles
Access to Kaspersky Endpoint Security functions is provided to users in accordance with their roles. A role is a set of rights and privileges for managing the application.
Four groups of system users are created in the operating system: kesladmin, kesluser, keslaudit, and nokesl. When you assign an application role to a system user, the user is added to the corresponding group of roles (see the Roles table below). When you revoke a role from a user, this user is removed from the corresponding group of roles.
If no application role is assigned to a system user, that user belongs to a separate group of users without rights.
Thus, the roles correspond to the four groups of operating system users:
- kesladmin – the Administrator role
- kesluser – the User role
- keslaudit – the Auditor role
- nokesl is assigned to a user if no other roles are assigned. In this case, the user belongs to a separate group of users without privileges
The table below describes the application roles and their permissions.
User roles
Role name |
Role in application |
OS user |
Permissions |
|---|---|---|---|
Administrator |
admin |
kesladmin |
Manage all application and task settings. Manage application licensing. Assigning roles to users. Revoking user roles (the administrator has no right to revoke the admin role from himself). View and manage users' Storages. |
User |
user |
kesluser |
Manage only Scan_File tasks. Start and stop Update tasks. View reports for the tasks created by this user. View specific events that are common for all application users. |
Auditor |
audit |
keslaudit |
Viewing application settings View application status. View all tasks, their settings, and start schedules. View all events. View all objects in the Storage. |
— |
— |
nokesl |
No role is assigned in the application, no permissions. |
Viewing a list of users and roles
To view a list of users and their roles, execute the following command:
kesl-control [-U] --get-user-list
Assigning a role to a user
To assign a role to a specific user, execute the following command:
kesl-control [-U] --grant-role <role> <user>
Example: To assign the audit role to the user test15:
|
Revoking a user role
To revoke a role from a specific user, execute the following command:
kesl-control [-U] --revoke-role <role> <user>
Example: To revoke the audit role from the user test15:
|
Managing application tasks using the command line
You can manage the application operation using tasks locally on the computer (using the command line or configuration files), as well as using Administration Console or Kaspersky Security Center Web Console.
There are two types of tasks for working with the application:
- A predefined task that is created during installation of the application. Predefined tasks cannot be created or deleted, but you can modify the settings of these tasks.
- A user task that you can create or delete on your own. You can create the following types of user tasks: ODS, Update, Rollback, ODFIM, ContainerScan, and InventoryScan.
Task ID is an identifier that the application assigns to the task at creation. IDs for user tasks are starting from 100. All tasks (including deleted tasks) have unique IDs. The application does not reuse the identifiers of the deleted tasks. The identifier of a new task is the next successive number to the identifier of the latest created task.
Task names are not case-sensitive.
Predefined Kaspersky Endpoint Security tasks are described in the table below.
Kaspersky Endpoint Security tasks
Task |
Task name in the command line |
Task ID |
Task type |
|---|---|---|---|
File_Threat_Protection |
1 |
OAS |
|
Scan_My_Computer |
2 |
ODS |
|
Scan_File |
3 |
ODS |
|
Critical_Areas_Scan |
4 |
ODS |
|
Update |
6 |
Update |
|
Rollback |
7 |
Rollback |
|
License |
9 |
License |
|
Backup |
10 |
Backup |
|
System_Integrity_Monitoring |
11 |
OAFIM |
|
Firewall_Management |
12 |
Firewall |
|
Anti_Cryptor |
13 |
AntiCryptor |
|
Web_Threat_Protection |
14 |
WTP |
|
Device_Control |
15 |
DeviceControl |
|
Removable_Drives_Scan |
16 |
RDS |
|
Network_Threat_Protection |
17 |
NTP |
|
Container_Scan |
18 |
ContainerScan |
|
Custom_Container_Scan |
19 |
ContainerScan |
|
Behavior_Detection |
20 |
BehaviorDetection |
|
Application_Control |
21 |
AppControl |
|
Inventory_Scan |
22 |
InventoryScan |
You can perform the following actions with tasks:
- Start and stop tasks.
- Create and delete user tasks.
- Edit task settings.
View the list of tasks
To view the list of application tasks, execute the following command:
kesl-control [-T] --get-task-list
The list of Kaspersky Endpoint Security tasks will be displayed.
The following information will be displayed for each task:
Name. Task name.ID. Task ID.Type. Task type.State. Current task status.
If Kaspersky Security Center policy prohibits users from viewing and editing tasks locally, information will only be displayed about the Scan_File, Backup, License, File_Threat_Protection, System_Integrity_Monitoring, and Anti_Cryptor tasks. Information about other tasks is not available.
If your license does not include the Anti-Cryptor and System Integrity Monitoring functions, information on the corresponding tasks will not be displayed.
Creating a new task
You can create tasks with default settings or with settings specified in a configuration file.
You can create only the following types of user tasks: ODS, Update, Rollback, ODFIM, ContainerScan, and InventoryScan.
To create a task with default settings, execute the following command:
kesl-control [-T] --create-task <task name> --type <task type>
where:
<task name>is the name you assign to the new task;<task type>is the type of task.
A task of the specified type is created with default settings.
To create a task with the settings specified in the configuration file, execute the following command:
kesl-control [-T] --create-task <task name> --type <task type> --file <path to file> [--json]
where:
<task name>is the name you assign to the new task;<task type>is the type of task;<path to file>is the full path to the configuration file.
A task of the specified type is created with settings specified in a configuration file.
Editing task settings using a configuration file
To edit task settings by changing a configuration file:
- Save task settings to the configuration file:
kesl-control --get-settings <task ID>|<task name> --file <full path to the file> [--json] - Open the created configuration file for editing.
- Edit the required settings in the configuration file.
- Save the changes in the configuration file.
- Import the settings from the configuration file into the task:
kesl-control --set-settings <task ID>|<task name> --file <full path to the file> [--json]
Task settings will be updated.
If you change the allowlist, or prohibit launch of all applications or applications that affect the operation of Kaspersky Endpoint Security in the Application Control task settings, run the --set-settings command with the --accept flag.
Editing task settings using the command line
To edit task settings using the command line:
- Specify the required setting value:
kesl-control --set-settings <task ID>|<task name> <setting=value> [<setting=value>]The application changes the specified setting.
If you change the allowlist, or prohibit launch of all applications or applications that affect the operation of Kaspersky Endpoint Security in the Application Control task settings, run the
--set-settingscommand with the--acceptflag. - Make sure the setting value is changed in the task configuration file:
kesl-control --get-settings <task ID>|<task name>
If you add a new scan scope or exclusion scope not specifying all settings, a scope with default settings is added to the configuration file.
Example: To specify a new scan scope, execute the following command:
A new section describing the scan scope is added to the task configuration file with ID=100:
|
Resetting task settings to their default values
Kaspersky Endpoint Security allows you to reset task settings to default values from command line.
Restoring default settings is not available for the License and Rollback tasks.
To reset task settings to their default values from the command line:
- Execute the following command:
kesl-control --set-settings <task ID>|<task name> --set-to-defaultThe application changes the setting values to their defaults.
- Make sure the settings' values are changed in the task configuration file:
kesl-control --get-settings <task ID>|<task name> --file <configuration file name>The task configuration file contains default values for all settings.
Starting and stopping a task
By default, the following tasks are automatically started when the application starts: File Threat Protection, Device Control, and Behavior Detection. The remaining tasks are stopped (their status is Stopped).
You can start a task at any time.
The Backup and License tasks cannot be started or stopped.
To start a task, execute the following command:
kesl-control --start-task <task ID>|<task name>
To stop a task, execute the following command:
kesl-control --stop-task <task ID>|<task name>
Managing scan scopes from the command line
You can add or delete a scan scope with a specified Path for OAS, ODS, OAFIM, ODFIM, and AntiCryptor tasks from the command line.
To add a new scan scope, execute the following command:
kesl-control --set-settings <task ID>|<task name> --add-path <path>
A new [ScanScope.item_#] section will be added to the configuration file. The application scans the objects in the directory specified by the Path setting.
If a [ScanScope.item_#] section already exists for the specified Path setting, a duplicate section will not be added to the configuration file. If the UseScanArea setting is set to No its value will change to Yes after this command is executed and the objects located in this directory will be scanned.
To delete a scan scope, execute the following command:
kesl-control --set-settings <task ID>|<task name> --del-path <path>
The [ScanScope.item_#] section that contains the specified path will be deleted from the task configuration file. The application will not scan the objects in the directory specified by the Path setting.
Managing exclusion scopes from the command line
You can add or delete an exclusion scope with a specified Path for OAS, ODS, OAFIM, ODFIM, and AntiCryptor tasks from the command line.
To add a new exclusion scope, execute the following command:
kesl-control --set-settings <task ID>|<task name> --add-exclusion <path>
In order to optimize the operation of scan tasks, it is recommended to add the path with snapshots mounted by the system in the read-only mode to the exclusions for the systems with the btrfs file system and enabled active snapshots. For example, for the systems based on SUSE/OpenSUSE, you can add the following exclusion for the path: /.snapshots/*/snapshot/.
A new [ExcludedFromScanScope.item_#] section will be added to the configuration file. The application will exclude objects in the directory specified by the Path setting from scans.
If an [ExcludedFromScanScope.item_#] section already exists for the specified Path setting, a duplicate section will not be added to the configuration file. If the UseScanArea setting is set to No its value will change to Yes after this command is executed and the objects located in this directory will be excluded from scans.
To delete an exclusion scope, execute the following command:
kesl-control --set-settings <task ID>|<task name> --del-exclusion <path>
The [ExcludedFromScanScope.item_#] section that contains the specified path is deleted from the task configuration file. The application will not exclude objects in the directory specified by the Path setting from scans.
Viewing a task state
To view a task state, execute the following command:
kesl-control --get-task-state <task ID>|<task name>
where:
<taskID>
The application tasks can have one of the following states:
Started—Task is running.Starting—Task is being launched.Stopped—Task has been stopped.Stopping—Task is stopping.
The Scan_My_Computer, Scan_File, Critical_Areas_Scan, Container_Scan, and Custom_Container_Scan tasks can also have one of the following states:
Pausing— Task is pausing.Suspended— Task is suspended.Resuming— Task is resuming.
The Backup and License tasks cannot be started, suspended, or stopped. They can have only the Started state.
Scheduling a task
Editing task schedule settings
To set a task schedule:
- Save task schedule settings to a configuration file by executing the following command:
kesl-control --get-schedule <task ID>|<task name> - Open the configuration file for editing.
- Specify the schedule settings.
- Save the changes in the configuration file.
- Import the schedule settings from the configuration file to the task using the following command:
kesl-control --set-schedule <task ID>|<task name> --file <full path to file>
The application will apply the new values of the schedule settings immediately.
Task schedule settings
The application provides the following settings for configuring the task launch schedule:
RuleType=Once|Monthly|Weekly|Daily|Hourly|Minutely|Manual|PS|BR
where:
PS – start the task after starting the application.
BR – start the task after the application databases have been updated.
StartTime=[year/month/month_day] [hh]:[mm]:[ss]; [<month_day>|<week_day>]; [<period>] – task start time.
RandomInterval=<min.> – task run interval, if several tasks are running at the same time (in minutes).
RunMissedStartRules – enables launch of the missed task after the application starts.
Examples: To schedule the task to start every ten hours, specify the following settings:
To schedule the task to start every ten minutes, specify the following settings:
To schedule the task to start on the 15th of every month, specify the following settings:
To schedule the task to start on every Tuesday, specify the following settings:
To schedule the task to start every 11 days, specify the following settings:
|
The kesl-control --get-schedule command
The kesl-control --get-schedule command displays the task schedule settings or saves them to the specified configuration file.
Command syntax
kesl-control [-T] --get-schedule <task ID>|<task name> [--file <configuration file name>]
kesl-control [-T] --get-schedule <task ID>|<task name> <parameter name>
Arguments and keys
<task ID> is the task identification number in the application.
<task name> is the name of the task.
--file <configuration file name> is the name of the configuration file where the schedule settings will be saved. If you specify the name of a file without specifying its path, the file will be created in the current directory. If a file with the specified name already exists in the specified path, it will be overwritten. If the specified directory cannot be found on the disk, the configuration file will not be created.
Example: Save the update task settings to a file named update_schedule.ini and save the created file in the current directory:
Display the Update task schedule:
|
The kesl-control --set-schedule command
The kesl-control --set-schedule command sets the task schedule settings using the command keys or imports the task schedule settings from the specified configuration file.
Command syntax
kesl-control --set-schedule <task ID>|<task name> --file <configuration file name>
kesl-control --set-schedule <task ID>|<task name> <parameter name>=<parameter value> <parameter name>=<parameter value>
Arguments and keys
<task ID> is the task identification number in the application.
<task name> is the name of the task.
--file <configuration file name> is the name of the configuration file; the schedule settings from this file will be imported into the task; includes the full path to the file.
Example: Import the schedule settings from the configuration file named /home/test/on_demand_schedule.ini into the task with ID=2:
|
Deleting a task
You can only delete tasks that you have created. You cannot delete predefined tasks.
To delete a task, execute the following command:
kesl-control --delete-task <task ID>|<task name>
File Threat Protection task (File_Threat_Protection, ID:1)
File Threat Protection prevents infection of the device's file system. The File Threat Protection task is created automatically with default settings when you install Kaspersky Endpoint Security application on your device. By default, the File Threat Protection task starts automatically when the application starts. The task resides in the device's RAM and scans all opened, saved, and active files.
Administrator role privileges are required to start and stop the File Threat Protection task from the command line.
Upon detecting malware, Kaspersky Endpoint Security may remove the infected file and terminate the malware process started from this file.
While the File Threat Protection task is running, the application scans all namespaces and containers on all supported operating systems if the value of the NamespaceMonitoring setting in the general application settings is set to Yes. Additionally, for Astra Linux, a custom virus scan task (Scan_File) allows files from other namespaces to be scanned (as part of a mandatory scan). You can separately configure general settings for scanning containers and namespaces.
The application does not scan namespaces and containers unless components for working with containers and namespaces are installed in the operating system. Moreover, when viewing application information in the Container Monitoring row, "The task is available and not running" is displayed.
File Threat Protection user tasks cannot be created. You can modify the settings of the default File Threat Protection task.
If InterceptorProtectionMode is set to Notify in the general application settings, then when infected objects are detected, the application does not perform the actions specified in the FirstAction and SecondAction settings of the File Threat Protection task.
Special considerations for scanning symbolic links and hard links
Kaspersky Endpoint Security lets you scan symbolic links and hard links to files.
Scanning symbolic links
The application scans symbolic links only if the file referenced by the symbolic link is within the protection scope of the File Threat Protection task.
If the file referenced by the symbolic link is not within the File Threat Protection task, the application does not scan this file. However, if the file contains malicious code, the security of the device is at risk.
Scanning hard links
When processing a file with more than one hard link, the application chooses an action depending on the specified action on objects:
- If the Perform recommended action option is selected, the application automatically selects and performs an action on an object based on data about the danger level of the threat detected in the object and the possibility of disinfecting it.
- If the Remove action is selected, the application removes the hard link being processed. The remaining hard links to this file will not be processed.
- If the Disinfect action is selected, the application disinfects the source file. If disinfection fails, the application deletes the hard link and creates in its place a copy of the source file with the name of the deleted hard link.
When you restore a file with a hard link from the Storage, the application creates a copy of the source file with the name of the hard link that was moved to the Storage. Connections with the remaining hard links to the source file will not be restored.
Page top
File Threat Protection task settings
The table describes all available values and default values of all the settings that you can specify for the File Threat Protection task.
File Threat Protection task settings
Setting |
Description |
Values |
|
|---|---|---|---|
|
Enables scanning of archives (including SFX self-extracting archives). The application detects threats in archives, but does not disinfect them. The following archive types are supported: .zip; .7z*; .7-z; .rar; .iso; .cab; .jar; .bz;.bz2; .tbz; .tbz2; .gz; .tgz; .arj. |
|
|
|
Enables scanning of self-extracting archives only (archives that contain an executable extraction module). |
|
|
|
Enables scanning email databases of Microsoft Outlook, Outlook Express, The Bat, and other mail clients. |
|
|
|
Enables scanning of plain text email messages. |
|
|
|
Maximum size of an object to be scanned (in megabytes). If the object to be scanned is larger than the specified value, the application skips this object. |
The default value is |
|
|
Maximum object scan duration (in seconds). The application stops scanning the object if it takes longer than the time specified by this parameter. |
The default value is |
|
|
Selection of the first action to be performed by the application on the infected objects. Before performing the action specified by you on an object, Kaspersky Endpoint Security blocks access to the object by applications that attempt to access it. |
Default value: |
|
|
Selection of the second action to be performed by the application on the infected objects. The application performs the second action if the first action fails. |
The possible values of the If Default value: |
|
|
Enables exclusion of the objects specified by the |
|
|
|
Excludes objects from being scanned by name or mask. You can use this setting to exclude an individual file from the specified scan scope by name or exclude several files at once using masks in the shell format. |
The default value is not defined.
|
|
|
Enables exclusion of objects containing the threats specified by the |
|
|
|
Excludes objects from scans by the name of the threats detected in them. Before specifying a value for this setting, make sure that the In order to exclude a single object from scans, specify the full name of the threat detected in this object – the string containing the application's decision that the object is infected. For example, you may be using a utility to collect information about your network. To keep the application from blocking it, add the full name of the threat contained in it to the list of threats excluded from scans. You can find the full name of the threat detected in the object in the application log. You can also find the full name of the threat on the Virus Encyclopedia website. To find the name of a threat, enter the application name in the Search field. |
The setting value is case-sensitive. The default value is not defined.
|
|
|
Enables logging of information about scanned objects that the application reports as not being infected. You can enable this setting, for example, to make sure that a particular object was scanned by the application. |
|
|
|
Enables logging of information about scanned objects that are part of compound objects. You can enable this setting, for example, to make sure that an object within an archive has been scanned by the application. |
|
|
|
Enables logging of information about objects that have not been processed for some reason.
|
|
|
|
Enables heuristic analysis. Heuristic analysis helps the application to detect threats even before they become known to virus analysts. |
|
|
|
Specifies the heuristic analysis level. You can specify the heuristic analysis level. The heuristic analysis level sets the balance between the thoroughness of searches for threats, the load on the operating system's resources, and the scan duration. The higher the heuristic analysis level, the more resources and time are required for scanning. |
|
|
|
Enables usage of the iChecker technology. |
|
|
|
File Threat Protection task operation mode. The |
|
|
The [ScanScope.item_#] section contains the following settings: |
|||
|
Description of the scan scope, which contains additional information about the scan scope. The maximum length of the string specified using this setting is 4096 characters. |
Default value:
|
|
|
Enables scans of the specified scope. To run the task, enable scans of at least one scope. |
|
|
|
Scan scope limitation. With this scan scope, the application only scans files that are specified using masks in the shell format. If this setting is not specified, the application scans all objects in the scan scope. You can specify several values for this setting. |
The default value is
|
|
|
Path to the directory with objects to be scanned.
|
|
|
The [ExcludedFromScanScope.item_#] section contains the following settings: |
|||
|
Description of the scan exclusion scope, which contains additional information about the exclusion scope. |
The default value is not defined. |
|
|
Excludes the specified scope from scans. |
|
|
|
Path to the directory with objects to be excluded.
|
|
|
Specifying an exclusion scope
You can specify an exclusion scope for the File Threat Protection task. Files in the exclusion scope are excluded from protection scopes.
To create an exclusion scope:
- Save the File Threat Protection task settings to a file using the following command:
kesl-control --get-settings 1 --file <full path to configuration file> - Add the
[ExcludedFromScanScope.item_#]section to the created file. The section contains the following settings:AreaDesc– a description of the exclusion scope, which contains additional information about the exclusion scope.Path– the path to the files or directories to be excluded from the protection scope.AreaMask.item_#– file name mask for files to be excluded from the protection scope.Example:
[ExcludedFromScanScope.item_0000]AreaDesc=UseScanArea=YesPath=/tmp/notcheckedAreaMask.item_0000=*
- Import settings from the configuration file to the File Threat Protection task by using the following command:
kesl-control --set-settings 1 --file <full path to configuration file>
You can also manage exclusion scopes from the command line.
Page top
Virus Scan task (Scan_My_Computer, ID:2)
This section contains information about the Virus Scan task.
About the Virus Scan task
Virus Scan is a one-time full or custom scan of files on the device by Kaspersky Endpoint Security. The application can perform several virus scan tasks at the same time.
By default, the application creates a predefined virus scan task – full scan. During a full scan, the application scans all objects located on the device's local drives, as well as all mounted and shared objects that are accessed via Samba or NFS protocols with the recommended security settings.
You can create virus scan user tasks. By default, the application also creates a predefined custom virus scan task.
If during execution of the virus scan task the application is restarted by a control service or manually by the user, the task will be stopped. The application logs the OnDemandTaskInterrupted event.
Virus Scan task settings
The table describes all available values and the default values of all the settings that you can specify for the Virus Scan task.
Virus Scan task settings
Setting |
Description |
Values |
|
|---|---|---|---|
|
Enables file scan. |
|
|
|
Enables boot sector scans. |
|
|
|
Enables process memory and kernel memory scans. |
|
|
|
Enables startup object scans. |
|
|
|
Enables scanning of archives (including SFX self-extracting archives). The application scans the following archives: .zip; .7z*; .7-z; .rar; .iso; .cab; .jar; .bz; .bz2; .tbz; .tbz2; .gz; .tgz; .arj. The list of supported archive formats depends on the application databases being used. |
|
|
|
Enables scanning of self-extracting archives only (archives that contain an executable extraction module). |
|
|
|
Enables scanning email databases of Microsoft Outlook, Outlook Express, The Bat, and other mail clients. |
|
|
|
Enables scanning of plain text email messages. |
|
|
|
Task priority. Task priority is a setting that combines a number of internal Kaspersky Endpoint Security settings and process start settings. By using this setting, you can specify the way the application consumes system resources for running tasks. |
|
|
|
Maximum size of an object to be scanned (in megabytes). If the object to be scanned is larger than the specified value, the application skips this object. |
The default value is |
|
|
Maximum object scan duration (in seconds). The application stops scanning the object if it takes longer than the time specified by this setting. |
The default value is |
|
|
Selection of the first action to be performed by the application on the infected objects. If an infected object is detected in a file referenced to by a symbolic link that is included in the scan scope (while the file referenced by this symbolic link is not included in the scan scope), the specified action will be performed to the target file. For example, if you specify the |
Default value: |
|
|
Selection of the second action to be performed by the application on the infected objects. The application performs the second action if the first action fails. |
The possible values of the If Default value: |
|
|
Enables exclusion of the objects specified by the |
|
|
|
Excludes objects from being scanned by name or mask. You can use this setting to exclude an individual file from the specified scan scope by name or exclude several files at once using masks in the shell format. Before specifying a value for this setting, make sure that the |
The default value is not defined.
|
|
|
Enables exclusion of objects containing the threats specified by the |
|
|
|
Excludes objects from scans by the name of the threats detected in them. Before specifying a value for this setting, make sure that the In order to exclude a single object from scans, specify the full name of the threat detected in the object – the string containing the application's decision that the object is infected. For example, you may be using a utility to collect information about your network. To keep the application from blocking it, add the full name of the threat contained in the object to the list of threats excluded from scans. You can find the full name of the threat detected in the object in the application log. You can also find the full name of the threat on the Virus Encyclopedia website. To find the name of a threat, enter the name in the Search field. |
The setting value is case-sensitive. The default value is not defined.
|
|
|
Enables logging of information about scanned objects that the application reports as not being infected. You can enable this setting, for example, to make sure that a particular object was scanned by the application. |
|
|
|
Enables logging of information about scanned objects that are part of compound objects. You can enable this setting, for example, to make sure that an object within an archive has been scanned by the application. |
|
|
|
Enables logging of information about objects that have not been processed for some reason.
|
|
|
|
Enables heuristic analysis. Heuristic analysis helps the application to detect threats even before they become known to virus analysts. |
|
|
|
Specifies the heuristic analysis level. You can specify the heuristic analysis level. The heuristic analysis level sets the balance between the thoroughness of searches for threats, the load on the operating system's resources, and the scan duration. The higher the heuristic analysis level, the more resources and time are required for scanning. |
|
|
|
Enables usage of the iChecker technology. |
|
|
|
List of device names. The application will scan boot sectors of these devices. The setting value cannot be empty. At least one device name mask must be specified to run this task. |
Default value: |
|
The [ScanScope.item_#] section contains the following settings: |
|||
|
Description of the scan scope, which contains additional information about the scan scope. The maximum length of the string specified using this setting is 4096 characters. |
Default value:
|
|
|
Enables scans of the specified scope. To run the task, enable scans of at least one scope. |
|
|
|
Scan scope limitation. Within the scan scope, the application scans only the files that are specified using the masks in the shell format. If this setting is not specified, the application scans all the objects in the scan scope. You can specify several values for this setting. |
The default value is
|
|
|
Path to the directory with objects to be scanned.
|
|
|
The [ExcludedFromScanScope.item_#] section contains the following settings: |
|||
|
Description of the scan exclusion scope, which contains additional information about the exclusion scope. |
The default value is not defined. |
|
|
Excludes the specified scope from scans. |
|
|
|
Limitation of scan exclusion scope. In the exclusion scope, the application excludes only the files that are specified using masks in the shell format. If this setting is not specified, the application excludes all the objects in the exclusion scope. You can specify several values for this setting. |
Default value: |
|
|
Path to the directory with objects to be excluded.
|
In order to optimize the operation of scan tasks, it is recommended to add the path with snapshots mounted by the system in the read-only mode to the exclusions for the systems with the btrfs file system and enabled active snapshots. For example, for the systems based on SUSE/OpenSUSE, you can add the following exclusion
In order to optimize the operation of scan tasks, it is recommended to add the path with snapshots mounted by the system in the read-only mode to the exclusions for the systems with the btrfs file system and enabled active snapshots. For example, for the systems based on SUSE/OpenSUSE, you can add the following exclusion
Remote directories are excluded from scans by the application only if they were mounted before the task was started. Remote directories mounted after the task is started are not excluded from scans. |
|
Custom Scan task (Scan_File, ID:3)
This section contains information about the Custom Scan task.
About the Custom Scan task
If you want to scan a file or directory, you can run the Custom Scan task. The application creates a temporary Virus Scan task (ODS type) with the settings of the Scan_File task. After the scan is complete, the temporary task is automatically deleted.
You can change scan parameters for the temporary Scan_File task from the command line.
To scan a file or a directory, run the following command:
kesl-control --scan-file <file path>
Custom Scan task settings
The table describes all available values and the default values of all the settings that you can specify for the Custom Scan task.
Custom Scan task settings
Setting |
Description |
Values |
|
|---|---|---|---|
|
Enables file scan. |
|
|
|
Enables boot sector scans. |
|
|
|
Enables process memory and kernel memory scans. |
|
|
|
Enables startup object scans. |
|
|
|
Enables scanning of archives (including SFX self-extracting archives). The application scans the following archives: .zip; .7z*; .7-z; .rar; .iso; .cab; .jar; .bz; .bz2; .tbz; .tbz2; .gz; .tgz; .arj. The list of supported archive formats depends on the application databases being used. |
|
|
|
Enables scanning of self-extracting archives only (archives that contain an executable extraction module). |
|
|
|
Enables scanning email databases of Microsoft Outlook, Outlook Express, The Bat, and other mail clients. |
|
|
|
Enables scanning of plain text email messages. |
|
|
|
Task priority. Scan task priority is a setting that combines a number of internal Kaspersky Endpoint Security settings and process start settings. By using this setting, you can specify the way the application consumes system resources for running tasks. |
|
|
|
Maximum size of an object to be scanned (in megabytes). If the object to be scanned is larger than the specified value, the application skips this object. |
The default value is |
|
|
Maximum object scan duration (in seconds). The application stops scanning the object if it takes longer than the time specified by this setting. |
The default value is |
|
|
Selection of the first action to be performed by the application on the infected objects. If an infected object is detected in a file referenced to by a symbolic link that is included in the scan scope (while the file referenced by this symbolic link is not included in the scan scope), the specified action will be performed to the target file. For example, if you specify the |
Default value: |
|
|
Selection of the second action to be performed by the application on the infected objects. The application performs the second action if the first action fails. |
The possible values of the If Default value: |
|
|
Enables exclusion of the objects specified by the |
|
|
|
Excludes objects from being scanned by name or mask. You can use this setting to exclude an individual file from the specified scan scope by name or exclude several files at once using masks in the shell format. |
The default value is not defined.
|
|
|
Enables exclusion of objects containing the threats specified by the |
|
|
|
Excludes objects from scans by the name of the threats detected in them. Before specifying a value for this setting, make sure that the In order to exclude a single object from scans, specify the full name of the threat detected in the object – the string containing the application's decision that the object is infected. For example, you may be using a utility to collect information about your network. To keep the application from blocking it, add the full name of the threat contained in the object to the list of threats excluded from scans. You can find the full name of the threat detected in the object in the application log. You can also find the full name of the threat on the Virus Encyclopedia website. To find the name of a threat, enter the name in the Search field. |
The setting value is case-sensitive. The default value is not defined.
|
|
|
Enables logging of information about scanned objects that the application reports as not being infected. You can enable this setting, for example, to make sure that a particular object was scanned by the application. |
|
|
|
Enables logging of information about scanned objects that are part of compound objects. You can enable this setting, for example, to make sure that an object within an archive has been scanned by the application. |
|
|
|
Enables logging of information about objects that have not been processed for some reason. |
|
|
|
Enables heuristic analysis. Heuristic analysis helps the application to detect threats even before they become known to virus analysts. |
|
|
|
Specifies the heuristic analysis level. You can specify the heuristic analysis level. The heuristic analysis level sets the balance between the thoroughness of searches for threats, the load on the operating system's resources, and the scan duration. The higher the heuristic analysis level, the more resources and time are required for scanning. |
|
|
|
Enables usage of the iChecker technology. |
|
|
|
List of device names. The application will scan boot sectors of these devices. The setting value cannot be empty. At least one device name mask must be specified to run this task. |
Default value: |
|
The [ScanScope.item_#] section contains the following settings: |
|||
|
Description of the scan scope, which contains additional information about the scan scope. The maximum length of the string specified using this setting is 4096 characters. |
Default value:
|
|
|
Enables scans of the specified scope. To run the task, enable scans of at least one scope. |
|
|
|
Scan scope limitation. Within the scan scope, the application scans only the files that are specified using the masks in the shell format. If this setting is not specified, the application scans all the objects in the scan scope. You can specify several values for this setting. |
The default value is
|
|
|
Path to the directory with objects to be scanned.
|
|
|
The [ExcludedFromScanScope.item_#] section contains the following settings: |
|||
|
Description of the scan exclusion scope, which contains additional information about the exclusion scope. |
The default value is not defined. |
|
|
Excludes the specified scope from scans. |
|
|
|
Limitation of scan exclusion scope. In the exclusion scope, the application excludes only the files that are specified using masks in the shell format. If this setting is not specified, the application excludes all the objects in the exclusion scope. You can specify several values for this setting. |
Default value: |
|
|
Path to the directory with objects to be excluded. |
In order to optimize the operation of scan tasks, it is recommended to add the path with snapshots mounted by the system in the read-only mode to the exclusions for the systems with the btrfs file system and enabled active snapshots. For example, for the systems based on SUSE/OpenSUSE, you can add the following exclusion
In order to optimize the operation of scan tasks, it is recommended to add the path with snapshots mounted by the system in the read-only mode to the exclusions for the systems with the btrfs file system and enabled active snapshots. For example, for the systems based on SUSE/OpenSUSE, you can add the following exclusion
Remote directories are excluded from scans by the application only if they were mounted before the task was started. Remote directories mounted after the task is started are not excluded from scans. |
|
Critical Areas Scan task (Critical_Areas_Scan, ID:4)
The Critical Areas Scan task allows you to scan boot sectors, startup objects, process memory, and kernel memory.
Upon detecting malware, Kaspersky Endpoint Security may remove the infected file and terminate the malware process started from this file.
The table describes all available values and the default values of all the settings that you can specify for the Critical Areas Scan task.
Critical Areas Scan task settings
Setting |
Description |
Values |
|
|---|---|---|---|
|
Enables file scan. |
|
|
|
Enables boot sector scans. |
|
|
|
Enables process memory and kernel memory scans. |
|
|
|
Enables startup object scans. |
|
|
|
Enables scanning of archives (including SFX self-extracting archives). The application scans the following archives: .zip; .7z*; .7-z; .rar; .iso; .cab; .jar; .bz; .bz2; .tbz; .tbz2; .gz; .tgz; .arj. The list of supported archive formats depends on the application databases being used. |
|
|
|
Enables scanning of self-extracting archives only (archives that contain an executable extraction module). |
|
|
|
Enables scanning email databases of Microsoft Outlook, Outlook Express, The Bat, and other mail clients. |
|
|
|
Enables scanning of plain text email messages. |
|
|
|
Task priority. Task priority is a setting that combines a number of internal Kaspersky Endpoint Security settings and process start settings. By using this setting, you can specify the way the application consumes system resources for running tasks. |
|
|
|
Maximum size of an object to be scanned (in megabytes). If the object to be scanned is larger than the specified value, the application skips this object. |
0 – 999999 0 — The application scans objects of any size. Default value: 0. |
|
|
Maximum object scan duration (in seconds). The application stops scanning the object if it takes longer than the time specified by this setting. |
0 – 9999 0 — The object scan time is unlimited. Default value: 0. |
|
|
Selection of the first action to be performed by the application on the infected objects. If an infected object is detected in a file referenced to by a symbolic link that is included in the scan scope (while the file referenced by this symbolic link is not included in the scan scope), the specified action will be performed to the target file. For example, if you specify the |
Default value: |
|
|
Selection of the second action to be performed by the application on the infected objects. The application performs the second action if the first action fails. |
The possible values of the If Default value: |
|
|
Enables exclusion of the objects specified by the |
|
|
|
Excludes objects from being scanned by name or mask. You can use this setting to exclude an individual file from the specified scan scope by name or exclude several files at once using masks in the shell format. Before specifying a value for this setting, make sure that the |
The default value is not defined.
|
|
|
Enables exclusion of objects containing the threats specified by the |
|
|
|
Excludes objects from scans by the name of the threats detected in them. Before specifying a value for this setting, make sure that the In order to exclude an object from scans, specify the full name of the threat detected in this object – the string containing the application's decision that the object is infected. For example, you may be using a utility to collect information about your network. To keep the application from blocking it, add the full name of the threat contained in it to the list of threats excluded from scans. You can find the full name of the threat detected in an object in the application log or on the Virus Encyclopedia website. |
The setting value is case-sensitive. The default value is not defined.
|
|
|
Enables logging of information about scanned objects that the application reports as not being infected. You can enable this setting, for example, to make sure that a particular object was scanned by the application. |
|
|
|
Enables logging of information about scanned objects that are part of compound objects. You can enable this setting, for example, to make sure that an object within an archive has been scanned by the application. |
|
|
|
Enables logging of information about objects that have not been processed for some reason. |
|
|
|
Enables heuristic analysis. Heuristic analysis helps the application to detect threats even before they become known to virus analysts. |
|
|
|
Specifies the heuristic analysis level. You can specify the heuristic analysis level. The heuristic analysis level sets the balance between the thoroughness of searches for threats, the load on the operating system's resources, and the scan duration. The higher the heuristic analysis level, the more resources and time are required for scanning. |
|
|
|
Enables usage of the iChecker technology. |
|
|
|
List of device names. The application will scan boot sectors of these devices. The setting value cannot be empty. At least one device name mask must be specified to run this task. |
Default value: |
|
The [ScanScope.item_#] section contains the following settings: |
|||
|
Description of the scan scope, which contains additional information about the scan scope. The maximum length of the string specified using this setting is 4096 characters. |
Default value:
|
|
|
Enables scans of the specified scope. To run the task, enable scans of at least one scope. |
|
|
|
Scan scope limitation. Within the scan scope, the application scans only the files that are specified using the masks in the shell format. If this setting is not specified, the application scans all the objects in the scan scope. You can specify several values for this setting. |
The default value is
|
|
|
Path to the directory with objects to be scanned. |
|
|
The [ExcludedFromScanScope.item_#] section contains the following settings: |
|||
|
Description of the scan exclusion scope, which contains additional information about the exclusion scope. |
The default value is not defined. |
|
|
Excludes the specified scope from scans. |
|
|
|
Limitation of scan exclusion scope. In the exclusion scope, the application excludes only the files that are specified using masks in the shell format. If this setting is not specified, the application excludes all the objects in the exclusion scope. You can specify several values for this setting. |
Default value: |
|
|
Path to the directory with objects to be excluded. |
In order to optimize the operation of scan tasks, it is recommended to add the path with snapshots mounted by the system in the read-only mode to the exclusions for the systems with the btrfs file system and enabled active snapshots. For example, for the systems based on SUSE/OpenSUSE, you can add the following exclusion
In order to optimize the operation of scan tasks, it is recommended to add the path with snapshots mounted by the system in the read-only mode to the exclusions for the systems with the btrfs file system and enabled active snapshots. For example, for the systems based on SUSE/OpenSUSE, you can add the following exclusion
Remote directories are excluded from scans by the application only if they were mounted before the task was started. Remote directories mounted after the task is started are not excluded from scans. |
|
Update task (Update, ID:6)
Updating the databases and application modules of Kaspersky Endpoint Security ensures up-to-date protection on your computer. New viruses and other types of malware appear worldwide on a daily basis. The application databases contain information about threats and ways of neutralizing them. To detect threats quickly, you are urged to regularly update the databases and application modules.
A valid application license is required for regular database updates. If there is no current license, you will only be able to perform one update.
The main application update sources are Kaspersky update servers.
Your computer must be connected to the Internet to successfully download the update package from Kaspersky update servers. By default, Internet connection settings are determined automatically. If you use a proxy server, you will need to adjust the connection settings. The update package is downloaded using the Update task.
During an update, the following objects are downloaded and installed on your computer:
- Application databases. During installation, the application downloads the latest databases from one of the Kaspersky HTTP update servers. If the predefined task with default settings (ID=6) is used for updates, the application will update the databases every 60 minutes. You can edit the settings of the predefined task for database and application module updates and create user update tasks.
If the database update download is interrupted or finishes with an error, the application continues to use the previously installed database version. If application databases were not installed before, the application continues functioning in "without databases" mode. Database and application module updates are still available.
By default, the application logs the Databases are out of date event (BasesAreOutOfDate) if the last installed database updates were published on the Kaspersky server more than three but less than seven days ago. If the databases have not been updated for seven days, the application logs the Databases are extremely out of date (BasesAreTotallyOutOfDate) event. The database is up-to-date if it was downloaded less than three days ago.
- Application updates. In addition to application databases, you can also update the application itself. Application updates fix vulnerabilities and enhance existing functions.
The application update can be installed regardless of the state of the application (started or stopped, managed by a Kaspersky Security Center policy) and the update schedule.
Kaspersky Endpoint Security continues protecting your computer during the application update procedure.
Kaspersky Endpoint Security transfers the application settings and event log automatically. The settings from the previous application version are exported when the updated version starts.
If the application does not work properly after the update, it automatically rolls back to the previous version. A message about the application rollback is displayed. It is recommended to contact Kaspersky Technical Support.
During an update, the application and databases on your computer are compared with the up-to-date version at the update source. If your current databases and application modules differ from their respective up-to-date versions, the missing portions of the updates will be installed on your computer.
If the databases are obsolete, the update package may be large, which may cause additional Internet traffic (up to several dozen MB). The amount of the disk space can be up to 3 GB.
About update sources
An update source is a resource that contains updates for Kaspersky Endpoint Security databases and application modules. Update sources can be FTP, HTTP, or HTTPS servers (such as Kaspersky Security Center and Kaspersky update servers), as well as local or network directories mounted by the user.
The default update sources for the predefined Update task are Kaspersky update servers. The update servers contain databases and application module updates for many Kaspersky applications. Updates are downloaded via HTTPS protocol.
If, for some reason, you cannot use Kaspersky update servers as the update source, you can receive updates from a custom update source such as a specified local or network directory (SMB/NFS) mounted by the user, or an FTP, HTTP, or HTTPS server. You can specify a custom update source in Update task settings.
Page top
Update task settings
The table describes all available values and default values of all the settings that you can specify for the Update task.
Update task settings
Setting |
Description |
Values |
|
|---|---|---|---|
|
Source from which the application receives updates. |
|
|
|
The application's access to Kaspersky update servers if all custom update sources are unavailable. |
|
|
|
Application update download and installation mode. |
|
|
|
Response timeout (in seconds) of an update source while attempting to connect to it. If an update source does not respond within the specified time interval, the application contacts the next update source in the list. |
You can use only integers within the range from 0 to 120. Default value: 10. |
|
The [CustomSources.item_#] section contains the following settings: |
|||
|
Address of the custom update source on the local area network or the Internet. |
The default value is not defined.
|
|
|
Enables the use of the update source specified as the value of the To run the task, at least one update source needs to be enabled. |
The default value is not defined. |
|
Rollback task (Rollback, ID:7)
After the application databases are updated for the first time, the rollback of the application databases to their previous versions becomes available.
Every time a user starts the update process, Kaspersky Endpoint Security creates a backup copy of the current application databases. This allows you to roll back the application databases to a previous version if needed. Rolling back the last database updates may be useful, for example, if the new application database version contains invalid signatures, which causes Kaspersky Endpoint Security to block safe applications.
The rollback task does not have any settings.
Page top
Licensing task (License, ID:9)
The Licensing task allows you to manage Kaspersky Endpoint Security license keys.
Adding an active key
The kesl-control --add-active-key command adds an active key.
Command syntax
kesl-control [-L] --add-active-key <path to key file>|<activation code>
Arguments and keys
<path to the key file> – path to the key file. If the key file is located in the current directory, it is sufficient to specify only the file name.
<activation code> – activation code.
Example: Add a key as an active key using the /home/test/00000001.key file:
|
Adding a reserve key
The kesl-control --add-reserve-key command adds a reserve key.
If an active key has not been added, the key will be added as the active key.
Command syntax
kesl-control [-L] --add-reserve-key <path to key file>|<activation code>
Arguments and keys
<path to the key file> – path to the key file. If the key file is located in the current directory, it is sufficient to specify only the file name.
<activation code> – activation code.
Example: Add a reserve key using the /home/test/00000002.key file:
|
Removing an active key
The kesl-control --remove-active-key command removes the active key.
Command syntax
kesl-control [-L] --remove-active-key
Removing a reserve key
The kesl-control --remove-reserve-key command removes the reserve key.
Command syntax
kesl-control [-L] --remove-reserve-key
Storage management task (Backup, ID:10)
The Storage is a list of backup copies of files that have been deleted or modified during the disinfection process. A backup copy is a copy of a file created before the first attempt to disinfect or delete this file. Backup copies of files are stored in a special format and do not pose a threat.
By default, the Storage is located in the /var/opt/kaspersky/kesl/common/objects-backup/ directory. Files in the Storage may contain personal data. Root privileges are required to access files in the Storage.
Sometimes it is not possible to maintain the integrity of files during disinfection. If you partially or completely lose access to important information in a disinfected file after disinfection, you can attempt to restore the file from the disinfected copy to the file's original directory.
Storage management task settings
The table describes all available values and the default values of all the settings that you can specify for the Storage management task.
Storage management task settings
Setting |
Description |
Value |
|---|---|---|
|
Time period for storing objects in the Storage (in days). To remove the time limit for storing objects in the Storage, specify 0. |
0 – the time period for storing objects in the Storage is not limited. Default value: 90. |
|
Maximum size of the Storage (MB). When the maximum Storage size is reached, the application deletes the oldest objects. To remove the Storage size limit, specify 0. |
0 – 999999 0 – the Storage size is not limited. Default value: 0. |
|
Path to the Storage directory. You can specify a custom Storage directory that is different from the default directory. You can use directories on any device as the Storage. It is not recommended to assign directories that are located on remote devices, such as those mounted via the Samba and NFS protocols. Kaspersky Endpoint Security starts moving the objects to the specified directory after you change the settings and restart the application. If the specified directory does not exist or is unavailable, the application uses the default directory. |
Default value: /var/opt/kaspersky/kesl/common/objects-backup/ Root privileges are required to access the default Storage directory. |
Viewing IDs of the objects in the Storage
When an object is placed in the Storage, the application assigns a numeric ID to it. This ID is used to perform actions on the object, such as restoring or removing the object from the Storage.
To view the IDs of the objects in the Storage, execute the following command:
kesl-control -B --query
The object ID is displayed in the ObjectId string.
Restoring objects from the Storage
Kaspersky Endpoint Security stores objects in the Storage in encrypted form to keep the protected device safe from their potential harmful effects.
You can restore objects from Storage if necessary. You may need to restore objects, for example, if while disinfecting an infected file the application failed to preserve its integrity, which made the information in the file inaccessible. You can save the object under a new name when restoring it from the Storage. If a file has been deleted from an archive, restoring it will restore the entire original archive.
Restoring infected objects may lead to a device infection.
To restore an object under its original name to its original location, execute the following command:
kesl-control [-B] --restore <object ID>
where <object ID> is the ID of the object in the Storage.
To restore an object under a new name to a specified directory, execute the following command:
kesl-control [-B] --restore <object ID> --file <file name and path to the file directory>
If the specified directory does not exist, the application creates it.
Page top
Removing objects from the Storage
To remove an object from the Storage, execute the following command:
kesl-control -B --mass-remove --query "ObjectId == '<object ID>'"
Example: To remove an object with ID=15:
|
To remove several objects from the Storage, execute the following command:
kesl-control -B --mass-remove --query "<field> <logical expression> '<value>' [and <field> <logical expression> '<value>']"
Example: To remove objects that contain "test" in their names or paths:
|
To remove all objects from the Storage, execute one of the following commands:
kesl-control -B --mass-remove
, or
kesl-control -B --mass-remove --query
System Integrity Monitoring task (System_Integrity_Monitoring, ID:11)
The System Integrity Monitoring task is designed to track actions performed on files and directories in the monitoring scope specified in the task settings. You can use the task to find file changes that may indicate a security breach on a protected server.
To use the task, a license that includes the corresponding function is required.
System Integrity Monitoring can be performed in real-time when you run the On-access File Integrity Monitoring (OAFIM) task. You can also create and run On-demand File Integrity Monitoring (ODFIM) tasks.
Both OAFIM and ODFIM tasks send notifications about changes to an object access control list. For the OAFIM task, details about what exactly was changed are not reported. For the ODFIM task, information about attribute changes and file/directory moves are reported.
On-access File Integrity Monitoring (OAFIM)
While the OAFIM task is running, each object change is determined through real-time interception of file operations in real-time mode. When an object changes, Kaspersky Endpoint Security sends an event to Kaspersky Security Center Administration Server. A file checksum is not calculated during the task run. The application task does not monitor changes in files (attributes and content) with hard links that are outside the monitoring scope. The application monitors operations on specific files or the monitoring scopes specified in the task settings.
Monitoring scopes
Monitoring scopes must be specified for the System Integrity Monitoring task. The administrator can change monitoring scopes in real-time mode. You can specify several monitoring scopes. If no monitoring scope is specified, task settings cannot be saved in the configuration file.
Monitoring exclusions
You can create exclusions for the monitoring scope. Exclusions are specified for each individual scope and only work for the indicated monitoring scope. You can specify several monitoring exclusions.
Exclusions have a higher priority than the monitoring scope and are not monitored by a task, even if a specific directory or file is in the monitoring scope. If the settings for one of the rules specify a monitoring scope that is at a lower level than a directory specified in exclusions, the monitoring scope is not considered when the task is run.
To specify exclusions, you can use the same command line shell masks that are used to specify monitoring scopes.
When a monitoring scope or exclusion scope is added, the application does not check whether the specified directory exists.
Monitored settings
Changes to the following settings are monitored when the System Integrity Monitoring task runs:
- Content (write (), truncate (), etc.)
- Metadata (possession rights (chmod/chown))
- Time stamps (utimensat)
- Extended attributes ((setxattr) and others)
The technical limitations of the Linux operating system prevent the System Integrity Monitoring task from detecting which administrator or process made changes to the file.
On-demand File Integrity Monitoring (ODFIM)
While the ODFIM task is running, each object change is determined by comparing the current state of the monitored object to its original state, which was previously established as a baseline.
The baseline is created during the first run of the ODFIM task on the device. You can create several ODFIM tasks. For each ODFIM task, a separate baseline is created. The task is performed only if the baseline corresponds to the monitoring scope. If the baseline does not match the monitoring scope, Kaspersky Endpoint Security creates a system integrity violation event. The baseline contains paths to monitored objects and their metadata. The baseline may also contain personal data.
The baseline is rebuilt after an ODFIM task has finished. You can rebuild a baseline for the task using the RebuildBaseline setting. Also, a baseline is rebuilt when the settings of a task change, for example, if a new monitoring scope is added. The baseline will be rebuilt during the next task run. You can delete a baseline by deleting the corresponding ODFIM task.
The ODFIM task creates a baseline storage on the device that has the System Integrity Monitoring component installed. By default, the storage for baselines is located in /var/opt/kaspersky/kesl/private/fim.db. Root privileges are required to access a database that contains baselines.
Page top
On-access File Integrity Monitoring task settings
The table describes all available values and default values of all the settings that you can specify for the On-access File Integrity Monitoring task.
On-access File Integrity Monitoring task settings
Setting |
Description |
Values |
|---|---|---|
|
Enables monitoring scope exclusions for objects specified by the This setting only applies if a value is specified for the |
|
|
Excludes objects from monitoring by names or masks. You can use this setting to exclude an individual file from the specified scan scope by name or exclude several files at once using masks in the shell format. Before specifying a value for this setting, make sure that the You can specify several masks. Each mask must be specified on a new line with a new index. |
The default value is not defined. |
The [ScanScope.item_#] section contains the monitoring scopes of the System Integrity Monitoring task. At least one monitoring scope must be specified for the task. You can specify several [ScanScope.item_#] sections in any order. The application processes the scopes by index in ascending order. The [ScanScope.item_#] section contains the following settings: |
||
|
Description of monitoring scope; contains additional information about the monitoring scope. |
The default value is not defined. |
|
Enables monitoring of the specified scope. |
|
|
Path to the monitoring directory. |
You can use masks to specify the path. Default value: /opt/kaspersky/kesl/ |
|
Monitoring scope limitation. Within the monitoring scope, the application scans only the objects that are specified using the masks in the shell format. You can specify several |
Default value: |
The [ExcludedFromScanScope.item_#] section contains the objects to be excluded from all [ScanScope.item_#] sections. The objects that match the rules of any [ExcludedFromScanScope.item_#] section will be excluded from monitoring. The format of the [ExcludedFromScanScope.item_#] section is similar to the format of the [ScanScope.item_#] section. You can specify several [ExcludedFromScanScope.item_#] sections in any order. The application processes the scopes by index in ascending order. The [ExcludedFromScanScope.item_#] section contains the following settings: |
||
|
Description of the monitoring exclusion scope, which contains additional information about the monitoring exclusion scope. |
The default value is not defined. |
|
Excludes the specified scope from monitoring. |
|
|
Path to the directory with objects excluded from monitoring. |
You can use masks to specify the path. The default value is not defined. |
|
Limitation of monitoring exclusion scope. In the monitoring exclusion scope, the application only excludes the objects that are specified using masks in the shell format. You can specify several |
Default value: |
On-demand File Integrity Monitoring settings
The table describes all available values and default values of all the settings that you can specify for the On-demand File Integrity Monitoring task.
On-demand File Integrity Monitoring settings
Setting |
Description |
Values |
|---|---|---|
|
Enables rebuilding a baseline after the ODFIM task has finished. |
|
|
Enables hash check (SHA-256). |
|
|
Enables directory monitoring. |
|
|
Enables tracking last file access time. In the Linux operating systems it is the |
|
|
Enables monitoring scope exclusions for objects specified by the This setting only applies if a value is specified for the |
|
|
Excludes objects from monitoring by names or masks. You can use this setting to exclude an individual file from the specified scan scope by name or exclude several files at once using masks in the shell format. Before specifying a value for this setting, make sure that the You can specify several masks. Each mask must be specified on a new line with a new index. |
The default value is not defined. |
The [ScanScope.item_#] section contains the monitoring scopes of the System Integrity Monitoring task. At least one monitoring scope must be specified for the task. You can specify several [ScanScope.item_#] sections in any order. The application processes the scopes by index in ascending order. The [ScanScope.item_#] section contains the following settings: |
||
|
Description of monitoring scope; contains additional information about the monitoring scope. |
The default value is not defined. |
|
Enables monitoring of the specified scope. |
|
|
Path to the monitoring directory. |
You can use masks to specify the path. Default value: /opt/kaspersky/kesl/ |
|
Monitoring scope limitation. Within the monitoring scope, the application scans only the objects that are specified using the masks in the shell format. You can specify several |
Default value: |
The [ExcludedFromScanScope.item_#] section contains the objects to be excluded from all [ScanScope.item_#] sections. The objects that match the rules of any [ExcludedFromScanScope.item_#] section will be excluded from monitoring. The format of the [ExcludedFromScanScope.item_#] section is similar to the format of the [ScanScope.item_#] section. You can specify several [ExcludedFromScanScope.item_#] sections in any order. The application processes the scopes by index in ascending order. The [ExcludedFromScanScope.item_#] section contains the following settings: |
||
|
Description of the monitoring exclusion scope, which contains additional information about the monitoring exclusion scope. |
The default value is not defined. |
|
Excludes the specified scope from monitoring. |
|
|
Path to the directory with objects excluded from monitoring. |
You can use masks to specify the path. The default value is not defined. |
|
Limitation of monitoring exclusion scope. In the monitoring exclusion scope, the application only excludes the objects that are specified using masks in the shell format. You can specify several |
Default value: |
Firewall Management task (Firewall_Management, ID:12)
During use on local area networks (LANs) and the Internet, a computer is exposed to viruses, other malware, and a variety of attacks that exploit vulnerabilities in operating systems and software.
The operating system firewall protects personal data that is stored on the user's computer. The firewall blocks most threats to the operating system when the computer is connected to the Internet or a LAN. Firewall Management detects all network connections by the user's computer and provides a list of IP addresses, as well as an indication of the default network connection's status.
The Firewall Management task filters all network activity according to network packet rules. Configuring network packet rules lets you specify the desired level of computer protection, from blocking Internet access for all applications to allowing unlimited access.
While the Firewall Management task is running, Kaspersky Endpoint Security manages the parameters and rules of the operating system firewall. The application blocks any configuration of the operating system firewall parameters when, for example, a program or tool adds or deletes a rule. Kaspersky Endpoint Security checks the operating system firewall every 60 seconds and, if necessary, restores the set of firewall rules. The checking period cannot be changed.
In the Red Hat Enterprise Linux and CentOS 8 operating systems, firewall rules created using Kaspersky Endpoint Security can only be viewed through Kaspersky Endpoint Security (kesl-control -F --query command).
The operating system firewall continues to be checked even when the Firewall Management task is stopped. This allows the application to restore dynamic rules.
All outbound connections are allowed by default (default action setting), unless the corresponding blocking rules for the Firewall Management task are specified. The default action is performed with the lowest priority: if no other network packet rule has been triggered or if no network packet rules have been specified, the connection is allowed.
It is recommended to disable other operating system firewall management tools before enabling the Firewall Management task.
About network packet rules
Network packet rules are actions taken by the Kaspersky Endpoint Security to allow or deny a detected network connection attempt.
Network packet rules impose restrictions on network packets regardless of the application. Such rules restrict inbound and outbound network traffic through specific ports of the selected data protocol.
All outbound connections are allowed by default (default action setting), unless the corresponding blocking rules for the Firewall Management are specified. The default action is performed with the lowest priority: if no other network packet rule has been triggered or if no network packet rules have been specified, the connection is allowed.
Firewall Management specifies certain network packet rules by default. You can create your own network packet rules and specify an execution priority for each network packet rule.
Page top
About dynamic rules
Kaspersky Endpoint Security allows dynamic rules to be added to, or deleted from, the firewall to ensure the application works properly. For example, Network Agent adds dynamic rules that allow connections to Kaspersky Security Center initiated by the application or by Kaspersky Security Center. The rules of the Anti-Cryptor are also dynamic.
Kaspersky Endpoint Security does not control dynamic rules and does not block application components' access to network resources. Dynamic rules do not depend on the Firewall Management state (started/stopped) or on changes of the Firewall Management settings. The execution priority of dynamic rules is higher than the priority of network packet rules. The application restores a set of dynamic rules if any of them are deleted, for example, by using the iptables utility.
You can view the set of dynamic rules (using the kesl-control -F --query command); however the dynamic rules settings cannot be modified.
About the predefined network zone names
A predefined network zone is a specific group of IP addresses or subnets. Using a predefined network zone, you can use the same rules for several IP addresses or subnets without having to create a separate rule for each IP address or subnet. The network zone can be used as the value of the "remote address" parameter when creating a network packet rule. Kaspersky Endpoint Security has three predefined network zones with specific names:
- Public. Add a network address or subnet to this zone if it is assigned to networks that are not protected by any anti-virus applications, firewalls, or filters (for example, for Internet cafe networks).
- Local. Add a network address or subnet to this zone if it is assigned to networks whose users are trusted to access files and printers on this device (for example, a LAN or home network).
- Trusted. This zone is intended for a safe network in which the device is not exposed to attacks or unauthorized data access attempts.
You cannot create or delete a network zone. You can add or delete IP addresses and subnets to/from a network zone.
Page top
Firewall Management task settings
The table describes all available values and the default values of all the settings that you can specify for the Firewall Management task.
Firewall Management task settings
Setting |
Description |
Values |
|---|---|---|
|
The default action to perform on an inbound connection if no network rules apply to this connection type. |
|
|
The default action to perform on an incoming packet if no network packet rules apply to this connection type. |
|
|
Adds Network Agent dynamic rules to the network packet rules. |
|
The [PacketRules.item_#] section contains network packet rules for the Firewall Management task. You can specify several Each |
||
|
Network packet rule name. |
Default value: |
|
Action to be performed on connections specified in this network packet rule. |
|
|
Type of protocol for which network activity is to be monitored. |
|
|
Port numbers of the remote devices whose connection is monitored. This setting can only be specified if the An integer or interval can be specified for this setting. |
|
|
Port numbers of the local devices whose connection is monitored. This setting can only be specified if the An integer or interval can be specified for this setting. |
|
|
ICMP packet type. This setting can only be specified if the |
Integer number according to the data transfer protocol specification. |
|
ICMP packet code. This setting can only be specified if the |
Integer number according to the data transfer protocol specification. |
|
Direction of the monitored network activity. |
|
|
The network addresses of the remote devices that can send and receive network packets. |
|
|
Network addresses of devices that have Kaspersky Endpoint Security installed and can send and/or receive network packets. |
|
|
Specify whether you want the actions of the network rule to be included in the report. |
|
The [NetworkZonesPublic] section contains network addresses associated with public networks. You can specify several IP addresses or subnets of IP addresses. |
||
|
Specifies IP addresses or subnets of IP addresses. |
Default value: "" (no network addresses in this zone) |
The [NetworkZonesLocal] section contains network addresses associated with local networks. You can specify several IP addresses or subnets of IP addresses. |
||
|
Specifies IP addresses or subnets of IP addresses. |
Default value: "" (no network addresses in this zone) |
The [NetworkZonesTrusted] section contains network addresses associated with trusted networks. You can specify several IP addresses or subnets of IP addresses. |
||
|
Specifies IP addresses or subnets of IP addresses. |
Default value: "" (no network addresses in this zone) |
Adding a network packet rule
You can manually add a network packet rule.
You can add only one network packet rule at a time.
To add a network packet rule, execute the following command:
kesl-control -F --add-rule --name <rule name> --action <action> --protocol <protocol> --direction <direction> --remote <remote address> --local <local address> --at <index in a list of network packet rules>
A section containing new network packet rule settings is added to the Firewall Management task configuration file. If you did not specify a certain setting in the command, the default value is set.
The --at setting lets you specify the index of the created rule in the list of network packet rules. If the --at setting is not specified or its value is larger than the number of rules in the list, the new rule is added to the end of the list.
Examples: To create a rule that blocks all incoming and established connections to TCP port 23, execute the following command:
To create a rule that blocks incoming and established connections via the TCP port 23 for the Public network zone, execute the following command:
|
Deleting a network packet rule
You can manually delete a network packet rule.
You can delete only one network packet rule at a time.
To delete a network packet rule, execute one of the following commands:
kesl-control -F --del-rule --name <rule name>A network packet rule will be deleted by its name. If a list of network packet rules contains several rules with the same name, the application does not delete any of them.
kesl-control -F --del-rule --index <index>A network packet rule will be deleted by its index in the network packet rules list.
A section with network packet rules settings is deleted from the configuration file of the Firewall Management task.
If the list of network packet rules does not contain a rule with a specified name or index, an error occurs.
Page top
Changing the execution priority of a network packet rule
You can manually change a network packet rule's execution priority.
To change a network packet rule's execution priority, execute the following command:
kesl-control -F --move-rule [--name <rule name>|--index <index>] --at <index>
The execution priority of the network packet rule will be changed according to the specified index.
Page top
Adding a network address to a zone section
You can manually add network addresses associated with a certain type of network to the configuration file of the Firewall Management task.
To add a network address to the zone, execute the following command:
kesl-control -F --add-zone <Public|Local|Trusted> --address <address>
The network address is added to the indicated zone section in the task configuration file.
Page top
Deleting a network address from a zone section
You can manually delete network addresses associated with a certain type of network from the configuration file of the Firewall Management task. This may be useful if the network addresses are not used any more.
To delete a network address from a zone, execute the following command:
kesl-control -F --del-zone <zone> [--address <address>| --index <index address in the zone>]
The specified network address will be deleted from the indicated zone section in the configuration file.
If a zone contains several items with the same network address, the --del-zone command will not be executed.
If the specified network address or index does not exist, an error message is generated.
Page top
Anti-Cryptor task (Anti_Cryptor, ID:13)
The Anti-Cryptor task allows you to protect your files in the local directories with network access by SMB/NFS protocols from remote malicious encrypting.
While the Anti-Cryptor task is running, Kaspersky Endpoint Security scans remote computers' calls to access files located in the shared network directories of the protected device. If the application considers a remote device actions on network file resources to be malicious encrypting, this device is added to a list of untrusted devices and loses access to the shared network directories. By default, the application blocks access of untrusted devices to network file resources for 30 minutes. The application does not consider actions to be encryption if encryption activity is detected in directories excluded from the protection scope of the Anti-Cryptor task.
To use the task, a license that includes the corresponding function is required.
For the Anti-Cryptor task to perform correctly, at least one of the services (Samba or NFS) must be installed in the operating system. The NFS service requires the rpcbind package to be installed.
The Anti-Cryptor task runs correctly with SMB1, SMB2, SMB3, NFS3, TCP/UDP, and IP/IPv6 protocols. Working with NFS2 and NFS4 protocols is not supported. It is recommended to configure your server settings so that the NFS2 and NFS4 protocols cannot be used to mount resources.
The Anti-Cryptor task does not block access to network file resources until the host's activity is identified as malicious. So, at least one file will be encrypted before the application detects malicious activity.
About blocking access to devices
When malicious encryption activity is detected, the application creates and enables a rule for the operating system firewall that blocks network traffic from a compromised device. The compromised device is added to the list of blocked devices. The application blocks access to shared network directories for all remote devices in the list of blocked devices. Information about blocked devices from a protected server is sent to Kaspersky Security Center.
Firewall rules created by the Anti-Cryptor task cannot be deleted using the iptables utility, since the application restores a set of rules every minute. Use the --allow-hosts command to unblock a device.
By default, the application removes blocked devices from the list 30 minutes after being added to the list. Devices' access to network file resources is restored automatically after they are deleted from the list. You can change the list of blocked devices and specify the period after which the blocked devices will be automatically unblocked.
Page top
Anti-Cryptor task settings
The table describes all available values and the default values of all the settings that you can specify for the Anti-Cryptor task.
Anti-Cryptor task settings
Setting |
Description |
Values |
|---|---|---|
|
Enables untrusted hosts blocking. If untrusted hosts blocking is disabled, the application still scans the actions of the remote devices on network file resources for malicious encryption when the Anti-Cryptor task is running. If malicious activity is detected, the EncryptionDetected event is created, but the attacking device is not blocked. |
|
|
The time an untrusted device is blocked (in minutes). If a compromised host is blocked, and you change a value for the |
Integer from 1 to 4294967295. Default value: 30. |
|
Enables protection scope exclusions for objects specified by the This setting only applies if a value is specified for the |
|
|
Excludes objects from the protection scope by names or masks. You can use this setting to exclude an individual file from the specified protection scope by name or exclude several files at once using masks in the shell format. Before specifying a value for this setting, make sure that the If you want to specify several masks, specify each mask on a new line with a new index. |
The default value is not defined. |
The [ScanScope.item_#] section contains the scopes protected by the application. For the Anti-Cryptor task, you need to specify at least one protection scope; you can only specify shared directories. You can specify several [ScanScope.item_#] sections in any order. The application processes the scopes by index in ascending order. The [ScanScope.item_#] section contains the following settings: |
||
|
Description of protection scope; contains additional information about the protection scope. |
Default value: |
|
Enables protection of the specified scope. To run the task, enable protection of at least one scope. |
|
|
Protection scope limitation. In the protection scope, the application protects only the objects that are specified using the masks in the shell format. You can specify several |
Default value: |
|
Path to the directory with the objects to be protected. |
|
The [ExcludedFromScanScope.item_#] section contains the objects to be excluded from all [ScanScope.item_#] sections. The objects that match the rules of any [ExcludedFromScanScope.item_#] section are not scanned. The format of the [ExcludedFromScanScope.item_#] section is similar to the format of the [ScanScope.item_#] section. You can specify several [ExcludedFromScanScope.item_#] sections in any order. The application processes the scopes by index in ascending order. The [ExcludedFromScanScope.item_#] section contains the following settings: |
||
|
Description of the protection exclusion scope, which contains additional information about the exclusion scope. |
Default value: |
|
Excludes the specified scope from protection. |
|
|
Limitation of the protection exclusion scope. In the exclusion scope, the application excludes only the objects that are specified using masks in the shell format. You can specify several |
Default value: |
|
Path to the directory with objects excluded from protection. |
|
Viewing the list of blocked devices
You can view the list of devices blocked by the Anti-Cryptor task.
To view the list of blocked devices, execute the following command:
kesl-control -[H] --get-blocked-hosts
The application will display blocked devices.
Page top
Allowing blocked devices
You can manually unblock devices that were blocked by the Anti-Cryptor task, and restore network access to them.
To unblock devices, execute the following command:
kesl-control [-H] --allow-hosts <device>
where <device> can be a list of valid IPv4/IPv6 addresses (including addresses in short form) or subnets. Also, you can specify devices as a list.
Specified devices are unblocked.
Examples: IPv4 addresses:
IPv6 addresses:
|
Web Threat Protection task (Web_Threat_Protection, ID:14)
While the Web Threat Protection task is running, the application scans incoming traffic, prevents download of malicious files from the Internet, and blocks access to phishing, advertising, and other dangerous websites. The application scans traffic transmitted via HTTP, HTTPS and FTP protocols. Also, the application scans websites and IP addresses. You can specify network ports or network port ranges to be monitored.
To monitor HTTPS traffic, enable secure connection scan.
To monitor FTP traffic, specify the following setting value: MonitorNetworkPorts=All.
When a website is opened, the Web Threat Protection task performs the following:
- Checks the website security using the downloaded application databases.
- Checks the website security using heuristic analysis, if enabled.
- Checks the website's security using Kaspersky Security Network, if it is enabled.
You are advised to participate in Kaspersky Security Network to help Web Threat Protection work more effectively.
- Blocks or allows opening of the website.
On attempt to open a dangerous website, the application performs the following:
- For HTTP or FTP traffic, the application blocks access and shows a warning message.
- For HTTPS traffic, a browser displays an error page.
The table describes all available values and default values of all the settings that you can specify for the Web Threat Protection task.
Web Threat Protection task settings
Setting |
Description |
Values |
|---|---|---|
|
Specifies the action to be performed upon detection of an infected object in web traffic. |
|
|
Specifies whether links will be checked against the database of malicious web addresses. |
|
|
Specifies whether links will be checked against the database of phishing web addresses. |
|
|
Specifies whether heuristic analysis must be used to scan web pages for phishing links. |
|
|
Specifies whether links must be checked against the database of adware web addresses. |
|
|
Specifies whether links must be checked against the database of web addresses that contain legal software that may be used by criminals to damage your computer or personal data. |
|
|
Enables or disables the usage of a list of trusted web addresses. The application does not analyze information from trusted web addresses to check them for viruses or other dangerous objects. You can specify trusted web addresses using the |
|
|
Specifies trusted web addresses. You can use masks to specify web addresses. Masks are not supported to specify IP addresses. |
The default value is not defined. |
Device Control task (Device_Control, ID:15)
When the Device Control task is running, Kaspersky Endpoint Security manages user access to devices that are installed on or connected to the computer (for example, hard drives, smart card readers, or Wi-Fi modules). This lets you protect the computer from infection when such devices are connected, and prevent data loss or leaks.
By default, the Device Control task starts automatically when the application starts. You can stop the task at any moment if necessary.
The Device Control task manages user access to devices using the access rules.
Device Control task manages user access at the following levels:
- Device class. For example, printers, removable drives, or CD/DVD drives.
For each device type, you can specify the following access rules: Allow, Block, or DependsOnBus. If the DependsOnBus value is specified, access to the device is defined by the connection bus access rule.
- Connection bus. Connection bus is an interface used to connect devices to the computer (USB or FireWire).
For each connection bus, you can specify the following access rules: Allow or Block. For example, you can allow or block connection of all USB devices.
- Trusted devices. Trusted devices are devices to which users have full access.
You can add devices to a list of trusted devices by ID. Each device has a unique ID. You can view the IDs of the connected devices by executing the
kesl-control --get-device-listcommand.
If a device blocked by Device Control task is connected to a computer, the application blocks user access to this device and shows a notification. You can view blocked devices in the list of connected devices (Blocked: Yes).
Kaspersky Endpoint Security ignores the excluded mount points for the Device Control task. The access rules apply to devices mounted in a globally excluded mount point.
About access rules
Device access rule is the setting that determines which users can access devices that are installed on the client device or connected to it For each device type, you can specify the following access rules: Allow, Block, or DependsOnBus. If the DependsOnBus value is specified, access to the device is defined by the connection bus access rule.
A connection bus access rule allows or blocks access to the connection bus (USB or FireWire). For each connection bus, you can specify the following access rules: Allow or Block. For example, you can allow or block connection of all USB devices. You can also limit access to specific USB devices or only to USB drives; access to other USB devices is denied.
Examples: To deny access to all USB devices except the specified one, specify the following settings: In the In the To deny access to all USB devices, but allow access to all USB drives, specify the following settings: In the In the |
By default, device access rules are created for all types of devices according to the classification of the Device Control component. Such rules grant users full access to devices if access to the connection buses of the respective device types is allowed.
You can edit device access rules and connection bus access rules.
Page top
Device Control task settings
The table describes all available values and the default values of all the settings that you can specify for the Device Control task.
Device Control task settings
Setting |
Description |
Values |
|
|---|---|---|---|
The [DeviceClass] section contains access rules for devices depending on their type. |
|||
|
Specifies access rules for hard drives connected to a computer. |
|
|
|
Specifies access rules for removable drives connected to a computer. |
|
|
|
Specifies access rules for floppy disks connected to a computer. The application does not block floppy disks connected to the computer using the ISA bus. |
|
|
|
Specifies access rules for CD/DVD drives connected to a computer. |
|
|
|
Specifies access rules for devices connected to a computer through a serial port. The application does not block devices connected to a computer via a serial port using the ISA bus. |
|
|
|
Specifies access rules for devices connected to a computer through a parallel port. |
|
|
|
Specifies access rules for printers connected to a computer. |
|
|
|
Specifies access rules for modems connected to a computer. |
|
|
|
Specifies access rules for tape devices connected to a computer. |
|
|
|
Specifies access rules for multifunctional devices connected to a computer. |
|
|
|
Specifies access rules for smart card readers connected to a computer. |
|
|
|
Specifies access rules for Wi-Fi adapters connected to the computer. |
|
|
|
Specifies access rules for external network adapters connected to a computer. |
Device Control does not allow you to deny access to external network adapters to avoid disconnecting your computer from the network. |
|
|
Specifies access rules for portable devices connected to a computer. |
|
|
|
Specifies access rules for Bluetooth devices connected to a computer. |
|
|
|
Specifies access rules for imaging devices connected to a computer. |
|
|
|
Specifies access rules for sound adapters connected to a computer. |
|
|
|
Specifies access rules for input devices (keyboards, mouse, touch pad and other) connected to a computer. |
|
|
The [DeviceBus] section contains connection bus access rules that determine whether the connection of devices is allowed or blocked. |
|||
|
Specifies connection bus access rules for devices connected to a computer via USB interface. |
|
|
|
Specifies connection bus access rules for devices connected to a computer via FireWire interface. |
|
|
The [TrustedDevices.item_#] section contains trusted devices to which users have full access at any time. |
|||
|
Specifies ID or ID mask of a trusted device. You can use the following masks to indicate the device ID: * (any sequence of characters) or ? (any character). |
— |
|
|
Comment to the specified trusted device. |
— |
|
The [Schedules.item_#] section contains the device access schedule. You can configure schedules only for hard drives, removable drives, floppy disks, and CD/DVD drives. |
|||
|
Specifies a schedule name. The You cannot delete the |
The default value: |
|
|
Specifies time intervals for a schedule. |
|
|
The [HardDrivePrincipals.item_#] section contains hard drive access rules. For hard drives, at least one schedule must always be enabled. You can assign several access rules to a hard drive. Also, multiple schedules can be specified for a user or group of users. If access schedules for a user or group conflict, minimal access rights are granted. |
|||
|
Specifies a user or group of users for whom the access rule is applied. |
|
|
|
Access rule settings. |
— |
|
|
Specifies whether the rule is enabled or disabled. |
|
|
|
Schedule specified in the |
The default value: |
|
|
Specifies access type. |
|
|
The [RemovableDrivePrincipals.item_#] section contains the access rules for removable drives. For removable drives, at least one schedule must always be enabled. You can assign several access rules to a removable drive. Also, multiple schedules can be specified for a user or group of users. If access schedules for a user or group conflict, minimal access rights are granted. |
|||
|
Specifies a user or group of users for whom the access rule is applied. |
|
|
|
Access rule settings. |
— |
|
|
Specifies whether the rule is enabled or disabled. |
|
|
|
Schedule specified in the |
The default value: |
|
The [FloppyDrivePrincipals.item_#] section contains access rules for floppy drives. For floppy drives, at least one schedule must always be enabled. You can assign several access rules to a floppy drive. Also, multiple schedules can be specified for a user or group of users. If access schedules for a user or group conflict, minimal access rights are granted. |
|||
|
Specifies a user or group of users for whom the access rule is applied. |
|
|
|
Access rule settings. |
— |
|
|
Specifies whether the rule is enabled or disabled. |
|
|
|
Schedule specified in the |
The default value: |
|
|
Specifies access type. |
|
|
The [OpticalDrivePrincipals.item_#] section contains the access rules for CD/DVD drives. For CD/DVD drives, at least one schedule must always be enabled. You can assign several access rules to a CD/DVD drive. Also, multiple schedules can be specified for a user or group of users. If access schedules for a user or group conflict, minimal access rights are granted. |
|||
|
Specifies a user or group of users for whom the access rule is applied. |
|
|
|
Access rule settings. |
— |
|
|
Specifies whether the rule is enabled or disabled. |
|
|
|
Schedule specified in the |
The default value: |
|
|
Specifies access type. |
|
|
Viewing a list of connected devices in the command line
Only users with the admin and audit roles can view the list of connected devices.
To view the list of connected devices, execute the following command:
kesl-control [-D] --get-device-list
Kaspersky Endpoint Security displays the following information about connected devices:
- Device type. Type of the connected device. For example,
OpticalDriveorHardDrive. - Identifier. ID of the connected device.
- Name. Name of the connected device.
- Path. Path to the device in the sysfs virtual operating system.
- System drive. The setting indicates whether the connected device is a system drive (Yes or No).
- Bus. Connection bus. Possible values:
UnknownBus,USB,FireWire. - Driver. Name of the driver read by the sysfs virtual operating system.
Removable Drives Scan task (Removable_Drives_Scan, ID:16)
When the Removable Drives Scan task is working, the application scans the connected device and its boot sectors for viruses and other malware. The following removable drives are scanned: CDs, DVDs, Blu-ray discs, flash drives (including USB modems), external hard drives, and floppy disks.
When the Removable Drives Scan task is running, the application monitors connection of removable drives to the device. When a removable drive is connected, the application creates and starts the temporary Scan_Boot_Sectors task of the ODS type with the following setting: ScanBootSectors=yes. This task cannot be stopped. After the task execution completes, the application automatically deletes the task.
If file scan is configured, the application also starts one or several custom Scan_File tasks of the ODS type with the following setting: ScanFiles=yes. If necessary, a user with administrator privileges can stop this task.
If you change the Removable Drives Scan task settings, the new values are not applied to the already running Scan_Boot_Sectors and Scan_File tasks. Stopping the Removable Drives Scan task does not stop the Scan_Boot_Sectors and Scan_File tasks that are already running.
Removable Drives Scan is stopped by default. You can start or stop the task at any moment if necessary.
The table describes all available values and the default values of all the settings that you can specify for the Removable Drives Scan task.
Removable Drives Scan task settings
Setting |
Description |
Values |
|---|---|---|
|
Enables the scanning of removable drives when they are connected to the device. This setting does not apply to CD/DVD drives and Blu-ray discs (see the description of the |
|
|
Enables the scanning of CD/DVD drives and Blu-ray discs when they are connected to the device. |
|
|
Enables the blocking of files on a connected disk during scanning. While scanning boot sectors, files are not blocked. |
|
Network Threat Protection task (Network_Threat_Protection, ID:17)
While the Network Threat Protection task is running, the application scans inbound network traffic for activity that is typical for network attacks. The application receives the numbers of the TCP ports from the current application databases and scans incoming traffic for these ports.
To scan network traffic, the Network Threat Protection task receives port numbers from the application databases and accepts connections via all these ports. During the network scan process, it may look like an open port on the device, even if no application on the system is listening to this port. It is recommended to close unused ports by means of a firewall.
Upon detecting an attempted network attack that targets your computer, the application blocks network activity from the attacking computer and logs a respective event. The application blocks network traffic from the attacking computer for one hour. You can change the block duration in the task settings.
The table describes all available values and the default values of all the settings that you can specify for the Network Threat Protection task.
Network Threat Protection task settings
Setting |
Description |
Values |
|---|---|---|
|
Enables or disables blocking of network activity from attacking computers. |
|
|
Specifies how long attacking computers will be blocked (in minutes). |
The default value is |
|
Enables or disables the usage of a list of IP addresses whose network activity will not be blocked when a network attack is detected. The application will only log information about dangerous activity from these computers. You can add IP addresses to the exclusion list by using the |
|
|
Specifies an IP address whose network activity will not be blocked by the application. |
d.d.d.d — IPv4 address, where d is a decimal number from 0 to 255. d.d.d.d/p — Subnet of IPv4 addresses, where p is a number from 0 to 32. x:x:x:x:x:x:x:x — IPv6 address, where x is a hexadecimal number from 0 to ffff. x:x:x:x::0/p — Subnet of IPv6 addresses, where p is a number from 0 to 64. The default value is not defined. |
Container Scan task (Container_Scan, ID:18)
When the Container Scan task is running, Kaspersky Endpoint Security scans containers and images for viruses and other malware. You can run multiple Container Scan tasks simultaneously.
Integration with Docker container management system, CRI-O framework, and Podman and runc utilities is supported.
To use the task, a license that includes the corresponding function is required.
Container scan task settings
The table describes all available values and the default values of all the container and image scan settings.
Container scan task settings
Setting |
Description |
Values |
|
|---|---|---|---|
|
Scan of containers specified by mask You can specify masks using the |
|
|
|
Specifies a name or a name mask that defines a container to scan. Masks are specified in command shell format. You can use the ? and * symbols. Before specifying this setting, make sure that |
Default value: * (scan all containers).
|
|
|
Scan of images specified by mask You can specify masks using the |
|
|
|
Specifies a name or a name mask that define images to scan. Before specifying this setting, make sure that the Masks are specified in command shell format. If you want to specify several masks, each mask must be specified on a new line with a new index. |
Default value: * (scan all images).
|
|
|
Checking all image layers and running containers. |
|
|
|
Action to be performed on a container when an infected object is detected. Actions on an infected object inside the container are described below. |
|
|
|
Specifies the action to be performed on an image when an infected object is detected. Actions on an infected object inside the image are described below. |
All dependencies will also be deleted. Running containers will be stopped, and then deleted. |
The settings described below are applied to the objects inside containers and images.
Container scan task settings
Setting |
Description |
Values |
|
|---|---|---|---|
|
Enables scanning of archives (including SFX self-extracting archives). The application scans the following archives: .zip; .7z*; .7-z; .rar; .iso; .cab; .jar; .bz; .bz2; .tbz; .tbz2; .gz; .tgz; .arj. The list of supported archive formats depends on the application databases being used. |
|
|
|
Enables scanning of self-extracting archives only (archives that contain an executable extraction module). |
|
|
|
Enables scanning email databases of Microsoft Outlook, Outlook Express, The Bat, and other mail clients. |
|
|
|
Enables scanning of plain text email messages. |
|
|
|
Task priority. Task priority is a setting that combines a number of internal Kaspersky Endpoint Security settings and process start settings. By using this setting, you can specify the way the application consumes system resources for running tasks. |
|
|
|
Maximum object scan duration (in seconds). The application stops scanning the object if it takes longer than the time specified by this setting. |
0 – 9999 0 — The object scan time is unlimited. Default value: 0. |
|
|
Maximum size of an object to be scanned (in megabytes). If the object to be scanned is larger than the specified value, the application skips this object. |
0 – 999999 0 — The application scans objects of any size. Default value: 0. |
|
|
Selection of the first action to be performed by the application on the infected objects. If an infected object is detected in a file referenced to by a symbolic link that is included in the scan scope (while the file referenced by this symbolic link is not included in the scan scope), the specified action will be performed to the target file. For example, if you specify the |
Default value: |
|
|
Selection of the second action to be performed by the application on the infected objects. The application performs the second action if the first action fails. |
The possible values of the If Default value: |
|
|
Enables exclusion of the objects specified by the |
|
|
|
Excludes objects from being scanned by name or mask. You can use this setting to exclude an individual file from the specified scan scope by name or exclude several files at once using masks in the shell format. |
The default value is not defined.
|
|
|
Enables exclusion of objects containing the threats specified by the |
|
|
|
Excludes objects from scans by the name of the threats detected in them. Before specifying a value for this setting, make sure that the In order to exclude an object from scans, specify the full name of the threat detected in this object – the string containing the application's decision that the object is infected. For example, you may be using a utility to collect information about your network. To keep the application from blocking it, add the full name of the threat contained in it to the list of threats excluded from scans. You can find the full name of the threat detected in an object in the application log or on the Virus Encyclopedia website. |
The setting value is case-sensitive. The default value is not defined.
|
|
|
Enables logging of information about scanned objects that the application reports as not being infected. You can enable this setting, for example, to make sure that a particular object was scanned by the application. |
|
|
|
Enables logging of information about scanned objects that are part of compound objects. You can enable this setting, for example, to make sure that an object within an archive has been scanned by the application. |
|
|
|
Enables logging of information about objects that have not been processed for some reason. |
|
|
|
Enables heuristic analysis. Heuristic analysis helps the application to detect threats even before they become known to virus analysts. |
|
|
|
Specifies the heuristic analysis level. You can specify the heuristic analysis level. The heuristic analysis level sets the balance between the thoroughness of searches for threats, the load on the operating system's resources, and the scan duration. The higher the heuristic analysis level, the more resources and time are required for scanning. |
|
|
|
Enables usage of the iChecker technology. |
|
Integration with Jenkins
Kaspersky Endpoint Security supports integration with Jenkins. Jenkins Pipeline plug-ins can be used to scan Docker images at different stages. For example, you can scan Docker images in a repository during the development process or before publishing.
To integrate Kaspersky Endpoint Security with Jenkins:
- Install Kaspersky Endpoint Security on a Jenkins node.
- Install Docker Engine on a Jenkins node.
For details, please refer to the Docker Engine documentation.
- Grant the Kaspersky Endpoint Security administrator privileges to the Jenkins user:
kesl-control --grant-role admin <Jenkinsuser name> - Add a Jenkins user to the docker group:
sudo usermod -aG docker <Jenkinsuser name>Usually the jenkins name is used.
- In Jenkins, create a new build job with the
testname (New Item → Enter an item name).
- Configure your project, according to your needs. It is assumed that as a result, you have an image or a started container that you need to scan.
- To start the Docker container, add the following script to the Jenkins build procedure. If you use Jenkins plug-ins or another way to start Docker containers, save the ID of the running Docker container to the file /tmp/kesl_cs_info, for further scanning:
TMP_FILE="/tmp/kesl_cs_info"EXIT_CODE=0echo "Start container from image: '${TEST_CONTAINER_IMAGE}'"CONTAINER_ID=$(docker run -d -v /storage:/storage ${TEST_CONTAINER_IMAGE} /storage/docker_process.sh)if [ -z "${CONTAINER_ID}" ] ; thenecho "Cannot start container from image ${TEST_CONTAINER_IMAGE}"exit 1fiecho "${CONTAINER_ID}" > ${TMP_FILE}exit ${EXIT_CODE}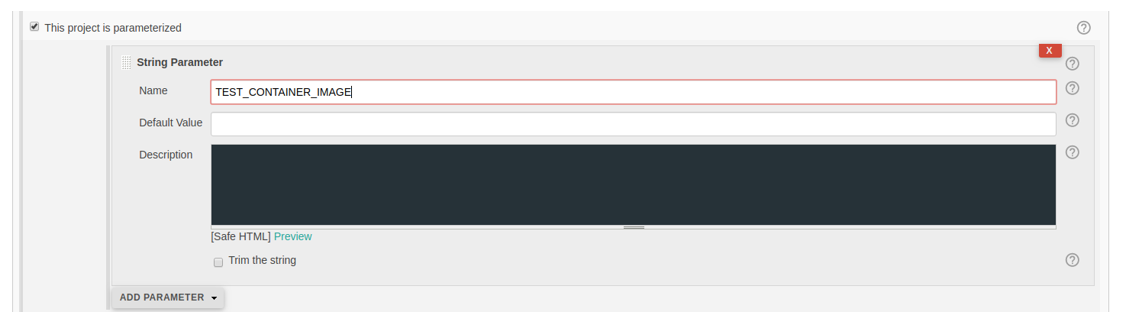
- After building the artifacts, add the following script to the steps to build the jenkins.
This script supports one container for scanning. If necessary, modify the script according to your needs.
TMP_FILE="/tmp/kesl_cs_info"EXIT_CODE=0if [ ! -f "${TMP_FILE}" ] ; thenecho "Cannot find temporary file with container ID: '${TMP_FILE}'"exit 1fiCONTAINER_ID=$(cat ${TMP_FILE})if [ -z "${CONTAINER_ID}" ] ; thenecho "Cannot find container ID in the temporary file: '${TMP_FILE}'"exit 1fiecho "Start anti-virus scan for: '${CONTAINER_ID}'"THREATS_AMOUNT=$(kesl-control --scan-container ${CONTAINER_ID}|grep 'Total detected objects'|awk '{print $5}')if [ "${THREATS_AMOUNT}" != "0" ] ; thenecho "ATTENTION! ${THREATS_AMOUNT} threats detected at: '${CONTAINER_ID}'"EXIT_CODE=1elseecho "Not threats found"fiecho "Remove container: {${CONTAINER_ID}}"docker kill ${CONTAINER_ID}docker rm -f ${CONTAINER_ID}rm -f ${TMP_FILE} - To scan a Docker image from a repository, use the following script:
DOCKER_FILE=https://raw.githubusercontent.com/ianmiell/simple-dockerfile/master/DockerfileDOCKER_FILE_FETCHED=$$.DockerfileTEST_IMAGE_NAME=test_imageecho "Build image from ${DOCKER_FILE}"curl ${DOCKER_FILE} -o ${DOCKER_FILE_FETCHED}if [ -f ${DOCKER_FILE_FETCHED} ] ; thenecho "Dockerfile fetched: ${DOCKER_FILE_FETCHED}"elseecho "Dockerfile not fetched"exit 1fidocker build -f ${DOCKER_FILE_FETCHED} -t ${TEST_IMAGE_NAME}echo "Scan docker image"SCAN_RESULT=$(/opt/kaspersky/kesl/bin/kesl-control --scan-container ${TEST_IMAGE_NAME}*)echo "Scan done: "echo $SCAN_RESULT - Save the build job.
Custom Container Scan task (Custom_Container_Scan, ID:19)
The Custom Container Scan task is used to store the setting values that are applied by executing the kesl-control --scan-container command.
To use the task, a license that includes the corresponding function is required.
When the Custom Container Scan task is run, the application creates a temporary Container Scan task (ContainerScan type) with the Custom_Container_Scan task settings. You can change the setting values of the Custom_Container_Scan task using the command line. After the scan is complete, the Custom_Container_Scan task is automatically deleted. The Custom Container Scan task cannot be deleted manually.
To start the Custom Container Scan task, execute the following command:
kesl-control --scan-container <container ID or image ID|container name|image name[:tag]>
If there are several entities with the same name, the application scans all of them.
You can use masks to scan several objects.
When you create the Custom Container Scan task by executing the kesl-control --create-task <task name> --type ContainerScan command, the application uses the same setting values as for the Container Scan task (Container_Scan), except for the ScanPriority=Normal setting.
Examples: Scan the container named my_container:
Scan the image named my_image (all tags):
|
The table describes all available values and the default values of all the container and image scan settings.
Custom Container Scan task settings
Setting |
Description |
Values |
|
|---|---|---|---|
|
Scan of containers specified by mask You can specify masks using the |
|
|
|
Specifies a name or a name mask that defines a container to scan. Masks are specified in command shell format. You can use the ? and * symbols. Before specifying this setting, make sure that |
Default value:
|
|
|
Scan of images specified by mask You can specify masks using the |
|
|
|
Specifies a name or a name mask that define images to scan. Before specifying this setting, make sure that the Masks are specified in command shell format. If you want to specify several masks, each mask must be specified on a new line with a new index. |
Default value: * (scan all images).
|
|
|
Checking all image layers and running containers. |
|
|
|
Action to be performed on a container when an infected object is detected. Actions on an infected object inside the container are described below. |
|
|
|
Specifies the action to be performed on an image when an infected object is detected. Actions on an infected object inside the image are described below. |
All dependencies will also be deleted. Running containers will be stopped, and then deleted. |
The settings described below are applied to the objects inside containers and images.
Custom Container Scan task settings
Setting |
Description |
Values |
|
|---|---|---|---|
|
Enables scanning of archives (including SFX self-extracting archives). The application scans the following archives: .zip; .7z*; .7-z; .rar; .iso; .cab; .jar; .bz; .bz2; .tbz; .tbz2; .gz; .tgz; .arj. The list of supported archive formats depends on the application databases being used. |
|
|
|
Enables scanning of self-extracting archives only (archives that contain an executable extraction module). |
|
|
|
Enables scanning email databases of Microsoft Outlook, Outlook Express, The Bat, and other mail clients. |
|
|
|
Enables scanning of plain text email messages. |
|
|
|
Task priority. Task priority is a setting that combines a number of internal application settings and process start settings. By using this setting, you can specify the way the application consumes system resources for running tasks. |
|
|
|
Maximum object scan duration (in seconds). The application stops scanning the object if it takes longer than the time specified by this setting. |
0 – 9999 0 — The object scan time is unlimited. Default value: 0. |
|
|
Maximum size of an object to be scanned (in megabytes). If the object to be scanned is larger than the specified value, the application skips this object. |
0 – 999999 0 — The application scans objects of any size. Default value: 0. |
|
|
Selection of the first action to be performed by the application on the infected objects. If an infected object is detected in a file referenced to by a symbolic link that is included in the scan scope (while the file referenced by this symbolic link is not included in the scan scope), the specified action will be performed to the target file. For example, if you specify the |
Default value: |
|
|
Selection of the second action to be performed by the application on the infected objects. The application performs the second action if the first action fails. |
The possible values of the If Default value: |
|
|
Enables exclusion of the objects specified by the |
|
|
|
Excludes objects from being scanned by name or mask. You can use this setting to exclude an individual file from the specified scan scope by name or exclude several files at once using masks in the shell format. |
The default value is not defined.
|
|
|
Enables exclusion of objects containing the threats specified by the |
|
|
|
Excludes objects from scans by the name of the threats detected in them. Before specifying a value for this setting, make sure that the In order to exclude an object from scans, specify the full name of the threat detected in this object – the string containing the application's decision that the object is infected. For example, you may be using a utility to collect information about your network. To keep the application from blocking it, add the full name of the threat contained in it to the list of threats excluded from scans. You can find the full name of the threat detected in an object in the application log or on the Virus Encyclopedia website. |
The setting value is case-sensitive. The default value is not defined.
|
|
|
Enables logging of information about scanned objects that the application reports as not being infected. You can enable this setting, for example, to make sure that a particular object was scanned by the application. |
|
|
|
Enables logging of information about scanned objects that are part of compound objects. You can enable this setting, for example, to make sure that an object within an archive has been scanned by the application. |
|
|
|
Enables logging of information about objects that have not been processed for some reason. |
|
|
|
Enables heuristic analysis. Heuristic analysis helps the application to detect threats even before they become known to virus analysts. |
|
|
|
Specifies the heuristic analysis level. You can specify the heuristic analysis level. The heuristic analysis level sets the balance between the thoroughness of searches for threats, the load on the operating system's resources, and the scan duration. The higher the heuristic analysis level, the more resources and time are required for scanning. |
|
|
|
Enables usage of the iChecker technology. |
|
Behavior Detection task (Behavior_Detection, ID:20)
The Behavior Detection task monitors malicious activity in the operating system. If malicious activity is detected, Kaspersky Endpoint Security terminates that process.
By default, the Behavior Detection task starts automatically when the application starts. You can stop the task at any moment if necessary.
The Behavior Detection task does not have any settings.
Page top
Application Control task (Application_Control, ID:21)
During execution of the Application Control task, Kaspersky Endpoint Security controls the launching of applications on user computers. This helps reduce the risk of computer infection by restricting access to applications. Application launching is regulated by application control rules.
To use the task, a license that includes the corresponding function is required.
The Application Control task can operate in two modes:
- Denylist. In this mode Kaspersky Endpoint Security allows all users to launch any applications that are not specified in the application control rules. This is the default operation mode of the Application Control task.
- Allowlist. In this mode Kaspersky Endpoint Security prevents all users from launching any applications that are not specified in the application control rules.
Thus, if the application control rules are created to the fullest extent possible, Kaspersky Endpoint Security prohibits the launching of all new applications that are not verified by the administrator of the organization's local network, but ensures the performance of the operating system and verified applications that users need to perform their job duties.
For each operation mode of the Application Control task, separate rules can be created and an action can be specified: apply rules or test rules. Kaspersky Endpoint Security performs this action when it detects an attempt to start an application.
If you change the list of allowed applications or prohibit the launch of all applications or applications affecting Kaspersky Endpoint Security's operation, then when modifying the task settings using the configuration file or using the command line, run the --set-settings command with the --accept flag.
Kaspersky Endpoint Security supports the following interpreters: python, perl, bash, ssh. The Application Control task does not control the launching of scripts from interpreters that are not supported by Kaspersky Endpoint Security, or the launching of scripts that are not passed to the interpreter via the command line.
If the interpreter is allowed to launch by the Application Control rules, Kaspersky Endpoint Security does not block the script launched from this interpreter. If the launch of at least one script specified in the interpreter command line is prohibited by the Application Control rules, Kaspersky Endpoint Security blocks all the scripts specified in the interpreter command line. Exclusion: cat script.py | python.
About Application Control rules
An Application Control rule is a set of parameters required for the Application Control task to work:
- Assignment of an application to an application category. An application category is a group of applications with common characteristics. For example, a category that includes executable files of installed applications, or a category of applications required for operation, which includes a standard set of applications used by the organization. Each category can only be used in one rule. KL categories usage is not supported in Kaspersky Security Center.
- Permission or prohibition for selected users or user groups to run applications. You can specify a user or user group that is allowed or not allowed to run applications of the specified category.
- Rule triggering condition. A condition is represented by the following correspondence: "condition type – condition criterion – condition value". Based on the rule triggering condition, Kaspersky Endpoint Security applies or does not apply the rule to the application. The rules use inclusive and exclusive conditions:
- Inclusive conditions. Kaspersky Endpoint Security applies the rule to the application if the application meets at least one inclusive condition.
- Exclusive conditions. Kaspersky Endpoint Security does not apply the rule to the application if the application meets at least one exclusive condition or does not meet any of the inclusive conditions.
Rule triggering conditions are created using the following criteria:
- Name of the application's executable file.
- Name of the directory with the application's executable file.
- Hash (SHA-256) of the application executable file.
For each criterion used in the condition, a value must be specified.
You can use masks to specify the names of files and directories.
If the settings of the application being launched match the values of the criteria specified in the inclusive condition, the rule is triggered. In this case, Application Control performs the action specified in the rule. If application settings match the values of the criteria specified in the exclusive condition, Application Control does not control the application launch.
For each operation mode of the Application Control task, separate rules must be created and an action must be specified: apply rules or test rules. The Application Control task performs this action when it detects an attempt to start an application.
The Application control rules have three operation statuses:
- Enabled – the rule is enabled, Kaspersky Endpoint Security applies this rule when the Application Control task is running.
- Disabled – the rule is disabled and is not used when the Application Control task is running.
- Test – Kaspersky Endpoint Security allows launching applications that meet the rule criteria, but logs information about launches of these applications in the report.
The priority of the rule operation status is higher than the priority of the action specified in the rule.
Page top
Application Control task settings
The table describes all available values and the default values of all the settings that you can specify for the Application Control task.
Application Control task settings
Setting |
Description |
Values |
|---|---|---|
|
|
|
|
Action performed by Kaspersky Endpoint Security when a user attempts to launch an application prohibited by the application control rules. |
|
The [Categories.item_#] section contains the following settings: |
||
|
Name of the created application category to which the rule applies. |
|
|
Usage of inclusive conditions to trigger the rule. |
|
|
Name of the executable file that triggers the rule. You can use masks to specify the file name. |
|
|
Name of the directory with the application's executable file that triggers the rule. You can use masks to specify the directory name. |
|
|
Hash (SHA-256) of the executable file that triggers the rule. |
|
|
Usage of excluding conditions to trigger the rule. |
|
|
Name of the executable file that triggers the rule. You can use masks to specify the file name. |
|
|
Name of the directory with the application's executable file that triggers the rule. You can use masks to specify the directory name. |
|
|
Hash (SHA-256) of the executable file that triggers the rule. |
|
The [AllowListRules.item_#] section contains a list of application control rules for the Each [AllowListRules.item_#] section contains the following settings: |
||
|
Description of the application control rule. |
|
|
Operation status of the application control rule. |
|
|
Name of the created application category to which the rule applies. You can specify the "Golden Image" category. |
|
The [AllowListRules.item_#.ACL.item_#] section contains a list of users who are allowed or denied to run applications. |
||
|
Access type assigned to a user or user group. |
|
|
User or user group to which the Application Control rule applies. |
|
The [DenyListRules.item_#] section contains a list of application control rules for the Each [DenyListRules.item_#] section contains the following settings: |
||
|
Description of the application control rule. |
|
|
Operation status of the application control rule. |
|
|
Name of the created application category to which the rule applies. You can specify the "Golden Image" list of applications as a category. |
|
The [DenyListRules.item_#.ACL.item_#] section contains a list of users who are allowed or denied to run applications. |
||
|
Access type assigned to a user or user group. |
|
|
User or user group to which the Application Control rule applies. |
|
Viewing the list of created categories
You can view the list of created application categories. The list of created categories displays the categories created in Kaspersky Security Center.
To view the list of created application categories, execute the following command:
kesl-control [-A] --get-categories
Kaspersky Endpoint Security displays the following information about the application category:
- Unique identifier (GUID) of the category
- Category name and category description (if any).
- List of conditions for including applications into the category.
- List of conditions for excluding applications from the category.
Inventory Scan task (Inventory_Scan, ID:22)
The Inventory Scan task provides information about all application executable files stored on the user devices. Obtaining information about the applications installed on the devices can be useful, for example, for creating Application Control rules.
To use the task, a license that includes the corresponding function is required.
Inventory Scan task settings
The table describes all available values and the default values of all the settings that you can specify for the Inventory Scan task.
Inventory Scan task settings
Setting |
Description |
Values |
|---|---|---|
|
Enables script scanning. |
|
|
Enables binary files scanning (elf, java, and pyc). |
|
|
Enables the scanning of files with an executable bit. |
|
|
Task priority. Task priority is a setting that combines a number of internal Kaspersky Endpoint Security settings and process start settings. By using this setting, you can specify the way the application consumes system resources for running tasks. |
|
|
Enables creation of the "Golden Image" category of applications based on the list of applications detected on the device by the Inventory Scan task. If |
|
The [ScanScope.item_#] section contains the following settings: |
||
|
Description of inventory scope; contains additional information about the inventory scope. The maximum length of the string specified using this setting is 4096 characters. |
Default value:
|
|
Enables scans of the specified inventory scope. To run the task, enable scans of at least one inventory scope. |
|
|
Inventory scope limitation. In the inventory scope, the application scans only the files that are specified using the masks in the shell format. If this setting is not specified, the application scans all the objects in the inventory scope. You can specify several values for this setting. |
The default value is |
|
Path to the directory with objects to be scanned. |
Default value: |
The [ExcludedFromScanScope.item_#] section contains the following settings: |
||
|
Description of the inventory exclusion scope; contains additional information about the inventory scope. |
The default value is not defined. |
|
Excludes the specified scope from the inventory. |
|
|
Limiting the inventory exclusion scope using shell masks. If this setting is not specified, the application excludes all the objects in the inventory scope. You can specify several values for this setting. |
Default value: |
|
Path to the directory with objects to be excluded.
|
|
Viewing a list of detected applications
You can view the list of applications detected on the device by executing the Inventory Scan task. Obtaining information about the applications installed on the devices can be useful, for example, for creating application control rules.
To view the list of applications detected on the device, execute the following command:
kesl-control [-A] --get-app-list
Kaspersky Endpoint Security displays the following information about the detected applications (if they are specified set in the settings of the Application Control task):
- Inventory time. Date and time when the Inventory Scan task was performed
- Number of applications. The number of applications detected on the device
- The list of applications containing the following information:
- Path. Path to the application
- Hash. Application hash sum
- Type. Application type. For example,
Script,Executable. - Categories. The categories to which the application belongs
Participating in Kaspersky Security Network
Kaspersky Security Network (KSN) is an infrastructure of cloud services that provides access to the Kaspersky online knowledge base, which contains information about the reputation of files, web resources, and software. The use of data from Kaspersky Security Network ensures faster responses by Kaspersky Endpoint Security to various threats, improves the performance of some protection components, and reduces the likelihood of false positives.
The a Global KSN service (the infrastructure is hosted by Kaspersky servers) and Private KSN service (the infrastructure is hosted by third-party servers, for example on the network of the Internet service provider) differ according to the location of the infrastructure.
After changing the license, submit the details of the new key to the service provider in order to be able to use Private KSN. Otherwise, an authentication error will prevent data exchange with KPSN.
Use of Kaspersky Security Network lets Kaspersky develop solutions for neutralizing threats and minimize the number of false alarms displayed by application components. Use of Kaspersky Security Network is voluntary. During installation, Kaspersky Endpoint Security invites you to use KSN. You can start or stop using KSN at any time.
There are two ways to use Kaspersky Security Network:
- Kaspersky Security Network with statistics: you can obtain information from the knowledge base. The application automatically sends statistics generated during its operation to KSN. The application can also send to Kaspersky for additional scanning certain files (or parts of files) that intruders can use to harm the computer or data.
- Kaspersky Security Network without statistics — You can obtain information from the knowledge base, but the application does not send anonymous statistics and information about the types and sources of threats.
No personal data is collected, processed, or stored. Detailed information about the storage, and destruction, and/or submission to Kaspersky of statistical information generated during participation in KSN is available in the Kaspersky Security Network Statement and on Kaspersky website. The file with the text of the Kaspersky Security Network Statement is included in the application distribution kit.
User computers managed by Kaspersky Security Center Administration Server interact with KSN via the KSN Proxy service.
The KSN Proxy service provides the following capabilities:
- The user's computer can query KSN and submit information to KSN, even without direct access to the Internet.
- The KSN proxy server caches processed data, thereby reducing the load on the external network connection and accelerating the receipt of the information requested by the user's computer.
For details about the KSN Proxy service, refer to Kaspersky Security Center documentation. KSN proxy server settings can be configured in the Kaspersky Security Center Administration Server properties.
Enabling and disabling Kaspersky Security Network usage from the command line
To enable use of Kaspersky Security Network, execute one the following commands:
- To enable the use of Kaspersky Security Network with statistics (extended KSN mode), run the following command:
kesl-control --set-app-settings UseKSN=Extended --accept-ksn - To enable use of Kaspersky Security Network without sending statistics,
kesl-control --set-app-settings UseKSN=Basic --accept-ksn
To disable use of Kaspersky Security Network, execute the following command:
kesl-control --set-app-settings UseKSN=No
To enable or disable use of Kaspersky Security Network with a configuration file, execute the following command:
kesl-control --set-app-settings --file <configuration file name> [--accept-ksn]
To enable use of Kaspersky Security Network with a configuration file, run the following command: kesl-control --set-app-settings --file <configuration file name> with the --accept-ksn flag.
If Kaspersky Endpoint Security installed on a client device runs under a policy that was assigned in Kaspersky Security Center, the value of the UseKSN setting can only be modified by using Kaspersky Security Center. When Kaspersky Endpoint Security installed on a client device stops running under a policy, the following value is assigned to the setting: UseKSN=No.
The file ksn_license.<language ID> containing the text of the Kaspersky Security Network Statement is located in the directory /opt/kaspersky/kesl/doc/.
Page top
Checking the connection to Kaspersky Security Network using the command line
To check the connection to Kaspersky Security Network, run the following command:
kesl-control --app-info
The Kaspersky Security Network Status line shows the connection status to Kaspersky Security Network:
- If the
With statisticsstatus is displayed, Kaspersky Endpoint Security uses Kaspersky Security Network, information from the knowledge base can be obtained, and anonymous statistics and information about the types and sources of threats is sent. - If the
No statisticsstatus is displayed, Kaspersky Endpoint Security uses Kaspersky Security Network and information from the knowledge base can be obtained, but anonymous statistics and information about the types and sources of threats is not sent. - If the
Nostatus is displayed, Kaspersky Endpoint Security does not use Kaspersky Security Network.
A connection to Kaspersky Security Network may be absent for the following reasons:
- The user device is not connected to the internet.
- Using Kaspersky Security Network is disabled.
- The application has not been activated or the license has expired.
- Problems related to the license key are detected. For example, the key is in the denylist.
Integration with Kaspersky Managed Detection and Response
Integration between Kaspersky Endpoint Security and Kaspersky Managed Detection and Response (MDR) enables continuous search, detection and elimination of threats aimed at your organization.
When interacting with Kaspersky Managed Detection and Response, Kaspersky Endpoint Security can carry out the following functions:
- Send telemetry data to Kaspersky Managed Detection and Response for threat detection.
- Execute Kaspersky Managed Detection and Response commands for providing security features.
To configure integration between Kaspersky Endpoint Security and Kaspersky Managed Detection and Response, perform the following actions:
- Make sure File Threat Protection and Behavior Detection tasks have started. Otherwise, the computer's status will be red in Kaspersky Managed Detection and Response. We also recommend to start Web Threat Protection and Network Threat Protection tasks. Otherwise, the computer's status will be red in Kaspersky Managed Detection and Response. See the online help for Kaspersky Managed Detection and Response to learn more about statuses.
- Enable use of Kaspersky Security Network and send statistics.
You can enable use of Kaspersky Security Network via the command line, in the Administration Console, or in Kaspersky Security Center Web Console.
- Configure Kaspersky Private Security Network for sending telemetry using a Kaspersky Security Network configuration file located in the ZIP archive of the MDR configuration file.
You can configure Private KSN only in the Administration Console or in the Kaspersky Security Center Web Console.
- Enable integration with Kaspersky Managed Detection and Response and upload a BLOB configuration file, which is located in the ZIP archive of the MDR configuration file.
It is recommended to configure integration between Kaspersky Endpoint Security and Kaspersky Managed Detection and Response in the Administration Console or in the Kaspersky Security Center Web Console.
You can also configure integration between Kaspersky Endpoint Security and Kaspersky Managed Detection and Response and upload a BLOB configuration file from the command line.
To enable integration with Kaspersky Managed Detection and Response, execute the following command:
kesl-control --set-app-settings UseMDR=Yes
To disable integration with Kaspersky Managed Detection and Response, execute the following command:
kesl-control --set-app-settings UseMDR=No
To load the BLOB configuration file, execute the following command:
kesl-control --load-mdr-blob <path to MDR BLOB configuration file>
To remove the BLOB configuration file, execute the following command:
kesl-control --remove-mdr-blob
If Kaspersky Endpoint Security is integrated with Kaspersky Managed Detection and Response, a large number of events can be written to the systemd log. If you want to disable the logging of audit events to the systemd log, disable the systemd-journald-audit socket and restart the operating system.
To disable the systemd-journald-audit socket, run the following commands:
systemctl stop systemd-journald-audit.socket
systemctl disable systemd-journald-audit.socket
systemctl mask systemd-journald-audit.socket
KESL container
Kaspersky Endpoint Security distribution kit contains files for creating a container application ("KESL container") for embedding into external systems in order to scan container images from image repositories.
After deploying, activating and configuring the KESL container, the following functionality is available in it:
- Scanning images of the containers located in repositories.
- Transferring scanned images that do not contain infected objects to a trusted repository.
Interaction with the KESL container is performed using REST API. It is also possible to configure KESL container settings using Kaspersky Security Center.
KESL containers cannot be managed using the command line.
Deploying and activating KESL container
Distribution package description
The distribution package contains the following files:
- docker-service-<version>.tgz – Archive with files necessary to create the image
- kesl-<version>.rpm – Kaspersky Endpoint Security installation package
- klnagent.rpm – Kaspersky Security Center Network Agent installation package
The docker-service-<version>.tgz archive contains the following files:
- kesl-service – directory of the container application files.
- Dockerfile – file for building a docker image of a version below 18.06.
- Dockerfile.1809 – file for building a docker image of a version later than 18.05.
- build.sh.example – example of a script for building an image.
- run.sh.example – example of a script for launching a KESL container.
- kesl-service.config.example – example of a container application configuration file.
- klnagent.conf.example – example of a configuration file for connecting to Kaspersky Security Center.
- readme.md – quick reference.
KESL container deployment and activation
To prepare a KESL container for use:
- Unpack the tar -xvf docker-service-<version>.tgz archive.
- If you want to configure the KESL container settings using Kaspersky Security Center, do the following:
- In the klnagent.conf.example file, specify the values of the Network Agent variables. For more information, refer to Kaspersky Security Center documentation (the "Installing Network Agent for Linux in silent mode (with an answer file)" section).
- Copy klnagent.conf.example to kesl-service/klnagent.conf.
- Build the KESL container Docker image using the build.sh.example installation script:
- If you use a proxy server, specify the desired values for the COMMON_AGRS variable.
- If necessary, change the name of the target kesl-service image to the desired one.
- Copy build.sh.example to build.sh and assign an executable file attribute to it.
- Run build.sh.
- Make sure that the build completed successfully by executing the
docker images -acommand.The following command execution result is displayed:
REPOSITORY TAG IMAGE ID CREATED SIZEkesl-service latest <hex> <creation time> <size> - Activate the KESL container in one of the following ways:
- Using Kaspersky Security Center.
- Using a configuration file.
- Using an environment variable (see step 8).
- Configure the KESL container.
- Start the KESL container using the following command
docker run --privileged --init -p <<KESL container_port>:<device_port> \-e <variable_1> -e <variable_2> ... -e <variable_n> \-v <mount point_1> -v <mount point_2> ... -v <mount point_n> \<image name>where:
<KESL container port>is the port of the KESL container, which must be accessible by the network from outside the KESL container.<device_port>–is the port of the device where the KESL container is installed.You can see an example of the run command in the file run.sh.example.
- If you want to activate the KESL container using an environment variable, do one of the following:
- If you want to specify an activation code, add the following setting when starting the KESL container (see step 7):
KRAS4D_ACTIVATION ='<activation code>':docker run ... -e KRAS4D_ACTIVATION='<activation code>' - If you want to apply the key file, add the following options when starting the KESL container (see step 7):
KRAS4D_ACTIVATION ='<key file>' and KRAS4D_KEYPATH=/root/kesl-service/keys:docker run ... -e KRAS4D_ACTIVATION='<key file>' -e KRAS4D_KEYPATH=/root/kesl-service/keys -v <path to the directory with keys>:/root/kesl-service/keys
- If you want to specify an activation code, add the following setting when starting the KESL container (see step 7):
Configuring KESL container
KESL container settings are initialized in several ways:
- By default (unless otherwise specified).
- From the configuration file. In this case, the values from the configuration file have a higher priority than the default values.
- The values can be passed to the KESL container upon startup as environment variables. Environment variables have a higher priority than the settings from the configuration file.
- In the scan request body. The settings in the request body have the highest priority, but they are valid only within a single request.
KESL container settings
KESL container settings and their default values are described in the following table.
KESL container settings
Setting description |
Available values |
Default value |
|---|---|---|
Port for listening to REST API |
|
|
Event severity level |
|
|
Authorization key |
If the |
No |
Activation code or key file |
To activate a KESL container using an activation code, when running the KESL container specify the activation code in the configuration file or pass the activation code in an environment variable:
To activate a KESL container using a key file, when running the KESL container specify the key file in the configuration file or pass the key file in an environment variable:
To activate a KESL container using a key file, the /root/kesl-service/keys mount point is required. |
No |
Additional scan settings |
The optional
where |
No |
Additional update settings |
The optional
where |
No |
Update the application databases when KESL container starts |
By default, the application databases are downloaded to the /var/opt/kaspersky/kesl/common/updates directory when the KESL container is started. To implement the joint operation of several KESL containers with one instance of the application databases and to speed up the launch of the KESL container, it is recommended to move this directory to the computer where the KESL container is installed by means of mounting:
|
|
Do not process the image if it already exists in the target repository. |
|
|
Name of the settings configuration file. |
|
kesl-service.config |
Environment variables
The following environment variables can be used to configure a KESL container:
- KRAS4D_PORT – port for listening to REST API.
- KRAS4D_LOGLEVEL – event severity level.
- KRAS4D_XAPIKEY – request authorization key.
- KRAS4D_ACTIVATION – activation code or key file name.
- KRAS4D_SCANOPTIONS – additional scan settings.
- KRAS4D_UPDATEOPTIONS – additional update settings.
- KRAS4D_FORCEUPDATE – update the application databases when KESL container starts.
- KRAS4D_SKIPIMAGEIFEXISTS – do not process the image if it already exists in the target repository.
- KRAS4D_CFGNAME – name of the settings configuration file.
Configuration file
The configuration file with the KESL container settings uses the yaml format. To read the settings from the file, mount the /root/kesl-service/config/ path on the computer where the KESL container is installed, and specify the name of the configuration file if it differs from the default one. Thus, you can specify individual configuration file for each set of KESL containers.
Example: starting a KESL container
|
The table below shows the configuration file settings and the corresponding environment variables.
Correspondence between the settings and the environment variables
Configuration file setting |
Environment variable |
|---|---|
Common section |
|
port: <port for listening> |
# KRAS4D_PORT=8085 |
sqlpath: <full path to the database file that contains scan results> |
# KRAS4D_SQLPATH |
certdir: <path to the directory with registry certificates> |
# KRAS4D_CERTDIR |
keypath: <path to the directory with license keys> |
# KRAS4D_KEYPATH |
tmppath: <full path to the temporary directory> |
# KRAS4D_TMPPATH |
logpath: <full path to the event log> |
# KRAS4D_LOGPATH |
loglevel: [noset|debug|info|warning|error|critical] |
# KRAS4D_LOGLEVEL |
Control section |
|
xapikey: <request authorization key> |
# KRAS4D_XAPIKEY=None |
forceupdate: <forced database update at container start [True|False]> |
# KRAS4D_FORCEUPDATE |
activation: <activation code or key file name from /root/kesl-service/config/> |
# KRAS4D_ACTIVATION |
detectaction: [delete|skip] |
# KRAS4D_DETECTACTION |
scanoptions: <scan settings [ScanArchived=yes ScanSfxArchived=yes ...]> |
# KRAS4D_SCANOPTIONS |
skipimageifexist: <do not scan the image if it already exists on the server to which the scanned image is to be copied> |
# KRAS4D_SKIPIMAGEIFEXIST |
Repositories section |
|
<server>:<port>: address and port of the image registry that requires authorization when requesting for verification. |
|
Credentials subsection |
|
user: user name for authorization in the image registry |
|
pass: password for authorization in the image registry |
|
Example of a configuration file
|
Available mount points
The following mount points are available for working with the KESL container:
- /root/kesl-service/data/scans.sqlite – path to the database file that contains scan results.
- /var/opt/kaspersky/kesl/common/updates – path to the application databases.
- /root/kesl-service/certificates – path to the directory that contains repository certificates.
- /root/kesl-service/keys – path to the directory that contains license keys.
- /var/log/kaspersky/ – path to the directory that contains event logs.
- /root/kesl-service/config/ – path to the configuration files.
- /var/lib/containers/vfs-storage – required mount point for the Podman utility to work correctly.
Working with REST API
Interaction with the KESL container is implemented using the REST API.
Using the REST API, you can submit the following requests:
- Scan a file or multiple files. For this purpose, submit a scan request (POST).
Example:
POST http://<server>:<port>/scans
One or multiple files.
- Scan a Docker image or multiple Docker images. For this purpose, submit a scan request (POST).
Example:
POST http://<server>:<port>/scans
Link to the Docker images to scan.
- Scan a Docker image or multiple Docker images with additional settings. For this purpose, submit a scan request (POST).
Example:
POST http://<server>:<port>/scans
JSON of a certain type.
- Get a list of scan sessions. For this purpose, send a request for information on scan sessions (GET).
Example:
GET http://<server>:<port>/scans
- Get information on a scan session. For this purpose, send a request for information on scan sessions (GET).
Example:
GET http://<server>:<port>/scans/<unique scan session identifier>
- Add a registry certificate without reloading the KESL container. For this purpose, submit a request for adding a registry certificate (POST).
Example:
POST http://<server>:<port>/addcert
Events and reports
While the application is running, various events can occur. The events may be informational or may contain important data. For example, the application can use events to notify about a successful application database update, or to inform about an error in the operation of application components that must be eliminated.
The application generates various types of reports based on the events that occur while the application is running.
Events and reports may contain the following personal data:
- User name and user ID of operating system users
- Paths to user files
- IP addresses of remote devices that are scanned by the Anti-Cryptor task
- IP addresses of senders and receivers of network packets scanned by the Firewall Management task
- Web addresses of the update sources
- General application settings
- Task names and settings
- Detected malicious, phishing, adware web addresses, and web addresses that contain legal software that may be used by criminals to damage your device or personal data
- Names of the containers and images
- Paths to the containers and images
- Names and IDs of the devices
- Web addresses of the repositories
- File names, paths to files, and hash-sums of executable application files
- Application category names
Viewing events
You can view events in the following ways:
- In the application event log. The event log is located in the directory specified by the
EventsStoragePathgeneral application setting. By default, the application saves information about events to the database at /var/opt/kaspersky/kesl/private/storage/events.db. Root privileges are required to access the database of events. - In the general application settings, if the
UseSysLogsetting has the valueYes, then event data is also written to syslog. Root privileges are required to access syslog. - Enable output of current application events using the
kesl-control -Wcommand. - If Kaspersky Endpoint Security is managed by Kaspersky Security Center, information about events may be transmitted to the Kaspersky Security Center Administration Server. Aggregation rules apply to certain events. If a large number of same-type events are created within a short period of time while the application is running, the application will switch to event aggregation mode and send to Kaspersky Security Center one aggregated event with a description of the events settings. Different aggregation rules may be used for different events. The administrator can configure the execution of a script upon receiving events from the application or upon receiving notifications about events by e-mail. For more information about events, refer to Kaspersky Security Center documentation.
- If the graphical user interface (GUI) is enabled, information about events can be viewed in reports and in application pop-up windows.
To get information about all events in the event log, run the following command:
kesl-control -E --query|less
By default, the application stores up to 500,000 events. You can use the less command to navigate through the list of displayed events.
You can view specific events using the application's event store query system.
When creating a query, indicate the required field, select a comparison operator, and specify the desired value. The value must be specified in single quotation marks ('), and the whole query must be specified in double quotation marks ("):
--query "<field> <comparison operator> '<value>' [and <field> <comparison operator> '<value>' *]"
You can specify a date value in UNIX time (the number of seconds that have elapsed since 00:00:00 (UTC), January 1, 1970) or in YYYY-MM-DD hh:mm:ss format. The user specifies the date and time in the user's local time zone, and the application displays them in the same time zone.
ThreatDetected example:
|
Query examples: Get all events by the EventType field:
Display all events with the specified values of the EventType and FileName fields:
Get events generated by File_Threat_Protection task after the date specified in UNIX time (the number of seconds that have elapsed since 00:00:00 (UTC), January 1, 1970):
Get all events generated by the File_Threat_Protection task after the date specified in YYYY-MM-DD hh:mm:ss format:
|
Viewing reports
Information about the operation of each Kaspersky Endpoint Security component, the performance of each task, and the overall operation of the application is recorded in reports.
You can view reports in the following ways:
- If Kaspersky Endpoint Security is managed using Kaspersky Security Center, you can generate and view Kaspersky Security Center reports in the Administration Console and in the Web Console. You can use Kaspersky Security Center reports, for example, to get information about infected files or usage of keys and application databases. For detailed information on working with Kaspersky Security Center reports, refer to Kaspersky Security Center documentation.
- If the graphical user interface (GUI) is enabled, information about application events is displayed in the application reports.
Managing the application using Kaspersky Security Center Administration Console
This section describes administering Kaspersky Endpoint Security using Kaspersky Security Center Administration Console.
This description is provided for Kaspersky Security Center 12.
Kaspersky Security Center Administration Console (hereinafter also referred to as the "Administration Console") is Microsoft Management Console (MMC) snap-in that is installed on the administrator's workstation and provides user interface for the Administration Server and Network Agent administrative services.
The Administration Console lets you remotely install and uninstall, start and stop Kaspersky Endpoint Security, configure application settings, and start tasks on the managed devices.
The application is managed through Administration Console by means of the Kaspersky Endpoint Security MMC administration plug-in.
To manage Kaspersky Endpoint Security using the Administration Console, move the devices, on which Kaspersky Endpoint Security is installed, to administration groups. You can create administration groups in Kaspersky Security Center before Kaspersky Endpoint Security installation and configure rules to automatically move the devices to administration groups. You can also manually move the devices from the Unassigned devices folder to administration groups after installing Kaspersky Endpoint Security (for details, refer to Kaspersky Security Center documentation).
You can perform the following actions in the Kaspersky Security Center Administration Console:
- View the protection status of devices.
- View general application settings.
- Update application databases and modules.
- Manage policies.
- Manage application tasks.
If the user account which is used to access the Administration Server does not have permissions to edit the settings of certain functional scopes, the settings of these functional scopes are not available for editing. Configuration of some settings is not supported in the KESL container.
Starting and stopping the application on a client device
To start or stop the application on a client device:
- Open the Administration Console of Kaspersky Security Center.
- In the Managed devices folder of the Administration Console tree, open the folder with the name of the administration group that includes the required device.
- In the workspace, select the Devices tab.
- In the list of managed devices, select the device for which you want to start or stop the application. In the device context menu, select Properties.
- In the Properties: <Device name> window, select the Applications section.
The right part of the window displays a list of Kaspersky applications installed on the device.
- Select Kaspersky Endpoint Security 11.2.0 for Linux.
- Do one of the following:
- To run the application, click the
 button to the right of the list of Kaspersky applications or select Start in the application context menu.
 - To stop the application, click the
 button to the right of the list of Kaspersky applications or select Stop in the application context menu.
- To run the application, click the
Viewing the protection status of a device
To view the protection status of a device:
- Open the Administration Console of Kaspersky Security Center.
- In the Managed devices folder, open the folder with the name of the administration group that includes the required device.
- In the workspace, select the Devices tab.
- In the list of managed devices, select the required device and select Properties in the device context menu.
- In the Properties: <Device name> window, select the Protection section.
The Protection section displays the following information about the protected device:
- Device status: status of the client device generated based on the criteria set by the administrator for the protection status of the device and the device activity in the network.
- All problems: complete list of problems detected by the managed applications installed on the client device. Each problem has a status that the application prompts to assign to the device.
- Real-time protection status: current status of the File Threat Protection task, such as Running or Stopped. When the device status changes, the new status is displayed in the device properties window only after the client device is synchronized with the Administration Server.
- Last on-demand scan: date and time when the last malware scan was performed on the client device.
- Total threats detected: total number of threats detected on the client device since the installation of the application (first scan) or since the last reset of the threat counter.
To reset the counter, click the Reset button.
- Active threats: the number of unprocessed files on the client device.
Viewing application settings
To view the application settings:
- Expand the Managed devices node in the Kaspersky Security Center Administration Console tree and select the group to which the protected device belongs.
- In the workspace, select the Devices tab.
- In the protected device context menu, select Properties.
- In the Properties: <Device name> window, select the Applications section.
A list of Kaspersky applications that are installed on the device appears in the right part of the device properties window.
- Select Kaspersky Endpoint Security 11.2.0 for Linux.
- Click the Properties button under the list of applications or select Properties in the application context menu.
The Kaspersky Endpoint Security 11.2.0 for Linux settings window opens.
The Kaspersky Endpoint Security 11.2.0 for Linux settings window displays the following information about Kaspersky Endpoint Security:
- The General section contains general information about the installed application:
- Version number: the version number of the application
- Installed — Date and time when the application was installed on the protected device
- Current status: status of the File Threat Protection task, such as Running or Paused
- Last software update: date and time when Kaspersky Endpoint Security software modules were last updated
- Installed updates: list of software modules for which updates are installed
- Application databases: date and time when the application databases were created and last updated
- The Components section contains a list of standard application components. A status (for example, Stopped, Suspended, Not Installed) and version of each component is displayed.
- The License keys section contains information about the active key and reserve keys:
- Unique alphanumeric sequence
- Type: type of license (commercial or trial).
- Activation date (this field is only available for the active key): date when the active key was added.
- License expiration date (this field is only available for the active key): date when the application can no longer be used with the current active key
- Validity period: the number of days during which you can use the application activated by this key
- Maximum number of devices: number of devices on which the key can be used
- The Event configuration section contains the events that the application saves to the event storage.
- The Advanced section contains information about the application administration plug-in.
Updating application databases and modules
Updating the databases and application modules of Kaspersky Endpoint Security ensures up-to-date protection on your device. New viruses, malware, and other types of threats appear worldwide on a daily basis. Kaspersky Endpoint Security databases contain information about threats and ways of neutralizing them. To detect threats quickly, you are urged to regularly update the application databases and modules.
The following objects are updated on users' devices:
- Application databases. Application databases include databases of malware signatures, a description of network attacks, databases of malicious and phishing web addresses, databases of banners, spam databases, and other data.
- Application modules. Module updates are intended to eliminate vulnerabilities in the application and to improve methods of protecting devices. Module updates may change the behavior of application components and add new capabilities.
Kaspersky Endpoint Security supports the following scenarios for updating databases and application modules:
- Update from Kaspersky servers. Kaspersky update servers are located in different countries around the world, which ensures a high reliability of updates. If an update cannot be performed from one server, Kaspersky Endpoint Security switches over to the next server.
- Centralized update Centralized update reduces external Internet traffic, and provides for convenient monitoring of the update.
Centralized update consists of the following steps:
- Download the update package to a repository within the organization's network.
The update package is downloaded to the repository by the Download updates to Administration Server repository task of the Administration Server.
- Distribute the update package to client devices
The update package is distributed to the client devices by the Update task of Kaspersky Endpoint Security. You can create an unlimited number of update tasks for each administration group.
- Download the update package to a repository within the organization's network.
By default, the list of update sources contains Kaspersky update servers and the Kaspersky Security Center Administration Server. You can add other update sources to the list. You can specify FTP-, HTTP-, or HTTPS servers as update sources. If an update cannot be performed from an update source, Kaspersky Endpoint Security switches to the next update source.
Updates are downloaded from Kaspersky update servers or from other FTP, HTTP, or HTTPS servers over standard network protocols. If connection to a proxy server is required to access the update sources, specify the proxy server settings in the Kaspersky Endpoint Security policy settings.
Updating from a server repository
To save Internet traffic, you can configure updates of application databases and modules on devices on the organization's LAN from a server repository. For this purpose, configure the download of the update package from Kaspersky update servers to the Administration Server repository (FTP, HTTP, or HTTPS server, network, or local directory) in Kaspersky Security Center. Other devices on the organization's LAN will be able to receive the update package from the server repository.
Configuring application database and module updates from the server repository consists of the following steps:
- Configure the download of an update package to the Administration Server repository (the Download updates to the Administration Server repository task).
- Configure application database and module updates on the remaining devices of the organization's LAN from the specified server repository (the Update task).
To configure downloading an update package to the server storage:
- Open the Administration Console of Kaspersky Security Center.
- In the Administration Console tree, select the Tasks folder.
The list of tasks opens.
- In the list of tasks, select the Download updates to the Administration Server repository task, or create it, if it has not been created, and open the task properties window by double-clicking the task.
- In the task properties window, select the Settings section in the list on the left.
The task settings are displayed in the right part of the window.
- In the Other settings section, click Configure.
- In the Other settings window, in the Folder for storing updates field, specify the address of the FTP, HTTP, or HTTPS server, network or local directory where Kaspersky Security Center copies the update package received from Kaspersky update servers in the following format:
- For an FTP or HTTP server, enter its web address or IP address.
For example,
http://dnl-01.geo.kaspersky.com/or93.191.13.103.For an FTP server, specify the authentication settings within the address in the following format: ftp://<user name>:<password>@<node>:<port>.
- For a network or local directory enter the full path to the directory.
- For an FTP or HTTP server, enter its web address or IP address.
- In the Other settings window, click OK.
- Click Apply.
To configure updates of Kaspersky Endpoint Security from a specified server storage:
- Open the Administration Console of Kaspersky Security Center.
- In the Administration Console tree, select the Tasks folder.
The list of tasks is displayed in the right part of the window.
- In the list of tasks, select the Update task for Kaspersky Endpoint Security and double-click to open the task properties window.
The Update task is created automatically by the Quick Start Wizard.
- In the task properties window, select the Update sources section in the list on the left.
The task settings are displayed in the right part of the window.
- In the Database updates source section, select the Other sources on the local or global network option.
- In the table of update sources, click the Add button.
- In the Update source field, specify the address of the FTP, HTTP, or HTTPS server, or network or local directory where Kaspersky Security Center copies the update package received from Kaspersky update servers.
The address of the update source must match the address you specified in the Folder for storing updates field when configuring the download of updates to the server storage (see the instructions above).
- Select the Use this source check box and click OK.
- In the table, set the order of the update sources using the Up and Down buttons.
- Click Apply.
If an update cannot be performed from the first update source, the application automatically switches to the next source.
Page top
Updating using Kaspersky Update Utility
To reduce Internet traffic, you can configure updates of application databases and modules on devices of the organization's LAN from a shared directory by using the Kaspersky Update Utility. For this purpose, one of the devices in the organization LAN must receive update packages from the Kaspersky Security Center Administration Server or from Kaspersky update servers and copy the received update packages to the shared directory by using the utility. Other devices on the organization's LAN will be able to receive the update package from this shared directory.
Configuring application database and module updates from a shared directory consists of the following steps:
- Install Kaspersky Update Utility on one of the devices of the organization's LAN.
- Configure copying of the update package to the shared directory in the Kaspersky Update Utility settings.
- Configure application database and module updates from the specified shared directory to the remaining devices on the organization's LAN.
You can download the Kaspersky Update Utility distribution kit from the Kaspersky Technical Support website. After installing the utility, select the update source (for example, the Administration Server repository) and the shared directory to which the Kaspersky Update Utility will copy update packages. For detailed information about using Kaspersky Update Utility, refer to the Kaspersky Knowledge Base.
To configure updates from a shared directory:
- Open the Administration Console of Kaspersky Security Center.
- In the Administration Console tree, select the Tasks folder.
The list of tasks is displayed in the right part of the window.
- In the list of tasks, select the Update task for Kaspersky Endpoint Security and double-click to open the task properties window.
The Update task is created automatically by the Quick Start Wizard.
- In the task properties window, select the Update sources section.
The task settings are displayed in the right part of the window.
- In the Database updates source section, select the Other sources on the local or global network option.
- In the table of update sources, click the Add button.
- In the Update source field, specify the path to the shared directory.
The source address must match the address indicated in the Kaspersky Update Utility settings.
- Select the Use this source check box and click OK.
- In the table, set the order of the update sources using the Up and Down buttons.
- Click Apply.
Managing policies in the Administration Console
A policy is a set of Kaspersky Endpoint Security operation settings applied to an administration group. You can use policies to apply identical Kaspersky Endpoint Security settings to all client devices within an administration group.
Multiple policies with different values of the settings can be configured for a single application. However, there can be only one active policy at a time for an application within an administration group. When you create a new policy, all other policies within an administration group become inactive. You can change the policy status later.
Policies have a hierarchy, similarly to administration groups. By default, a child policy inherits the settings from the parent policy. A child policy is a policy of a nested hierarchy level, that is, a policy for nested administration groups and secondary Administration Servers. You can enable inheritance of the settings from the parent policy.
You can locally modify the values of the settings specified by the policy for individual devices within the administration group, if modification of these settings is not prohibited by the policy.
Each policy setting has a "lock" 
 attribute that indicates whether child policy settings and local application settings can be modified. The "lock" status of a setting within a policy determines whether or not an application setting on a client device can be edited:
- When a setting is "locked" (), you cannot edit the setting. The setting value specified by the policy is used for all client devices within the administration group.
- When a setting is "unlocked" (), you can edit the setting. For all client devices in the administration group, the settings specified locally are used. The settings specified in the policy are not applied.
After the policy is applied for the first time, the application settings change in accordance with the policy settings.
You can perform the following operations with the policies:
- Create a policy.
- Edit policy settings.
If the user account which is used to access the Administration Server does not have permissions to edit the settings of certain functional scopes, the settings of these functional scopes are not available for editing. Configuration of some settings is not supported in the KESL container.
- Delete a policy.
- Export and import a policy.
- Change a policy status.
- Compare policy versions in the Revision history section of the policy properties window.
You can also create policy profiles. A policy profile may contain settings that differ from the "base" policy settings and apply to client devices when the configured conditions (activation rules) are met. Using policy profiles allows you to flexibly configure operation settings for different devices. You can create and configure profiles in the Policy profiles section of the policy properties.
For general information on working with policies and policy profiles, refer to Kaspersky Security Center documentation.
Creating a policy
To create a policy:
- Open the Administration Console of Kaspersky Security Center.
- Do one of the following:
- Select the Managed devices folder to create a policy for all the devices managed by Kaspersky Security Center.
- In the Managed devices folder, select the folder with the name of the administration group that contains the required devices.
- In the workspace, select the Policies tab.
- Start the New Policy Wizard in one of the following ways:
- Click the New policy button.
- In the context menu of the policy list select New → Policy.
- In the drop-down list, select Kaspersky Endpoint Security 11.2.0 for Linux.
Proceed to the next step.
- Enter a name for the policy being created.
Proceed to the next step.
- To use the settings from the previous version of Kaspersky Endpoint Security policy in the policy being created, select the Use policy settings for the earlier application version check box.
Proceed to the next step.
- Decide whether you want to use Kaspersky Security Network. Carefully read the Kaspersky Security Network Statement and do one of the following:
- If you agree with all the terms and conditions of the Statement and want the application to use Kaspersky Security Network, select I confirm that I have fully read, understand, and accept the terms and conditions of Kaspersky Security Network Statement.
- If you do not want to use Kaspersky Security Network, select I do not accept the terms and conditions of the Kaspersky Security Network Statement and confirm your decision in the window that opens.
If necessary, you can change the decision to use Kaspersky Security Network later.
Proceed to the next step.
- If necessary, configure the File Threat Protection settings.
Proceed to the next step.
- If necessary, modify the default scan settings.
Proceed to the next step.
- If necessary, configure exclusion areas.
Proceed to the next step.
- If necessary, modify the default actions for infected objects.
Proceed to the next step.
- Complete the New Policy Wizard.
Editing policy settings
To edit policy settings:
- Open the Administration Console of Kaspersky Security Center.
- In the Managed devices folder, open the folder with the name of the required administration group for which you want to edit the policy settings.
- In the workspace, select the Policies tab.
- Select the required policy and in the context menu of the policy, select Properties.
The Properties: <Policy name> window will open.
- Edit the policy settings.
- In the Properties: <Policy name> window, click OK to save the changes.
If the user account which is used to access the Administration Server does not have permissions to edit the settings of certain functional scopes, the settings of these functional scopes are not available for editing. Configuration of some settings is not supported in the KESL container.
Page top
Policy settings
You can use the policy to configure Kaspersky Endpoint Security operation settings for all client computers included in the administration group.
The set and default values of the policy settings may differ depending on the application license type. Configuration of some settings is not supported in the KESL container.
You can configure the application's operation settings in the sections of the policy properties window described in the table below. For information about configuring general policy settings and event settings, refer to Kaspersky Security Center documentation.
Sections of the Policy properties window
Section |
Description |
|---|---|
Essential Threat Protection |
|
Advanced Threat Protection |
|
Local Tasks |
|
General settings |
File Threat Protection
File Threat Protection prevents infection of the file system on the user device. File Threat Protection starts automatically with the default settings upon Kaspersky Endpoint Security start. It resides in the device operating memory and scans all files that are opened, saved, and launched.
File Threat Protection settings
Setting |
Description |
|---|---|
Enable File Threat Protection |
This check box enables or disables File Threat Protection on all managed devices. The check box is selected by default. |
File Threat Protection mode |
In this drop-down list, you can select the File Threat Protection mode:
|
Scan |
This group of settings contains buttons that open windows where you can configure the scan scopes and scan settings. |
Actions for infected objects |
This group of settings contains the Configure button. Clicking this button opens the Actions for infected objects window, where you can configure the actions that Kaspersky Endpoint Security performs on detected infected objects. |
Scan scopes window
The table contains the scan scopes. The application will scan files and directories located in the paths specified in the table. By default, the table contains one scan scope that includes all directories of the local file system.
Scan scope settings
Setting |
Description |
|---|---|
Scope name |
Scan scope name. |
Path |
Path to the directory that the application scans. |
Status |
The status indicates whether the application scans this scope. |
You can add, edit, delete, move up, and move down items in the table.
Kaspersky Endpoint Security scans objects in the specified scopes in the order they appear in the list of scopes. If necessary, place the subdirectory higher in the list than its parent directory, to configure security settings for a subdirectory that are different from the security settings of the parent directory.
Page top
<Scan scope name> window
In this window, you can add and configure scan scopes.
Scan scope settings
Setting |
Description |
|---|---|
Scan scope name |
Field for entering the scan scope name. This name will be displayed in the table in the Scan scopes window. The entry field must not be blank. |
Use this scope |
This check box enables or disables scans of this scope by the application. If this check box is selected, the application processes this scan scope. If this check box is cleared, the application does not process this scan scope. You can later include this scope in the component settings by selecting the check box. The check box is selected by default. |
File system, access protocol, and path |
The settings block lets you set the scan scope. You can select the file system type in the drop-down list of file systems:
|
If Shared or Mounted is selected in the drop-down list of file systems, you can select the remote access protocol in the drop-down list on the right:
|
|
If Local is selected in the drop-down list of file systems, then in the input field you can enter a path to a directory that you want to add to the scan scope. The / path is specified by default – the application scans all directories of the local file system. If the Local type is selected in the drop-down list of file systems, and the path is not specified, the application scans all directories of the local file system. |
|
Filesystem name |
The field for entering the name of the file system where the directories that you want to add to the scan scope are located. The field is available if the Mounted type is selected in the drop-down list of file systems and the Custom item is selected in the drop-down list on the right. |
Masks |
The list contains name masks for the objects that the application scans. By default the list contains the * mask (all objects). |
Scan settings window
In this window, you can configure file scan settings while File Threat Protection is enabled.
File Threat Protection settings
Setting |
Description |
|---|---|
Scan archives |
This check box enables or disables scan of archives. If this check box is selected, Kaspersky Endpoint Security scans archives. The application detects infected objects in archives, but does not disinfect them. To scan an archive, the application has to unpack it first, which may slow down scanning. You can reduce the archive scan duration by enabling and configuring the Skip object if scan takes longer than (sec) and Skip objects larger than (MB) settings in the General scan settings section. If this check box is cleared, Kaspersky Endpoint Security does not scan archives. This check box is cleared by default. |
Scan SFX archives |
This check box enables or disables self-extracting archive scans. Self-extracting archives are archives that contain an executable extraction module. If this check box is selected, Kaspersky Endpoint Security scans self-extracting archives. If this check box is cleared, Kaspersky Endpoint Security does not scan self-extracting archives. This check box is available if the Scan archives check box is unchecked. This check box is cleared by default. |
Scan mail databases |
This check box enables or disables scan of mail databases of Microsoft Outlook, Outlook Express, The Bat!, and other mail applications. If this check box is selected, Kaspersky Endpoint Security scans mail database files. If this check box is cleared, Kaspersky Endpoint Security does not scan mail database files. This check box is cleared by default. |
Scan mail format files |
This check box enables or disables scan of files of plain-text email messages. If this check box is selected, Kaspersky Endpoint Security scans plain-text messages. If this check box is cleared, Kaspersky Endpoint Security does not scan plain-text messages. This check box is cleared by default. |
Skip object if scan takes longer than (sec) |
A field for specifying the maximum time to scan an object, in seconds. After the specified time is reached, Kaspersky Endpoint Security stops scanning the object. Available values: The default value is |
Skip objects larger than (MB) |
The field for specifying the maximum size of an archive to scan, in megabytes. Available values: The default value is |
Log clean objects |
This check box enables or disables the logging of ObjectProcessed type events. If this check box is selected, Kaspersky Endpoint Security logs ObjectProcessed type events for all scanned objects. If this check box is cleared, Kaspersky Endpoint Security does not log ObjectProcessed type events for any scanned object. This check box is cleared by default. |
Log unprocessed objects |
This check box enables or disables the logging ObjectNotProcessed type events if a file cannot be processed during a scan. If this check box is selected, Kaspersky Endpoint Security logs ObjectNotProcessed type events. If this check box is cleared, Kaspersky Endpoint Security does not log ObjectNotProcessed type events. This check box is cleared by default. |
Log packed objects |
This check box enables or disables the logging of PackedObjectDetected type events for all packed objects that are detected. If this check box is selected, Kaspersky Endpoint Security logs PackedObjectDetected type events. If this check box is cleared, Kaspersky Endpoint Security does not log PackedObjectDetected type events. This check box is cleared by default. |
Use iChecker technology |
This check box enables or disables scan of only new and modified since the last scan files. If the check box is selected, Kaspersky Endpoint Security scans only new or modified since the last scan files. If the check box is cleared, Kaspersky Endpoint Security scans files regardless to the date of creation or modification. The check box is selected by default. |
Use heuristic analysis |
This check box enables or disables heuristic analysis during file scans. The check box is selected by default. |
Heuristic analysis level |
If the Use heuristic analysis check box is selected, you can select the heuristic analysis level in the drop-down list:
|
Actions for infected objects window
In this window, you can configure actions to be performed by Kaspersky Endpoint Security on detected infected objects:
File Threat Protection settings
Setting |
Description |
|---|---|
First action |
In this drop-down list, you can select the first action to be performed by Kaspersky Endpoint Security on an infected object that has been detected:
|
Second action |
In this drop-down list, you can select the second action to be performed by Kaspersky Endpoint Security on an infected object, in case the first action is unsuccessful:
|
Exclusion scopes
Scan exclusion is a set of conditions. When these conditions are met, Kaspersky Endpoint Security does not scan the objects for viruses and other malware. You can also exclude objects from scans by masks and threat names.
Settings of scan exclusions
Group of settings |
Description |
|---|---|
Exclusions |
This group of settings contains the Configure button. Clicking this button opens the Exclusion scopes window. In this window, you can define the list of scopes to be excluded from scans. |
Exclusions by mask |
This group of settings contains the Configure button, which opens the Exclusions by mask window. In this window, you can configure the exclusion of objects from scans by name mask. |
Exclusions by threat name |
This group of settings contains the Configure button, which opens the Exclusions by threat name window. In this window, you can configure the exclusion of objects from scans based on threat name. |
Exclusion scopes window
This table contains scan exclusion scopes. The application does not scan files and directories located at the paths specified in the table. By default, the table is empty.
Exclusion scope settings
Setting |
Description |
|---|---|
Exclusion scope name |
Exclusion scope name. |
Path |
Path to the directory excluded from scan. |
Status |
The status indicates whether the application uses this exclusion. |
You can add, edit, and delete items in the table.
Page top
<Exclusion scope name> window
In this window, you can add and configure scan exclusion scopes.
Exclusion scope settings
Setting |
Description |
|---|---|
Exclusion scope name |
Field for entering the exclusion scope name. This name will be displayed in the table in the Exclusion scopes window. The entry field must not be blank. |
Use this scope |
The check box enables or disables exclusion of the scope from scan when the application is running. If this check box is selected, the application excludes this area during scans. If this check box is cleared, the application includes this area in the scan scope. You can later exclude this scope by selecting the check box. The check box is selected by default. |
File system, access protocol, and path |
The settings block lets you set the exclusion scope. In the drop-down list of file systems, you can select the type of file system of the directories to be excluded from scans:
|
If Mounted is selected in the drop-down list of file systems, you can select the remote access protocol in the drop-down list on the right:
|
|
If Local is selected in the drop-down list of file systems, then in the input field you can enter a path to a directory that you want add to the exclusion scope. The / path is specified by default. The application excludes all directories of the local file system from scan. |
|
Filesystem name |
The field for entering the name of the file system where the directories that you want to add to the exclusion scope are located. The field is available if the Mounted type is selected in the drop-down list of file systems and the Custom item is selected in the drop-down list on the right. |
Masks |
The list contains name masks of the objects that the application excludes from scan. Masks are only applied to objects in the directory specified in the path field. By default the list contains the * mask (all objects). |
Exclusions by mask window
You can configure the exclusion of objects from scans based on name mask. The application will not scan files whose names contain the specified mask. By default, the list of masks is empty.
You can add, edit, or delete masks.
Page top
Exclusions by threat name window
You can configure the exclusion of objects from scans based on threat name. The application will not block the specified threats. By default, the list of threat names is empty.
You can add, edit, and delete threat names.
Page top
Firewall Management
The operating system's firewall protects personal data stored on the user's device by blocking most threats to the operating system when the device is connected to the Internet or local network.
The operating system's firewall can detect all network connections on the user's device and provide a list of their IP addresses. The Firewall Management task lets you set the status of these network connections by configuring network packet rules.
This feature is not supported in the KESL container.
Configuring network packet rules lets you specify the desired level of the device protection, from blocking Internet access for all applications to allowing unlimited access. All outbound connections are allowed by default, unless corresponding blocking rules for the Firewall Management task are specified.
It is recommended to disable other operating system firewall management tools before enabling the Firewall Management component.
Firewall Management settings
Setting |
Description |
|---|---|
Enable Firewall Management |
This check box enables or disables Firewall Management. The check box is selected by default. |
Network packet rules |
This group of settings contains the Configure button. Clicking this button opens the Network packet rules window. In this window, you can configure network packet rules that are applied by the Firewall Management component when it detects the network connection attempt. |
Available networks |
This group of settings contains the Configure button. Clicking this button opens the List of available networks window. In this window, you can configure the list of networks that the Firewall Management component will monitor. |
Incoming connections |
In this drop-down list, you can select the action to be performed for incoming network connections:
|
Incoming packets |
In this drop-down list you can select the action to be performed for incoming packets:
|
Always add allowing rules for Network Agent ports |
This check box enables or disables automatic adding allowing rules for Network Agent ports. The check box is selected by default. |
Network packet rules window
The Network packet rules table contains network packet rules that the Firewall Management component uses for network activity monitoring. You can configure the settings described in the table below for network packet rules.
Network packet rules settings
Setting |
Description |
|---|---|
Name |
Network packet rule name |
Action |
Action to be performed by Firewall Management when it detects the network activity. |
Local address |
Network addresses of devices that have Kaspersky Endpoint Security installed and can send and/or receive network packets. |
Remote address |
Network addresses of remote devices that can send and/or receive network packets. |
Logging |
This column shows if the application logs actions of the network packet rule. If the value is Yes, the application logs the actions of the network packet rule. If the value is No, the application does not log the actions of the network packet rule. |
By default, the table of network packet rules is empty.
You can add, edit, delete, move up, and move down network packet rules in the table.
Page top
Added network packet rule window
In this window, you can configure the added network packet rule settings.
Network packet rule settings
Setting |
Description |
|---|---|
Protocol |
You can select the type of data transfer protocol for which you want to monitor network activity:
|
Direction |
You can specify the direction of network activity being monitored:
|
ICMP type |
You can specify the ICMP type. The Firewall Management component monitors messages of the specified type sent by the host or gateway. If the Specified option is selected, the field for entering the ICMP type will be displayed. This window is displayed if the ICMP or ICMPv6 data transfer protocol is selected in the Protocol drop-down list. |
ICMP code |
You can specify the ICMP code. The Firewall Management component monitors messages of the type specified in the ICMP type field and the code specified in the ICMP code field, sent by a host or gateway. If the Specified option is selected, the field for entering the ICMP code will be displayed. This window is displayed if the ICMP or ICMPv6 data transfer protocol is selected in the Protocol drop-down list. |
Remote ports |
You can specify the port numbers of the remote devices between which the connection is to be monitored. If the Specified option is selected, the field for entering the port numbers will be displayed. This window is displayed only if TCP or UDP data transfer protocol is selected in the Protocol drop-down list. |
Local ports |
You can specify the port numbers of the local devices between which the connection is to be monitored. If the Specified option is selected, the field for entering the port numbers will be displayed. This window is displayed only if TCP or UDP data transfer protocol is selected in the Protocol drop-down list. |
Remote addresses |
You can specify the network addresses of the remote devices that can send and receive network packets:
|
Local addresses |
You can specify the network addresses of the devices with Kaspersky Endpoint Security installed that can send and receive network packets:
|
Action |
You can select an action to be performed by the Firewall Management component when it detects network activity:
|
Logging |
You can specify whether the actions of the network rule will be logged in the report. |
Rule name |
The field for entering the name of the network packet rule. |
Available networks window
The Available networks table contains the networks controlled by the Firewall Management component. The table of available networks is empty by default.
Available networks settings
Setting |
Description |
|---|---|
IP address |
Network IP address. |
Network type |
Network type (Public network, Local network, or Trusted network). |
Network connection window
In this window, you can configure the network connection that the Firewall Management component will monitor.
Network connection
Setting |
Description |
|---|---|
IP address |
The field for entering IP address of the network. |
Network type |
You can select the type of the network:
|
Web Threat Protection
While the Web Threat Protection component is running, Kaspersky Endpoint Security scans inbound traffic and prevents downloads of malicious files from the Internet and also blocks phishing, adware, or other malicious websites. Web Threat Protection is started by default when the application starts.
This feature is not supported in the KESL container.
The application scans HTTP, HTTPS, and FTP traffic. Also, the application scans websites and IP addresses. You can specify the network ports or network port ranges to be monitored.
To monitor HTTPS traffic, enable encrypted connection scans. To monitor FTP traffic, select the Monitor all network ports check box.
Web Threat Protection settings
Setting |
Description |
|---|---|
Enable scans of incoming traffic on the device |
This check box enables or disables incoming traffic scans on the computer. The check box is selected by default. |
Trusted web addresses |
This group of settings contains the Configure button, which opens the Trusted web addresses window, where you can specify the list of trusted web addresses. Kaspersky Endpoint Security will not scan the contents of websites whose web addresses are included in this list. |
Action on threat detection |
In the drop-down list, you can select the action to be performed by Kaspersky Endpoint Security on a web resource where a dangerous object is detected:
|
Scan settings |
This group of settings contains the Configure button, which opens the Scan settings window, where you can configure the settings for scanning incoming traffic. |
Trusted web addresses window
In this window, you can add web addresses and web pages whose content you consider trusted.
You can only add HTTP/HTTPS web addresses to the list of trusted web addresses. You can use masks to specify web addresses. Masks are not supported to specify IP addresses. By default, the list is empty.
Web address window
In this window, you can add web addresses or web address masks to the list of trusted web addresses.
You can add only HTTP/HTTPS web addresses to the list of trusted web addresses. You can use masks to specify web addresses. Masks are not supported to specify IP addresses.
Page top
Scan settings window
In this window, you can configure the settings for scanning incoming traffic during operation of the Web Threat Protection component.
Web Threat Protection settings
Setting |
Description |
|---|---|
Detect malicious objects |
This check box enables or disables checking of links against the databases of malicious web addresses. The check box is selected by default. |
Detect phishing links |
This check box enables or disables checking of links against the databases of phishing web addresses. The check box is selected by default. |
Use heuristic analysis for detecting phishing links |
This check box enables or disables the use of heuristic analysis for detecting phishing links. This check box is available if the Detect phishing links check box is selected, and is selected by default. |
Detect adware |
This check box enables or disables checking links against the databases of adware web addresses. This check box is cleared by default. |
Detect legitimate applications that may be used by a hacker to harm devices or data |
This check box enables or disables checking links against the databases of legitimate applications that can be used by hackers to harm devices or data. This check box is cleared by default. |
Network Threat Protection
While the Network Threat Protection component is running, the application scans inbound network traffic for activity that is typical for network attacks. Network Threat Protection is started by default when the application starts.
This feature is not supported in the KESL container.
The application receives the numbers of the TCP ports from the current application databases and scans incoming traffic for these ports. Upon detecting an attempted network attack that targets your computer, the application blocks network activity from the attacking computer and logs a respective event.
To scan network traffic, the Network Threat Protection task receives port numbers from the application databases and accepts connections via all these ports. During the network scan process, it may look like an open port on the device, even if no application on the system is listening to this port. It is recommended to close unused ports by means of a firewall.
Network Threat Protection settings
Setting |
Description |
|---|---|
Enable Network Threat Protection |
This check box enables or disables Network Threat Protection. The check box is selected by default. |
Block attacking devices |
This check box enables or disables the blocking of network activity when a network attack attempt is detected. The check box is selected by default. |
Block the attacking host for (min) |
In this field you can specify the duration an attacking device is blocked in minutes. After the specified time, Kaspersky Endpoint Security allows network activity from this device. Available values: integer from The default value is |
Exclusions |
This group of settings contains the Configure button, which opens the Exclusions window, where you can specify a list of IP addresses. Network attacks from these IP addresses will not be blocked. |
Exclusions window
In this window, you can add IP addresses from which network attacks will not be blocked.
By default, the list is empty.
IP address window
In this window, you can add and edit IP addresses. Network attacks from these IP addresses will not be blocked by Kaspersky Endpoint Security.
IP addresses
Setting |
Description |
|---|---|
Specify an IP address (IPv4 or IPv6) |
Entry field for an IP address. You can specify IP addresses of IPv4 and IPv6 versions. |
Kaspersky Security Network
Kaspersky Security Network (KSN) is an infrastructure of cloud services providing access to Kaspersky's online knowledge base with information about the reputation of files, web resources, and software. The use of data from Kaspersky Security Network ensures faster responses by Kaspersky Endpoint Security to various threats, improves the performance of some protection components, and reduces the likelihood of false positives.
Depending on the location of the infrastructure, there are two types of KSN:
- Global KSN – the infrastructure is hosted by Kaspersky servers.
- Private KSN– the infrastructure is hosted by third-party servers, for example in the network of the Internet service provider.
After changing the license, submit the details of the new key to the service provider in order to be able to use Private KSN. Otherwise, data exchange with Private KSN will be impossible due to an authentication error.
Thanks to users who participate in Kaspersky Security Network, Kaspersky is able to develop solutions for neutralizing threats and minimize the number of false alarms displayed by Kaspersky Endpoint Security components. Participation in Kaspersky Security Network is voluntary. The application invites the user to participate in Kaspersky Security Network during installation.
Kaspersky Endpoint Security provides two options for participating in Kaspersky Security Network:
- Kaspersky Security Network with statistics: you can obtain information from the knowledge base. The application automatically sends statistics generated during operation of the application to KSN. The application can also send to Kaspersky for additional scanning certain files (or parts of files) that intruders can use to harm the device or data.
- Kaspersky Security Network without statistics — You can obtain information from the knowledge base, but the application does not send anonymous statistics and information about the types and sources of threats.
You can start or stop using Kaspersky Security Network at any time. You can also select another participation option by clicking the Edit button.
No personal data is collected, processed, or stored. Detailed information about the storage, and destruction, and/or submission to Kaspersky of statistical information generated during participation in KSN is available in the Kaspersky Security Network Statement and on Kaspersky website.
You can read the text of the Kaspersky Security Network Statement in the Kaspersky Security Network Statement window, which can be opened by clicking the Text of the Kaspersky Security Network Statement link.
User devices managed by Kaspersky Security Center Administration Server can interact with KSN via the KSN Proxy service. You can configure the KSN Proxy settings in the Kaspersky Security Center Administration Server properties. For details about the KSN Proxy service refer to Kaspersky Security Center documentation.
Page top
Kaspersky Security Network settings
In this window, you can configure Kaspersky Security Network participation settings.
Kaspersky Security Network settings
Setting |
Description |
|---|---|
More info |
Clicking this link opens the Kaspersky website. |
Do not participate in Kaspersky Security Network |
By selecting this option, you decline to participate in Kaspersky Security Network. |
Kaspersky Security Network without statistics |
By selecting this option, you accept the terms of participation in Kaspersky Security Network. You will be able to receive information from Kaspersky online knowledge base about the reputation of files, web resources, and software. |
Kaspersky Security Network with statistics |
By selecting this option, you accept the terms of participation in Kaspersky Security Network. You will be able to receive information from Kaspersky online knowledge base about the reputation of files, web resources, and software. Also, anonymous statistics and information about the types and sources of various threats will be sent to improve Kaspersky Security Network. |
Kaspersky Security Network Statement |
Clicking this link opens the Kaspersky Security Network Statement window. In this window, you can read the text of the Kaspersky Security Network Statement. |
Kaspersky Security Network Statement
In this window, you can read the text of the Kaspersky Security Network Statement and accept its terms and conditions.
Kaspersky Security Network settings
Setting |
Description |
|---|---|
I confirm that I have fully read, understand, and accept the terms and conditions of the Kaspersky Security Network Statement |
By selecting this option, you confirm that you want to participate in the Kaspersky Security Network, and you have fully read, understood, and accept the terms and conditions of the Kaspersky Security Network Statement that is displayed. This option is available if the Kaspersky Security Network without statistics or Kaspersky Security Network with statistics option is selected in the Kaspersky Security Network settings window. |
I do not agree to use Kaspersky Security Network |
By selecting this option, you confirm that you do not want to participate in the Kaspersky Security Network. This option is available if the Kaspersky Security Network without statistics or Kaspersky Security Network with statistics option is selected in the Kaspersky Security Network settings window. |
Application Control
During operation of the Application Control component, Kaspersky Endpoint Security controls launches of applications on the user computers. This helps reduce the risk of computer infection by restricting access to applications. Application launching is regulated by application control rules.
To use the component, a license that includes the corresponding function is required.
This feature is not supported in the KESL container.
Application Control can operate in two modes:
- Denylist. In this mode Kaspersky Endpoint Security allows all users to launch any applications that are not specified in the application control rules. This is the default operation mode of the Application Control task.
- Allowlist. In this mode Kaspersky Endpoint Security prevents all users from launching any applications that are not specified in the application control rules.
Thus, if the application control rules are created to the fullest extent possible, Kaspersky Endpoint Security prohibits the launching of all new applications that are not verified by the administrator of the organization's local network, but ensures the performance of the operating system and verified applications that users need to perform their job duties.
For each Application Control operation mode, separate rules can be created and the action can be specified: apply the rule or test the rule. Kaspersky Endpoint Security performs this action when it detects an attempt to start an application.
The Application Control settings are described in the following table.
Application Control settings
Setting |
Description |
|---|---|
Enable Application Control |
The check box enables the Application Control component. This check box is cleared by default. |
Action on detection of an application |
You can select the action to be performed by Kaspersky Endpoint Security upon detection of an attempt to start the application that matches the configured rules:
|
Application Control mode |
You can select the mode of the Application Control component operation:
|
Application Control rules |
This group of settings contains the Configure button. Clicking this button opens the Application Control rules window. |
Application Control rules window
The Application Control rules table contains the rules used by the Application Control component. The Application Control rules table is empty by default.
Application Control rules settings
Setting |
Description |
|---|---|
Category name |
The name of the application category that is used by the rule. |
Status |
Operation status of the application control rule:
You can change the rule status in the Add new rule window. |
You can add, modify and remove Application Control rules.
Page top
Adding rule window
In this window, you can configure the settings for the created Application Control rule.
Adding the Application Control rule
Setting |
Description |
|---|---|
Description |
Description of the application control rule. |
Rule status |
In the drop-down list, you can select the status of the Application Control rule:
|
Category |
This group of settings contains the Configure button. Clicking this button opens the Application Control categories window. |
Access control list |
The table contains a list of users or user groups to which the application control rule applies, and the types of access assigned to them, and consists of the following columns: |
Application Control categories window
In this window, you can add a new category or configure the category settings for an Application Control rule.
KL categories usage is not supported in Kaspersky Security Center.
Application Control categories
Setting |
Description |
|---|---|
Category name |
List of the added Application Control categories. |
Add |
Clicking this button launches the Kaspersky Security Center Category Creation Wizard. Follow the instructions of the Wizard. |
Edit |
Clicking this button opens the category properties window, where you can change the category settings. |
Principal name window
In this window, you can configure the settings for the created Application Control rule.
Adding the Application Control rule
Setting |
Description |
|---|---|
Principal type |
Principal type to which the rule applies: User or Group. |
User or group name |
Name of the user or user group to which the Application Control rule applies. |
Access |
Access type: Allow access or Block access. |
Anti-Cryptor
Anti-Cryptor allows you to protect your files in local directories with network access by SMB/NFS protocols from remote malicious encryption.
While the Anti-Cryptor component is running, Kaspersky Endpoint Security scans remote devices calls to access the files located in the shared network directories of the protected device. If the application considers a remote device actions on network file resources to be malicious encrypting, this device is added to a list of untrusted devices and loses access to the shared network directories. The application does not consider activity to be malicious encryption if it is detected in the directories excluded from the protection scope of the Anti-Cryptor component.
This feature is not supported in the KESL container.
To use the component, a license that includes the corresponding function is required.
For the Anti-Cryptor component to operate correctly, at least one of the services (Samba or NFS) must be installed in the operating system. For the NFS service, the rpcbind package must be installed.
Anti-Cryptor operates correctly with the SMB1, SMB2, SMB3, NFS3, TCP/UDP, and IP/IPv6 protocols. Working with NFS2 and NFS4 protocols is not supported. It is recommended to configure your server settings so that the NFS2 and NFS4 protocols cannot be used to mount resources.
Anti-Cryptor does not block access to network file resources until the device activity is identified as malicious. So, at least one file will be encrypted before the application detects malicious activity.
Anti-Cryptor settings
Setting |
Description |
|---|---|
Enable Anti-Cryptor |
This check box enables or disables the protection of files in local directories with network access by SMB/NFS protocols from remote malicious encryption. The check box is selected by default. |
Protection scopes |
This group of settings contains buttons that open the windows where you can configure scan scopes and protection settings. |
Exclusions |
This group of settings contains the Configure button. Clicking this button opens the Exclusion scopes window. In this window, you can define the list of scopes to be excluded from scans. |
Exclusions by mask |
This group of settings contains the Configure button, which opens the Exclusions by mask window. In this window, you can configure the exclusion of objects from scans by name mask. |
Scan scopes window
The table contains the scan scopes. The application will scan files and directories located in the paths specified in the table. By default, the table contains one scan scope that includes all directories of the local file system.
Scan scope settings
Setting |
Description |
|---|---|
Scope name |
Scan scope name. |
Path |
Path to the directory that the application scans. |
Status |
The status indicates whether the application scans this scope. |
You can add, edit, delete, move up, and move down items in the table.
Kaspersky Endpoint Security scans objects in the specified scopes in the order they appear in the list of scopes. If necessary, place the subdirectory higher in the list than its parent directory, to configure security settings for a subdirectory that are different from the security settings of the parent directory.
Page top
<New scan scope> window
In this window, you can add or configure protection scope for the Anti-Cryptor component.
Protection scope settings
Setting |
Description |
|---|---|
Scope name |
Field for entering the protection scope name. This name will be displayed in the table in the Scan scopes window. The entry field must not be blank. |
Use this scope |
This check box enables or disables scans of this scope by the application. If this check box is selected, the application processes this protection scope during the component operation. If this check box is cleared, the application does not process this protection scope during the component operation. You can later include this scope in the component operation settings by selecting the check box. The check box is selected by default. |
File system, access protocol, and path |
The settings block lets you set the scan scope. You can select the file system type in the drop-down list of file systems:
|
If Shared is selected in the drop-down list of file systems, you can select the remote access protocol in the drop-down list on the right:
|
|
If Local is selected in the drop-down list of file systems, then in the input field you can enter a path to a directory that you want to add to the protection scope. You can use masks to specify the path. The field must not be blank. |
|
Masks |
This list contains name masks of the objects that the application scans during operation of the Anti-Cryptor component. By default the list contains the * mask (all objects). |
Protection settings window
Protection settings
Setting |
Description |
|---|---|
Enable untrusted hosts blocking |
This check box enables or disables untrusted hosts blocking. The check box is selected by default. |
Block the untrusted device for (min.) |
In this field you can specify the untrusted device blocking duration in minutes. After the specified time, Kaspersky Endpoint Security removes the untrusted devices from the list of blocked devices. The access of the host to network file resources is restored automatically, after it is deleted from the list of untrusted hosts. If a compromised host is blocked and you change this setting value, the blocking time for this host will not change. The blocking time is not a dynamic value, and it is calculated at the moment of blocking. Available values: integer from 1 to 4294967295. Default value: 30. |
Exclusion scopes window
This table contains scan exclusion scopes. The application does not scan files and directories located at the paths specified in the table. By default, the table is empty.
Exclusion scope settings
Setting |
Description |
|---|---|
Exclusion scope name |
Exclusion scope name. |
Path |
Path to the directory excluded from scan. |
Status |
The status indicates whether the application uses this exclusion. |
You can add, edit, and delete items in the table.
Page top
<Exclusion scope name> window
In this window, you can add and configure scan exclusion scopes.
Exclusion scope settings
Setting |
Description |
|---|---|
Exclusion scope name |
Field for entering the exclusion scope name. This name will be displayed in the table in the Exclusion scopes window. The entry field must not be blank. |
Use this scope |
The check box enables or disables exclusion of the scope from scan when the application is running. If this check box is selected, the application excludes this area during scans. If this check box is cleared, the application includes this area in the scan scope. You can later exclude this scope by selecting the check box. The check box is selected by default. |
File system, access protocol, and path |
The settings block lets you set the exclusion scope. In the drop-down list of file systems, you can select the type of file system of the directories to be excluded from scans:
|
If Mounted is selected in the drop-down list of file systems, you can select the remote access protocol in the drop-down list on the right:
|
|
If Local is selected in the drop-down list of file systems, then in the input field you can enter a path to a directory that you want add to the exclusion scope. The / path is specified by default. The application excludes all directories of the local file system from scan. |
|
Filesystem name |
The field for entering the name of the file system where the directories that you want to add to the exclusion scope are located. The field is available if the Mounted type is selected in the drop-down list of file systems and the Custom item is selected in the drop-down list on the right. |
Masks |
The list contains name masks of the objects that the application excludes from scan. Masks are only applied to objects in the directory specified in the path field. By default the list contains the * mask (all objects). |
Exclusions by mask window
You can configure the exclusion of objects from scans based on name mask. The application will not scan files whose names contain the specified mask. By default, the list of masks is empty.
You can add, edit, or delete masks.
Page top
System Integrity Monitoring
System Integrity Monitoring is designed to track the actions performed on files and directories in the monitoring scope specified in the component operation settings. You can use System Integrity Monitoring to track the file changes that may indicate a security breach on a protected device.
To use the component, a license that includes the corresponding function is required.
This feature is not supported in the KESL container.
System Integrity Monitoring settings
Setting |
Description |
|---|---|
Enable System Integrity Monitoring |
This check box enables or disables System Integrity Monitoring. This check box is cleared by default. |
Monitoring scopes |
The group of settings contains the Configure button. Clicking this button opens the Scan scopes window. |
Monitoring exclusions |
This group of settings contains the Configure button. Clicking this button opens the Exclusion scopes window. |
Exclusions by mask |
This group of settings contains the Configure button, which opens the Exclusions by mask window. |
Scan scopes window
The table contains monitoring scopes for the System Integrity Monitoring component. The application monitors files and directories located in the paths specified in the table. By default, the table contains one monitoring scope, Kaspersky internal objects (/opt/kaspersky/kesl/).
Monitoring scope settings
Setting |
Description |
|---|---|
Scope name |
Monitoring scope name. |
Path |
Path to the directory that the application protects. |
Status |
The status indicates whether the application scans this scope. |
You can add, edit, delete, move up, and move down items in the table.
Kaspersky Endpoint Security scans objects in the specified scopes, in the order they appear in the list of scopes. If necessary, place the subdirectory higher in the list than its parent directory, to configure security settings for a subdirectory that are different from the security settings of the parent directory.
Page top
<New scan scope> window
In this window, you can add and configure monitoring scopes for the System Integrity Monitoring component.
Monitoring scope settings
Setting |
Description |
|---|---|
Scan scope name |
Field for entering the monitoring scope name. This name will be displayed in the table in the Scan scopes window. The entry field must not be blank. |
Use this scope |
This check box enables or disables scans of this scope by the application. If this check box is selected, the application controls this monitoring scope during the application's operation. If this check box is cleared, the application does not control this monitoring scope during the operation. You can later include this scope in the component settings by selecting the check box. The check box is selected by default. |
File system, access protocol, and path |
Entry field for the path to the local directory that you want to include in the monitoring scope. The field must not be blank. The default path is /opt/kaspersky/kesl. |
Masks |
The list contains name masks for the objects that the application scans. By default the list contains the * mask (all objects). |
Exclusion scopes window
The table contains monitoring exclusion scopes for the System Integrity Monitoring component. The application does not scan files and directories located at the paths specified in the table. By default, the table is empty.
Monitoring exclusion scope settings
Setting |
Description |
|---|---|
Exclusion scope name |
Exclusion scope name. |
Path |
Path to the directory excluded from monitoring. |
Status |
Indicates whether the application excludes this scope from monitoring during the component operation. |
You can add, edit, and delete items in the table.
Page top
<Exclusion scope name> window
In this window, you can add or configure the monitoring exclusion scope for the System Integrity Monitoring component.
Monitoring exclusion scope settings
Setting |
Description |
|---|---|
Exclusion scope name |
Field for entering the exclusion scope name. This name will be displayed in the table in the Exclusion scopes window. The entry field must not be blank. |
Use this scope |
The check box enables or disables the exclusion of the scope from monitoring when the application is running. If this check box is selected, the application excludes this scope from monitoring during the component operation. If this check box is cleared, the application monitors this scope during the component operation. You can later exclude this scope from monitoring by selecting the check box. The check box is selected by default. |
File system, access protocol, and path |
Entry field for the path to the local directory that you want to add to the exclusion scope. The field must not be blank. The / path is specified by default. The application excludes all directories of the local file system from scan. |
Masks |
The list contains name masks of the objects that the application excludes from the monitoring. By default the list contains the * mask (all objects). |
Exclusions by mask window
You can configure the exclusion of objects from monitoring based on name masks. The application does not scan the files with the names containing the specified masks. By default, the list of masks is empty.
You can add, edit, or delete masks.
Page top
Device Control
When the Device Control component is enabled, Kaspersky Endpoint Security manages user access to devices that are installed or connected to the computer (for example, hard drives, smart card readers, or Wi-Fi modules). This lets you protect the computer from infection when such devices are connected, and prevent data loss or leaks. Device Control manages user access to devices using the access rules.
This feature is not supported in the KESL container.
When a device blocked by Device Control is connected to the computer, the application blocks user access to this device and shows a notification.
Device Control settings
Setting |
Description |
|---|---|
Enable scanning of removable drives when connected |
This check box enables or disables the scanning of removable drives when they are connected to the computer. The check box is selected by default. |
Trusted devices |
This group of settings contains the Configure button. Clicking this button opens the Trusted devices window. In this window, you can add devices to a list of trusted devices by device ID or by selecting them from the list of devices existing on the computer. |
Device Control settings |
This group of settings contains buttons that open windows where you can configure access rules for various types of devices as well as connection bus access rules. |
Trusted devices window
The table contains a list of trusted devices. The table is empty by default.
Trusted device settings
Setting |
Description |
|---|---|
Device ID |
ID of a trusted device. |
Device name |
Name of a trusted device. |
Device type |
Trusted device type (for example, Hard drive or Smart card reader). |
Host name |
Name of the client device the trusted device is connected to. |
Comment |
Comment related to a trusted device. |
You can add a device to the list of trusted devices by the device ID or by selecting the required device in the list of devices detected on the user device.
You can edit and delete trusted devices in the table.
Page top
Trusted device window
In this window, you can add a device to the list of trusted devices by its identifier.
Adding device by ID
Setting |
Description |
|---|---|
Device ID |
The field for entering the identifier of the device that you want to add to the list of trusted devices. |
Find on hosts |
Clicking this button displays the settings of the device found by the specified identifier if the device is connected to the computer. The button is available if the Device ID field is not empty. |
Device settings |
This section contains the following information about the device:
|
Comment |
The field for entering a comment for the device that you want to add to the list of trusted devices (optional). |
Devices on host window
In this window you can add a device to the list of trusted devices by selecting it in the list of existing devices.
Information about existing devices is available only if there is an active policy and there has been synchronization with the Network Agent (performs within the limits specified in the Network Agent policy, 15 minutes by default). If you create a new policy and there are no other active ones, the list will be empty.
Adding device from list
Setting |
Description |
|---|---|
Host name |
Field for entering the name or the name mask for the managed computer for which you want to find connected devices. The default mask is * – all computers. |
Device type |
In this drop-down list, you can select the type of connected devices to search for (for example, Hard drives or Smart card readers). The All devices option is selected by default. |
Device ID |
Field for entering the identifier or identifier mask for the device you want to find. The default mask is * – all devices. |
Find on hosts |
When you click this button, the application searches for devices with the specified settings on the computer. The search results are displayed in the table below. |
Device type window
In this window, you can configure access rule for various types of devices.
Access rules for device types
Setting |
Description |
|---|---|
Device type |
Device type (for example, Hard drives, Printers). |
Access |
Device access type. Right-clicking opens a context menu where you can select one of the following options:
|
In the Configuring device access rule window, which opens by double-clicking the device type, you can configure access rules and access schedules for devices to which access with restrictions is allowed.
Page top
Configuring device access rule window
In this window, you can configure access rules and schedules for the selected device type.
This window is opened by double-clicking the device type in the Device type window.
Device access rules and schedules
Setting |
Description |
|---|---|
Users and/or groups of users |
The list contains users and groups for which you can configure access schedule. By default, the table contains the \Everyone item (all users). You can add, edit, and delete users or user groups. |
Rules for the selected user group by access schedules |
This table contains access schedules for users and user groups. It consists of the following columns:
|
Schedule for access to devices window
In this window, you can configure the device access schedule. You can configure schedules only for hard drives, removable drives, floppy disks, and CD/DVD drives.
In the General settings->Application settings section, if the Block access to files during scans check box is cleared, then it is not possible to block access to devices using a device access schedule.
Schedule for access to devices
Setting |
Description |
|---|---|
Name |
Entry field for the access schedule name. |
Time intervals |
The table where you can select time intervals for the schedule (days and hours). Intervals highlighted in green are included to the schedule. To exclude an interval from the schedule, click the corresponding cells. Intervals excluded from the schedule are highlighted in gray. By default, all intervals (24/7) are included to the schedule. |
Connection buses window
In this window, you can configure access rules for connection buses.
Connection rules for buses
Setting |
Description |
|---|---|
Device connection bus |
Connection bus used to connect the device to the client device:
|
Access |
Connection bus access rule. Right-clicking opens a context menu where you can select one of the following options:
|
Behavior Detection
By default, the Behavior Detection component starts when Kaspersky Endpoint Security starts and monitors malicious activity in the operating system. If malicious activity is detected, Kaspersky Endpoint Security terminates that process.
This feature is not supported in the KESL container.
Behavior Detection component settings
Setting |
Description |
|---|---|
Enable Behavior Detection |
This check box enables or disables the Behavior Detection component. The check box is selected by default. |
Task management
You can configure the ability to view and manage Kaspersky Endpoint Security tasks on managed devices.
Task management settings
Setting |
Description |
|---|---|
Allow users to view and manage local tasks |
This check box allows or prohibits the users from viewing local tasks created in Kaspersky Security Center and managing these tasks on managed devices. This check box is cleared by default. |
Allow users to view and manage group tasks |
The check box allows or prohibits the users from viewing tasks created in Kaspersky Security Center and managing these tasks on managed devices. This check box is cleared by default. |
Removable Drives Scan
When the Removable Drives Scan task is running, the application scans the removable device and its boot sectors for viruses and other malware. The following removable drives are scanned: CDs, DVDs, Blu-ray discs, flash drives (including USB modems), external hard drives, and floppy disks.
This feature is not supported in the KESL container.
Removable Drives Scan task settings
Setting |
Description |
|---|---|
Enable removable drives scan when connected to the device |
This check box enables or disables the scan of removable drives when they are connected to the user device. This check box is cleared by default. |
Action when a removable drive connects |
In the drop-down list, you can select an action to be performed by the application upon connection of removable drives to the user device:
|
Action on a CD / DVD drive connection |
In the drop-down list, you can select an action to be performed by the application upon connection of CD/DVD drives and Blu-ray discs to the user device:
|
Block access to the removable drive while scanning |
This check box enables or disables blocking of files on the connected drive during execution of the Removable Drives Scan task. This check box is cleared by default. |
Proxy server settings
You can configure proxy server settings if the users of the client devices use a proxy server to connect to the internet. Kaspersky Endpoint Security may use a proxy server to connect to Kaspersky servers, for example, when updating application databases and modules or when communicating with Kaspersky Security Network and Kaspersky Endpoint Detection and Response (KATA).
Proxy server settings
Setting |
Description |
|---|---|
Do not use proxy server |
If this option is selected, Kaspersky Endpoint Security does not use a proxy server. |
Use specified proxy server settings |
If this option is selected, Kaspersky Endpoint Security uses the specified proxy server settings. |
Address and port |
Fields for entering the proxy server's IP address or domain name as well as its port. Default port: 3128. The fields are available if the Use specified proxy server settings option is selected. |
Use user name and password |
This check box enables or disables proxy server authentication using a user name and password. This check box is available if the Use specified proxy server settings option is selected. This check box is cleared by default. When connecting via an HTTP proxy, we recommend to use a separate account that is not used to sign in to other systems. An HTTP proxy uses an insecure connection, and the account may be compromised. |
User name |
Entry field for the user name used for proxy server authentication. This entry field is available if the Use user name and password check box is selected. |
Password |
Entry field for entering the user password for proxy server authentication. It is recommended to make sure that the password complexity and anti-bruteforce mechanisms ensure that the password cannot be guessed within 6 months. Clicking the Show button causes the user's password to be displayed in clear text in the Password field. By default, the user password is hidden and is displayed as asterisks. The entry field and button are available if the Use user name and password check box is selected. |
Use Kaspersky Security Center as a proxy server for the application activation |
This check box enables or disables use of Kaspersky Security Center as a proxy server for application activation. If this check box is selected, Kaspersky Endpoint Security uses Kaspersky Security Center as a proxy server for the application activation. This check box is cleared by default. |
Application settings
You can configure the general settings of Kaspersky Endpoint Security.
General application settings
Setting |
Description |
|---|---|
Detect legitimate applications that may be used by a hacker to harm devices or data |
This check box enables or disables the detection of legitimate software that could be used by hackers to harm computers or data of users. This check box is cleared by default. |
Event notifications |
This group of settings contains the Configure button. Clicking this button opens the Notification settings window. In this window, you can select the events for which the application logs notifications to the operating system log (syslog). Select the check box next to each type of event for which you want to send notifications. You can also select the check box next to the importance level of events (Critical events, Informational messages, Functional failures, and Warnings). In this case, the check boxes will be automatically selected next to each type of event that belongs to the group of the selected importance level. All check boxes are cleared by default. |
Block files during scan |
The checkbox enables or disables blocking files in which threats were detected during scans by the File Threat Protection component. This setting also affects the operation of the Anti-Cryptor and Device Control components and the Removable Drive Scan task. The check box is selected by default. |
Container Scan settings
You can configure the settings for namespace and container scan by Kaspersky Endpoint Security.
The application does not scan namespaces and containers unless components for working with containers and namespaces are installed in the operating system. Moreover, in the device properties in the Applications section, in the application properties in the Components section for container scans, the Stopped status is displayed.
Container Scan settings
Setting |
Description |
|---|---|
Enable namespace and container scan |
This check box enables or disables namespace and container scan. The check box is selected by default. |
Action with container upon threat detection |
In the drop-down list, you can select the action to be performed on a container when an infected object is detected:
This setting is available when using the application under a license that supports this function. |
Container Scan settings |
The group of settings contains the Configure button. Clicking this button opens the Container Scan settings window. |
Container Scan settings window
In this window, you can configure the settings for container scan by Kaspersky Endpoint Security.
The application does not scan namespaces and containers unless components for working with containers and namespaces are installed in the operating system. Moreover, in the device properties in the Applications section, in the application properties in the Components section for container scans, the Stopped status is displayed.
Container Scan settings
Setting |
Description |
|---|---|
Use Docker |
This check box enables or disables the use of the Docker environment. The check box is selected by default. |
Docker socket path |
Entry field for the path or URI (Uniform Resource Identifier) of the Docker socket. The default value is /var/run/docker.sock. |
Use CRI-O |
The check box enables or disables the use of the CRI-O environment. The check box is selected by default. |
File path |
Entry field for the path to CRI-O configuration file. Default value: /etc/crio/crio.conf. |
Use Podman |
The check box enables or disables the use of the Podman utility. The check box is selected by default. |
File path |
Entry field for the path to the Podman utility executable file. Default value: /usr/bin/podman. |
Root folder |
Entry field for the path to the root directory of the container storage. |
Use runc |
The check box enables or disables the use of the runc utility. The check box is selected by default. |
File path |
Entry field for the path to the runc utility executable file. Default value: /usr/bin/runc. |
Root folder |
Entry field for the path to the root directory of the container state storage. Default value: /run/runc-ctrs. |
Managed Detection and Response
Integration between Kaspersky Endpoint Security and Kaspersky Managed Detection and Response enables continuous search, detection and elimination of threats aimed at your organization.
When interacting with Kaspersky Managed Detection and Response, Kaspersky Endpoint Security allows you to perform the following actions:
- Send telemetry data to Kaspersky Managed Detection and Response for threat detection.
- Carry out Kaspersky Managed Detection and Response commands for providing security features.
Managed Detection and Response settings
Setting
Description
Enable Managed Detection and Response
The check box enables integration between Kaspersky Endpoint Security and Kaspersky Managed Detection and Response.
This check box is cleared by default.
Download
Clicking this button opens a standard Microsoft Windows window, where you can select the BLOB configuration file.
Network settings
You can configure the settings of encrypted connection scans. These settings apply to the Web Threat Protection and Network Threat Protection components.
Network settings
Setting |
Description |
|---|---|
Enable encrypted connection scans |
This check box enables or disables encrypted connection scans. The check box is selected by default. |
Action when an untrusted certificate is encountered |
In the drop-down list, you can select an action to be performed by the application upon detection of an untrusted certificate:
|
Action on an encrypted connection scan error |
In this drop-down list, you can select the action to be performed by the application when an error occurs during an encrypted connection scan:
|
Certificate verification policy |
In the drop-down list, you can select how the application verifies certificates:
|
Exclusions |
This group of settings contains the Configure button. Clicking this button opens the Exclusion scopes window. In this window, you can configure the list of trusted domain names. |
Network ports settings |
This group of settings contains the Configure button. Clicking this button opens the Network ports window. |
Exclusions window
This list contains the domain names and domain name masks that will be excluded from encrypted connection scans. By default, the list is empty.
You can add, edit and remove domains from the list of trusted domains.
Page top
Network ports window
Network ports settings
Setting |
Description |
|---|---|
Monitor all network ports |
If this option is selected, the application monitors all network ports. |
Monitor specified ports only |
If this option is selected, the application monitors only the network ports specified in the table. This option is selected by default. |
Network ports settings |
This table contains network ports monitored by the application if the Monitor specified ports only option is selected. The table contains two columns:
By default, the table displays a list of network ports that are usually used for the transmission of mail and network traffic. The list of network ports is included in the application package. |
Global exclusions
Global exclusions allow you to set the mount points that will be excluded from the scan scope for the application components that use the file operation interceptor (File Threat Protection and Anti-Cryptor).
Global exclusion settings
Setting |
Description |
|---|---|
Excluded mount points |
This group of settings contains the Configure button. Clicking this button opens the Excluded mount points window. |
Excluded mount points window
The list contains paths to excluded mount points. By default, the list is empty.
You can add, edit, and delete items in the list.
Page top
Mount point path window
Mount point settings
Setting |
Description |
|---|---|
File system, access protocol, and path |
The settings block lets you set the location of the mount point. In the drop-down list of file systems, you can select the type of file system where the directories that you want to add to scan exclusions are located:
|
If Mounted is selected in the drop-down list of file systems, you can select the remote access protocol in the drop-down list on the right:
|
|
If Local is selected in the drop-down list of file systems, then in the input field you can enter a path to a mount point that you want to exclude from file operation interception. You can use masks to specify the path. |
|
Filesystem name |
The field for entering the name of the file system where the directories that you to exclude from file operation interception are located. The field is available if the Mounted type is selected in the drop-down list of file systems and the Custom item is selected in the drop-down list on the right. |
Storage settings
The Storage is a list of backup copies of files that have been deleted or modified during the disinfection process. A backup copy is a copy of a file created before the first attempt to disinfect or delete this file. Backup copies of files are stored in a special format and do not pose a threat. By default, the Storage is located in the /var/opt/kaspersky/kesl/common/objects-backup/ directory. Files in the Storage may contain personal data. Root privileges are required to access files in the Storage.
Storage settings
Setting |
Description |
|---|---|
Notify about unprocessed files |
This check box enables or disables sending notifications about the files, which cannot be processed during the scan, to the Administration Server. The check box is selected by default. |
Notify about installed devices |
This check box enables or disables the sending of information about the devices installed on the managed client device to the Administration Server. The check box is selected by default. |
Notify about files in the Storage |
This check box enables or disables sending of notifications about the files in the Storage to the Administration Server. The check box is selected by default. |
Store objects no longer than (days) |
The checkbox enables or disables limiting the retention period for objects in Storage to the specified time interval. Available values: 0–3653. Default value: 90. If 0 is specified, the period for storing objects in the Storage is unlimited. |
Maximum size of Storage (MB) |
The checkbox enables or disables limiting the maximum Storage size to the specified value (in megabytes). Available values: 0–999999. Default value: 0 (the size of Storage is unlimited). |
Managing tasks in the Administration Console
You can create the following tasks for working with Kaspersky Endpoint Security using Kaspersky Security Center Administration Console:
- Local tasks that are configured for an individual device
- Group tasks that are configured for devices within administration groups
- Tasks for sets of devices that do not belong to administration groups
The tasks for the sets of devices are performed only on the devices that are specified in the task settings. If new devices are added to the device selection for which the task is created, this task is not applied to the new devices. To apply the task to these computers, you must create a new task or edit the settings of the existing task.
You can create any number of group tasks, tasks for a set of devices, or local tasks.
The set and default values of the task settings may differ depending on the license type. Configuration of some settings is not supported in the KESL container.
You can perform the following actions with tasks:
- Start, stop, pause, and resume tasks.
The Update task cannot be paused or resumed, it can only be started or stopped.
- Create new tasks.
- Edit task settings.
If the user account which is used to access the Administration Server does not have permissions to edit the settings of certain functional scopes, the settings of these functional scopes are not available for editing. Configuration of some settings is not supported in the KESL container.
- Compare task versions in the Revision history section of the task properties window.
General information about the tasks in the Administration Console is provided in Kaspersky Security Center documentation.
Creating a local task
To create a local task:
- Open the Administration Console of Kaspersky Security Center.
- In the Managed devices folder, open the folder with the name of the administration group that includes the required device.
- In the workspace, select the Devices tab.
- In the list of managed devices, select the device for which you want to create a local task. In the device context menu, select Properties.
- In the Properties: <Device name> window, select the Task section.
- Click Add.
The Task Wizard starts.
- Follow the Task wizard instructions.
Creating a group task
To create a group task:
- Open the Administration Console of Kaspersky Security Center.
- In the Administration Console tree, select the Tasks folder.
- In the workspace, click the New task button.
The Task Wizard starts.
- Follow the Task wizard instructions.
Creating a task for device sets
To create a task for a set of devices:
- Open the Administration Console of Kaspersky Security Center.
- In the Administration Console tree, select the Tasks folder.
- In the workspace, click the New task button.
The Task Wizard starts.
- Follow the Task wizard instructions.
- In the Select devices to which the task will be assigned window of the Wizard, click the Assign task to a device selection button.
- In the next window of the Wizard, click the Browse button.
The Device selection window will open.
- Select the required devices and click OK in the Device selection window.
- Click Next.
- Follow the Task wizard instructions.
Manually starting, stopping, pausing, and resuming a task
If Kaspersky Endpoint Security is running on the client device, you can start, stop, pause, and resume the task on this client device using Kaspersky Security Center. When Kaspersky Endpoint Security is paused, running tasks are paused as well, and it becomes impossible to start, stop, pause, or resume a task using Kaspersky Security Center.
To start, stop, pause, or resume a local task:
- Open the Administration Console of Kaspersky Security Center.
- In the Managed devices folder, open the folder with the name of the administration group that includes the required device.
- In the workspace, select the Devices tab.
- In the list of managed devices, select the device on which you want to start, stop, pause, or resume a local task.
- In the device context menu, select Properties.
- In the Properties: <Device name> window, select the Task section.
A list of local tasks appears in the right part of the window.
- Select a local task that you want to start, stop, pause, or resume.
- Do one of the following:
- In the context menu of the local task, select Start / Stop / Pause / Resume.
- To start or stop a local task, click the / button to the right of the local tasks list.
- Click the Properties button under the list of local tasks and in the Properties: <Local task name> window that opens, on the General tab, click the Start / Stop / Pause / Resume button.
To start, stop, pause, or resume a group task:
- Open the Administration Console of Kaspersky Security Center.
- In the Managed devices folder, select the folder with the name of the administration group for which you want to start, stop, pause, or resume a group task.
- In the workspace, select the Tasks tab.
A list of group tasks appears in the right part of the window.
- Select a group task that you want to start, stop, pause, or resume.
- In the context menu of the group task, select Start / Stop / Pause / Resume.
Editing local task settings
To edit the local task settings:
- Open the Administration Console of Kaspersky Security Center.
- In the Managed devices folder, open the folder with the name of the administration group that includes the required device.
- In the workspace, select the Devices tab.
- In the list of managed devices, select the device for which you want to configure the application settings. In the device context menu, select Properties.
- In the Properties: <Device name> window, select the Task section.
A list of local tasks appears in the right part of the window.
- Select the required local task and in the context menu of the task, select Properties.
The Properties: <Local task name> window will open.
- Edit the local task settings.
- In the Properties: <Local task name> window, click OK to save the changes.
The number and the contents of the sections depend on the type of the selected task. The contents of the General, Notifications, Schedule, and Revision history sections are identical for all tasks. For a detailed description of these sections, please refer to the Kaspersky Security Center documentation.
Editing group task settings
to edit the group task settings:
- Open the Administration Console of Kaspersky Security Center.
- In the Managed devices folder, open the folder with the name of the required administration group.
- In the workspace, select the Tasks tab.
- In the list of group tasks, select the required group task and select Properties in the task context menu.
The Properties: <Group task name> window will open.
- Edit the group task settings.
- In the Properties: <Group task name> window, click OK to save the changes.
The number and the contents of the sections depend on the type of the selected task. The contents of the General, Notifications, Schedule, and Revision history sections are identical for all tasks. For a detailed description of these sections, please refer to the Kaspersky Security Center documentation.
Page top
Editing device sets task settings
To edit the task settings for a set of devices:
- Open the Administration Console of Kaspersky Security Center.
- Select the Tasks folder.
- In the Tasks folder, in the list of tasks, select the task for the set of devices. To change the settings of this task, select Properties from the task context menu.
The Properties: <Task name> window will open.
- Edit the task settings for the set of devices.
- In the Properties: <Task name> window click OK.
The number and the contents of the sections depend on the type of the selected task. The contents of the General, Notifications, Schedule, and Revision history sections are identical for all tasks. For a detailed description of these sections, please refer to the Kaspersky Security Center documentation.
Page top
Task settings
The following types of tasks are provided for managing Kaspersky Endpoint Security by means of Kaspersky Security Center:
- Virus Scan. During the task execution, the application scans the device areas that are specified in the task settings for viruses and other malware.
- Add Key. During the task execution, the application adds a key, including a reserve one, to activate the application.
- Inventory Scan. During the task execution, the application receives information about all executable files stored on the devices.
- Update. During the task execution, the application updates the databases in accordance with the configured update settings.
- Rollback. During the task execution, the application rolls back the last database update.
- Critical Areas Scan. During the task execution, the application scans boot sectors, startup objects, process memory, and kernel memory.
- Container Scan. During the task execution, the application scans containers and images for viruses and other malware.
- System Integrity Check. During the task execution, the application determines changes of each object by comparing the current state of the monitored object to its original state, which was previously established as a baseline.
The set and default values of the task settings may differ depending on the license type. Configuration of some settings is not supported in the KESL container.
Virus scan
Virus Scan is a one-time full or custom scan of files on the device performed by the application. The application can perform several virus scan tasks at the same time.
By default, the application creates one standard virus scan task—full scan. The application scans all the objects located on the local drives of the device, as well as all mounted and shared objects that are accessed via the Samba and NFS protocols with the recommended security settings.
During a full disk scan, the processor is busy. It is recommended to run the full scan task when the business is idle.
You can also create virus scan user tasks.
Virus Scan task settings
Setting |
Description |
|---|---|
Scan |
This group of settings contains buttons that open windows where you can configure the scan scopes, scan scope settings, and scan settings. |
Task priority |
In this group of settings you can select the scan task priority:
|
Actions for infected objects |
This group of settings contains the Configure button. Clicking this button opens the Actions for infected objects window, where you can configure the actions that the application performs on detected infected objects. |
In the Exclusions section, you can also configure exclusion scopes as well as exclusions by mask and by the threat name for the Virus Scan task.
Scan scopes window
The table contains the scan scopes. The application will scan files and directories located in the paths specified in the table. By default, the table contains one scan scope that includes all directories of the local file system.
Scan scope settings
Setting |
Description |
|---|---|
Scope name |
Scan scope name. |
Path |
Path to the directory that the application scans. |
Status |
The status indicates whether the application scans this scope. |
You can add, edit, delete, move up, and move down items in the table.
Kaspersky Endpoint Security scans objects in the specified scopes in the order they appear in the list of scopes. If necessary, place the subdirectory higher in the list than its parent directory, to configure security settings for a subdirectory that are different from the security settings of the parent directory.
Page top
<Scan scope name> window
In this window, you can add and configure scan scopes.
Scan scope settings
Setting |
Description |
|---|---|
Scan scope name |
Field for entering the scan scope name. This name will be displayed in the table in the Scan scopes window. The entry field must not be blank. |
Use this scope |
This check box enables or disables scans of this scope by the application. If this check box is selected, the application processes this scan scope. If this check box is cleared, the application does not process this scan scope. You can later include this scope in the component settings by selecting the check box. The check box is selected by default. |
File system, access protocol, and path |
The settings block lets you set the scan scope. You can select the file system type in the drop-down list of file systems:
|
If Shared or Mounted is selected in the drop-down list of file systems, you can select the remote access protocol in the drop-down list on the right:
|
|
If Local is selected in the drop-down list of file systems, then in the input field you can enter a path to a directory that you want to add to the scan scope. The / path is specified by default – the application scans all directories of the local file system. If the Local type is selected in the drop-down list of file systems, and the path is not specified, the application scans all directories of the local file system. |
|
Filesystem name |
The field for entering the name of the file system where the directories that you want to add to the scan scope are located. The field is available if the Mounted type is selected in the drop-down list of file systems and the Custom item is selected in the drop-down list on the right. |
Masks |
The list contains name masks for the objects that the application scans. By default the list contains the * mask (all objects). |
Scan scope settings window
In this window, you can configure the scan settings for the Virus Scan task. The application allows you to scan files, boot sectors, device memory, and startup objects.
Scan scope settings
Setting |
Description |
|---|---|
Scan files |
This check box enables or disables file scans. If the check box is selected, the application scans the files. If the check box is cleared, the application does not scan the files. The check box is selected by default. |
Scan boot sectors |
This check box enables or disables boot sector scans. If the check box is selected, the application scans the boot sectors. If the check box is cleared, the application does not scan the boot sectors. This check box is cleared by default. |
Scan computer memory |
This check box enables or disables device memory scan. If this check box is selected, the application scans process memory and kernel memory. If this check box is cleared, the application does not scan process memory and kernel memory. This check box is cleared by default. |
Scan startup objects |
This check box enables or disables startup object scans. If the check box is selected, the application scans startup objects. If the check box is cleared, the application does not scan startup objects. This check box is cleared by default. |
Devices to scan |
This group of settings contains the Configure button. Clicking this button opens the Scan scopes window, where you can specify the devices whose boot sectors must be scanned. |
Scan scopes window
The table contains name masks of the devices, whose boot sectors the application must scan. By default, the table contains the /** device name mask (all devices).
You can add, edit, and delete items in the table.
Page top
Scan settings window
In this window, you can configure the file scan settings for the task.
Scan settings
Setting |
Description |
|---|---|
Scan archives |
This check box enables or disables scan of archives. If the check box is selected, the application scans the archives. To scan an archive, the application has to unpack it first, which may slow down scanning. You can reduce the archive scan time by configuring the Skip object if scan takes longer than (sec) and Skip objects larger than (MB) settings in the General scan settings section. If the check box is cleared, the application does not scan the archives. The check box is selected by default. |
Scan SFX archives |
This check box enables or disables self-extracting archive scans. Self-extracting archives are the archives that contain an executable extraction module. If the check box is selected, the application scans self-extracting archives. If the check box is cleared, the application does not scan self-extracting archives. This check box is available if the Scan archives check box is unchecked. The check box is selected by default. |
Scan mail databases |
This check box enables or disables scans of mail databases of Microsoft Outlook, Outlook Express, The Bat!, and other mail applications. If the check box is selected, the application scans mail database files. If the check box is cleared, the application does not scan mail database files. This check box is cleared by default. |
Scan mail format files |
This check box enables or disables scan of files of plain-text email messages. If this check box is selected, the application scans plain-text messages. If this check box is cleared, the application does not scan plain-text messages. This check box is cleared by default. |
Skip object if scan takes longer than (sec) |
A field for specifying the maximum time to scan an object, in seconds. After the specified time, the application stops scanning the object. Available values: 0–9999. If the value is set to 0, the scan time is unlimited. Default value: 0. |
Skip objects larger than (MB) |
The field for specifying the maximum size of an archive to scan, in megabytes. Available values: 0–999999. If the value is set to 0, the application scans objects of any size. Default value: 0. |
Log clean objects |
This check box enables or disables the logging of ObjectProcessed type events. If this check box is selected, the application logs events of the ObjectProcessed type for all scanned objects. If this check box is cleared, the application does not log events of the ObjectProcessed type for any scanned object. This check box is cleared by default. |
Log unprocessed objects |
This check box enables or disables the logging ObjectNotProcessed type events if a file cannot be processed during a scan. If this check box is selected, the application logs the events of the ObjectNotProcessed type. If this check box is cleared, the application does not log the events of the ObjectNotProcessed type. This check box is cleared by default. |
Log packed objects |
This check box enables or disables the logging of PackedObjectDetected type events for all packed objects that are detected. If this check box is selected, the application logs the events of the PackedObjectDetected type. If this check box is cleared, the application does not log the events of the PackedObjectDetected type. This check box is cleared by default. |
Use iChecker technology |
This check box enables or disables scan of only new and modified since the last scan files. If the check box is selected, the application scans only new files or the files modified since the last scan. If the check box is cleared, the application scans the files regardless of the creation or modification date. The check box is selected by default. |
Use heuristic analysis |
This check box enables or disables heuristic analysis during file scans. The check box is selected by default. |
Heuristic analysis level |
If the Use heuristic analysis check box is selected, you can select the heuristic analysis level in the drop-down list:
|
Actions for infected objects window
In this window, you can configure actions to be performed by Kaspersky Endpoint Security on detected infected objects:
Actions for infected objects
Setting |
Description |
|---|---|
First action |
In this drop-down list, you can select the first action to be performed by the application on an infected object that has been detected:
|
Second action |
In this drop-down list, you can select the second action to be performed by the application on an infected object, in case the first action is unsuccessful:
|
Add Key
Using the Add Key task, you can add a key to activate Kaspersky Endpoint Security.
Add a key task settings
Setting |
Description |
|---|---|
Use as a reserve key |
This check box enables or disables the usage of the key as a reserve key. If this check box is selected, the application uses the key as a reserve key. If this check box is cleared, the application uses the key as an active key. This check box is cleared by default. The check box is unavailable if you are adding a trial license key or a subscription key. A trial license key and a subscription key cannot be added as a reserve key. |
Add |
Clicking this button opens the Kaspersky Security Center key storage window. In this window, you can select keys added to Kaspersky Security Center key storage and add keys to Kaspersky Security Center key storage. |
License information |
This section contains information about the key and the license corresponding to this key:
|
Kaspersky Security Center key storage window
In this window, you can select keys added to Kaspersky Security Center key storage and add keys to Kaspersky Security Center key storage.
Settings in the Kaspersky Security Center key storage window
Setting |
Description |
|---|---|
Key table |
The table contains the keys added to Kaspersky Security Center key storage and consists of the following columns:
|
Add a key |
Clicking this button launches the Add license key wizard. The key will be added to Kaspersky Security Center key storage. After adding a key, information about it will be displayed in the key table. |
Inventory Scan
The Inventory task provides information about all applications executable files stored on the client devices. Obtaining information about the applications installed on the devices can be useful, for example, for creating Application Control rules.
This feature is not supported in the KESL container.
To use the task, a license that includes the corresponding function is required.
The Kaspersky Security Center database can store information about up to 150,000 processed files. When this number of records is reached, new files will not be processed. To resume the Inventory Scan task, delete the files registered in the Kaspersky Security Center database as a result of previous inventories, from the device where Kaspersky Endpoint Security is installed.
Inventory Scan task settings
Setting |
Description |
|---|---|
Create golden image |
This check box enables or disables the creation of the "Golden Image" category of applications based on the list of applications detected on the device by the Inventory Scan task. If the check box is selected, you can use the "Golden Image" category in the Application Control rules. This check box is cleared by default. |
Scan all executables |
This check box enables or disables of executable file scans. The check box is selected by default. |
Scan binaries |
This check box enables or disables of binary file scans (with extensions elf, java, and pyc). The check box is selected by default. |
Scan scripts |
This check box enables or disables script scans. The check box is selected by default. |
Inventory Scan scopes |
The group of settings contains the Configure button. Clicking this button opens the Scan scopes window. |
Task priority |
In this group of settings you can select the task priority:
|
In the Exclusion scopes section for the Inventory Scan task, you can also configure scopes to be excluded from scans.
Page top
Scan scopes window
The table contains the scan scopes. The application will scan files and directories located in the paths specified in the table. By default, the table contains one scan scope – /usr/bin.
Scan scope settings for the Inventory Scan task
Setting |
Description |
|---|---|
Scope name |
Scan scope name. |
Path |
Path to the directory that the application scans. |
Status |
The status indicates whether the application scans this scope. |
You can add, edit, delete, move up, and move down items in the table.
Kaspersky Endpoint Security scans objects in the specified scopes in the order they appear in the list of scopes. If necessary, place the subdirectory higher in the list than its parent directory, to configure security settings for a subdirectory that are different from the security settings of the parent directory.
Page top
<New scan scope> window
In this window, you can add and configure scan scope for the Inventory Scan task.
Inventory scope settings
Setting |
Description |
|---|---|
Scan scope name |
Field for entering the scan scope name. This name will be displayed in the table in the Scan scopes window. The entry field must not be blank. |
Use this scope |
This check box enables or disables the scan of this scope when the task is performed. If this check box is selected, the application processes this scan scope while running the task. If this check box is cleared, the application does not process this scan scope while running the task. You can later include this scope in task settings by selecting the check box. The check box is selected by default. |
File system, access protocol, and path |
Entry field for the path to the local directory that you want to include in the scan scope. You can use masks to specify the path. The field must not be blank. |
Masks |
This list contains name masks of the objects that the application scans while running the task. By default the list contains the * mask (all objects). |
Exclusion scopes window
This table contains scan exclusion scopes. The application does not scan files and directories located at the paths specified in the table. By default, the table is empty.
Exclusion scope settings
Setting |
Description |
|---|---|
Exclusion scope name |
Exclusion scope name. |
Path |
Path to the directory excluded from scan. |
Status |
The status indicates whether the application uses this exclusion. |
You can add, edit, and delete items in the table.
Page top
<New exclusion scope> window
In this window, you can add and configure scan exclusion scope for the Inventory Scan task.
Exclusion scope settings
Setting |
Description |
|---|---|
Exclusion scope name |
Field for entering the exclusion scope name. This name will be displayed in the table in the Exclusion scopes window. The entry field must not be blank. |
Use this scope |
This check box enables or disables the exclusion of the scope when the task is executed. If this check box is selected, the application excludes this scope during task execution. If this check box is cleared, the application includes this scope during task execution. You can later exclude this scope from scanning by selecting the check box. The check box is selected by default. |
File system, access protocol, and path |
Entry field for the path to the local directory that you want to exclude from the inventory. You can use masks to specify the path. The field must not be blank. |
Masks |
The list contains name masks of the objects that the application excludes from scan. |
Update
Updating the databases and application modules of Kaspersky Endpoint Security ensures up-to-date protection of your device. New viruses and other types of malware appear worldwide on a daily basis. The application databases contain information about the threats and the ways to neutralize them. To detect threats quickly, you are urged to regularly update the application databases and modules.
An update source is a resource that contains updates for Kaspersky Endpoint Security databases and application modules. Update sources can be FTP, HTTP, or HTTPS servers (such as Kaspersky Security Center and Kaspersky update servers), as well as local or network directories mounted by the user.
Update source settings for the Update task
Setting |
Description |
|---|---|
Database update source |
You can select the update source:
|
Use Kaspersky update servers if other update sources are not available |
The check box enables or disables usage Kaspersky update servers as the update source, if the selected update sources are not available. This check box is available if the Other sources on the local or global network or the Kaspersky Security Center Administration Server option is selected. The check box is selected by default. |
Custom update sources |
This table contains a list of custom sources of database updates. During the update process, the application accesses update sources in the order they appear in the table. The table contains the following columns:
The table is empty by default. |
In the Settings section, you can specify the response timeout and the application update download settings.
Additional settings of the Update task
Setting |
Description |
|---|---|
Maximum time to wait for a response from the update source (sec) |
The maximum period of time that the application waits for a response from the selected update source. When no response has arrived by this time, an event involving a loss of communication with the update source is logged in the task log. Available values: 0–120 seconds. If 0 is specified, the period of time that the application waits for a response from the selected source is unlimited. Default value: 10 seconds. |
Application update download mode |
In the drop-down list, you can select the application database update mode:
This feature is not supported in the KESL container. |
Rollback
After the application databases are updated for the first time, the rollback of the application databases to their previous versions becomes available.
Every time a user starts the update process, Kaspersky Endpoint Security creates a backup copy of the current application databases. This allows you to roll back the application databases to a previous version if needed.
Rolling back the last database update may be useful, for example, if the new application database version contains invalid signatures, which causes Kaspersky Endpoint Security to block safe applications.
The rollback task does not have any settings.
Page top
Critical Areas Scan
The Critical Areas Scan task allows you to scan files, boot sectors, startup objects, process memory, and kernel memory.
Critical Areas Scan task settings
Setting |
Description |
|---|---|
Scan |
This group of settings contains buttons that open windows where you can configure the scan scopes, scan scope settings, and scan settings. |
Task priority |
In this group of settings you can select the scan task priority:
|
Actions for infected objects |
This group of settings contains the Configure button. Clicking this button opens the Actions for infected objects window, where you can configure the actions that Kaspersky Endpoint Security performs on detected infected objects. |
In the Exclusions section, you can also configure exclusion scopes as well as exclusions by mask and by the threat name for the Critical areas scan task.
Scan scopes window
The table contains the scan scopes. The application will scan files and directories located in the paths specified in the table. By default, the table contains one scan scope that includes all directories of the local file system.
Scan scope settings
Setting |
Description |
|---|---|
Scope name |
Scan scope name. |
Path |
Path to the directory that the application scans. |
Status |
The status indicates whether the application scans this scope. |
You can add, edit, delete, move up, and move down items in the table.
Kaspersky Endpoint Security scans objects in the specified scopes in the order they appear in the list of scopes. If necessary, place the subdirectory higher in the list than its parent directory, to configure security settings for a subdirectory that are different from the security settings of the parent directory.
Page top
<Scan scope name> window
In this window, you can add and configure scan scopes.
Scan scope settings
Setting |
Description |
|---|---|
Scan scope name |
Field for entering the scan scope name. This name will be displayed in the table in the Scan scopes window. The entry field must not be blank. |
Use this scope |
This check box enables or disables scans of this scope by the application. If this check box is selected, the application processes this scan scope. If this check box is cleared, the application does not process this scan scope. You can later include this scope in the component settings by selecting the check box. The check box is selected by default. |
File system, access protocol, and path |
The settings block lets you set the scan scope. You can select the file system type in the drop-down list of file systems:
|
If Shared or Mounted is selected in the drop-down list of file systems, you can select the remote access protocol in the drop-down list on the right:
|
|
If Local is selected in the drop-down list of file systems, then in the input field you can enter a path to a directory that you want to add to the scan scope. The / path is specified by default – the application scans all directories of the local file system. If the Local type is selected in the drop-down list of file systems, and the path is not specified, the application scans all directories of the local file system. |
|
Filesystem name |
The field for entering the name of the file system where the directories that you want to add to the scan scope are located. The field is available if the Mounted type is selected in the drop-down list of file systems and the Custom item is selected in the drop-down list on the right. |
Masks |
The list contains name masks for the objects that the application scans. By default the list contains the * mask (all objects). |
Scan scope settings window
In this window, you can configure the scan settings for the Critical Areas Scan task. The application allows you to scan files, boot sectors, startup objects, process memory, and kernel memory.
Scan scope settings
Setting |
Description |
|---|---|
Scan files |
This check box enables or disables file scans. If this check box is selected, Kaspersky Endpoint Security will scan files. If this check box is unchecked, Kaspersky Endpoint Security will not scan files. This check box is cleared by default. |
Scan boot sectors |
This check box enables or disables boot sector scans. If this check box is selected, Kaspersky Endpoint Security will scan boot sectors. If this check box is unchecked, Kaspersky Endpoint Security will not scan boot sectors. The check box is selected by default. |
Scan device memory |
The check box enables or disables the process memory scan and the kernel memory scan on your device. If this check box is selected, Kaspersky Endpoint Security will scan process memory and kernel memory. If this check box is unchecked, Kaspersky Endpoint Security will not scan process memory and kernel memory. The check box is selected by default. |
Scan startup objects |
This check box enables or disables startup object scans. If this check box is selected, Kaspersky Endpoint Security will scan startup objects. If this check box is unchecked, Kaspersky Endpoint Security will not scan startup objects. The check box is selected by default. |
Devices to scan |
This group of settings contains the Configure button. Clicking this button opens the Scan scopes window, where you can specify the devices whose boot sectors must be scanned. |
Scan scopes window
The table contains name masks of the devices, whose boot sectors the application must scan. By default, the table contains the /** device name mask (all devices).
You can add, edit, and delete items in the table.
Page top
Scan settings window
In this window, you can configure the file scan settings for the task.
Scan settings
Setting |
Description |
|---|---|
Scan archives |
This check box enables or disables scan of archives. If the check box is selected, the application scans the archives. To scan an archive, the application has to unpack it first, which may slow down scanning. You can reduce the archive scan time by configuring the Skip object if scan takes longer than (sec) and Skip objects larger than (MB) settings in the General scan settings section. If the check box is cleared, the application does not scan the archives. The check box is selected by default. |
Scan SFX archives |
This check box enables or disables self-extracting archive scans. Self-extracting archives are the archives that contain an executable extraction module. If the check box is selected, the application scans self-extracting archives. If the check box is cleared, the application does not scan self-extracting archives. This check box is available if the Scan archives check box is unchecked. The check box is selected by default. |
Scan mail databases |
This check box enables or disables scans of mail databases of Microsoft Outlook, Outlook Express, The Bat!, and other mail applications. If the check box is selected, the application scans mail database files. If the check box is cleared, the application does not scan mail database files. This check box is cleared by default. |
Scan mail format files |
This check box enables or disables scan of files of plain-text email messages. If this check box is selected, the application scans plain-text messages. If this check box is cleared, the application does not scan plain-text messages. This check box is cleared by default. |
Skip object if scan takes longer than (sec) |
A field for specifying the maximum time to scan an object, in seconds. After the specified time, the application stops scanning the object. Available values: 0–9999. If the value is set to 0, the scan time is unlimited. Default value: 0. |
Skip objects larger than (MB) |
The field for specifying the maximum size of an archive to scan, in megabytes. Available values: 0–999999. If the value is set to 0, the application scans objects of any size. Default value: 0. |
Log clean objects |
This check box enables or disables the logging of ObjectProcessed type events. If this check box is selected, the application logs events of the ObjectProcessed type for all scanned objects. If this check box is cleared, the application does not log events of the ObjectProcessed type for any scanned object. This check box is cleared by default. |
Log unprocessed objects |
This check box enables or disables the logging ObjectNotProcessed type events if a file cannot be processed during a scan. If this check box is selected, the application logs the events of the ObjectNotProcessed type. If this check box is cleared, the application does not log the events of the ObjectNotProcessed type. This check box is cleared by default. |
Log packed objects |
This check box enables or disables the logging of PackedObjectDetected type events for all packed objects that are detected. If this check box is selected, the application logs the events of the PackedObjectDetected type. If this check box is cleared, the application does not log the events of the PackedObjectDetected type. This check box is cleared by default. |
Use iChecker technology |
This check box enables or disables scan of only new and modified since the last scan files. If the check box is selected, the application scans only new files or the files modified since the last scan. If the check box is cleared, the application scans the files regardless of the creation or modification date. The check box is selected by default. |
Use heuristic analysis |
This check box enables or disables heuristic analysis during file scans. The check box is selected by default. |
Heuristic analysis level |
If the Use heuristic analysis check box is selected, you can select the heuristic analysis level in the drop-down list:
|
Actions for infected objects window
In this window, you can configure actions to be performed by Kaspersky Endpoint Security on detected infected objects:
Actions for infected objects
Setting |
Description |
|---|---|
First action |
In this drop-down list, you can select the first action to be performed by the application on an infected object that has been detected:
|
Second action |
In this drop-down list, you can select the second action to be performed by the application on an infected object, in case the first action is unsuccessful:
|
Container Scan
When the Container Scan task is running, Kaspersky Endpoint Security scans containers and images for viruses and other malware. You can run multiple Container Scan tasks simultaneously.
Integration with Docker container management system, CRI-O framework, and Podman and runc utilities is supported.
To use the task, a license that includes the corresponding function is required.
Container scan task settings
Setting |
Description |
|---|---|
Scan |
This group of settings contains buttons that open windows where you can configure the Container Scan settings and general scan settings. |
Task priority |
This section lets you specify a priority for a scan task:
|
Actions for infected objects |
This group of settings contains the Configure button. Clicking this button opens the Actions for infected objects window, where you can configure the actions that the application performs on detected infected objects. |
In the Exclusions section, you can also configure exclusions by mask and by the threat name for the Container scan task.
Page top
Container Scan settings window
In this window, you can configure container and image scan settings.
Container and image scan settings
Setting |
Description |
|---|---|
Scan containers |
This check box enables or disables container scans. If the check box is selected, you can specify a name or a name mask for containers to be scanned. The check box is selected by default. |
Name mask |
Entry field for a name or a name mask for containers to be scanned. By default, the * mask is specified – all containers will be scanned. |
Action on threat detection |
In the drop-down list, you can select the action to be performed on a container when an infected object is detected:
Due to the way a CRI-O environment works, an infected object is not disinfected or deleted in a container in a CRI-O environment. We recommend to select the Stop container action. |
Scan images |
This check box enables or disables the image scan. If the check box is selected, you can specify a name or a name mask for images to be scanned. The check box is selected by default. |
Name mask |
Entry field for a name or a name mask for images to be scanned. By default, the * mask is specified (all images are scanned). |
Action on threat detection |
In the drop-down list, you can select the action to be performed on an image when an infected object is detected:
|
Scan each layer |
This check box enables or disables the scanning of all layers of images and running containers. This check box is cleared by default. |
Scan settings window
In this window, you can configure the file scan settings for the task.
Scan settings
Setting |
Description |
|---|---|
Scan archives |
This check box enables or disables scan of archives. If the check box is selected, the application scans the archives. To scan an archive, the application has to unpack it first, which may slow down scanning. You can reduce the archive scan time by configuring the Skip object if scan takes longer than (sec) and Skip objects larger than (MB) settings in the General scan settings section. If the check box is cleared, the application does not scan the archives. The check box is selected by default. |
Scan SFX archives |
This check box enables or disables self-extracting archive scans. Self-extracting archives are the archives that contain an executable extraction module. If the check box is selected, the application scans self-extracting archives. If the check box is cleared, the application does not scan self-extracting archives. This check box is available if the Scan archives check box is unchecked. The check box is selected by default. |
Scan mail databases |
This check box enables or disables scans of mail databases of Microsoft Outlook, Outlook Express, The Bat!, and other mail applications. If the check box is selected, the application scans mail database files. If the check box is cleared, the application does not scan mail database files. This check box is cleared by default. |
Scan mail format files |
This check box enables or disables scan of files of plain-text email messages. If this check box is selected, the application scans plain-text messages. If this check box is cleared, the application does not scan plain-text messages. This check box is cleared by default. |
Skip object if scan takes longer than (sec) |
A field for specifying the maximum time to scan an object, in seconds. After the specified time, the application stops scanning the object. Available values: 0–9999. If the value is set to 0, the scan time is unlimited. Default value: 0. |
Skip objects larger than (MB) |
The field for specifying the maximum size of an archive to scan, in megabytes. Available values: 0–999999. If the value is set to 0, the application scans objects of any size. Default value: 0. |
Log clean objects |
This check box enables or disables the logging of ObjectProcessed type events. If this check box is selected, the application logs events of the ObjectProcessed type for all scanned objects. If this check box is cleared, the application does not log events of the ObjectProcessed type for any scanned object. This check box is cleared by default. |
Log unprocessed objects |
This check box enables or disables the logging ObjectNotProcessed type events if a file cannot be processed during a scan. If this check box is selected, the application logs the events of the ObjectNotProcessed type. If this check box is cleared, the application does not log the events of the ObjectNotProcessed type. This check box is cleared by default. |
Log packed objects |
This check box enables or disables the logging of PackedObjectDetected type events for all packed objects that are detected. If this check box is selected, the application logs the events of the PackedObjectDetected type. If this check box is cleared, the application does not log the events of the PackedObjectDetected type. This check box is cleared by default. |
Use iChecker technology |
This check box enables or disables scan of only new and modified since the last scan files. If the check box is selected, the application scans only new files or the files modified since the last scan. If the check box is cleared, the application scans the files regardless of the creation or modification date. The check box is selected by default. |
Use heuristic analysis |
This check box enables or disables heuristic analysis during file scans. The check box is selected by default. |
Heuristic analysis level |
If the Use heuristic analysis check box is selected, you can select the heuristic analysis level in the drop-down list:
|
Actions for infected objects window
In this window, you can configure actions to be performed by Kaspersky Endpoint Security on detected infected objects:
Actions for infected objects
Setting |
Description |
|---|---|
First action |
In this drop-down list, you can select the first action to be performed by the application on an infected object that has been detected:
|
Second action |
In this drop-down list, you can select the second action to be performed by the application on an infected object, in case the first action is unsuccessful:
|
Exclusions section
Settings of scan exclusions
Group of settings |
Description |
|---|---|
Exclusions by mask |
This group of settings contains the Configure button, which opens the Exclusions by mask window. In this window, you can configure the exclusion of objects from scans by name mask. |
Exclusions by threat name |
This group of settings contains the Configure button, which opens the Exclusions by threat name window. In this window, you can configure the exclusion of objects from scans based on threat name. |
System Integrity Check
While the System Integrity Check (ODFIM) task is running, each object change is determined by comparing the current state of the monitored objects with its original state, which was previously established as a baseline.
This feature is not supported in the KESL container.
The baseline is established during the first run of the ODFIM task on the computer. You can create several ODFIM tasks. For each ODFIM task, a separate baseline is created. The task is performed only if the baseline corresponds to the monitoring scope. If the baseline does not match the monitoring scope, Kaspersky Endpoint Security generates a system integrity violation event.
The baseline is rebuilt after an ODFIM task has finished. You can rebuild a baseline for a task using the corresponding setting. Also, a baseline is rebuilt when the settings of a task change, for example, if a new monitoring scope is added. The baseline will be rebuilt during the next task run. You can delete a baseline by deleting the corresponding ODFIM task.
The ODFIM task creates storage for baselines on a computer that has the System Integrity Monitoring component installed.
System Integrity Check task settings
Setting |
Description |
|---|---|
Rebuild baseline on each task start |
This check box enables or disables the reestablishment of a system baseline upon every start of the System Integrity Check task. This check box is cleared by default. |
Use hash for monitoring (SHA-256) |
This check box enables or disables use of the SHA-256 hash for the System Integrity Check task. SHA-256 is a cryptographic hash function that produces a 256-bit hash value. The 256-bit hash value is represented as a sequence of 64 hexadecimal digits. This check box is cleared by default. |
Track directories in monitoring scopes |
This check box enables or disables the monitoring of the specified directories while the System Integrity Check task is running. This check box is cleared by default. |
Track last file access time |
This check box enables or disables tracking the file access time while the System Integrity Check task runs. This check box is cleared by default. |
Monitoring scopes |
The group of settings contains the Configure button. Clicking this button opens the Scan scopes window. |
In the Exclusion scopes section, you can also configure monitoring exclusion scopes and exclusions by mask for the System Integrity Check task.
Page top
Scan scopes window
The table contains monitoring scopes for the System Integrity Monitoring component. The application monitors files and directories located in the paths specified in the table. By default, the table contains one monitoring scope, Kaspersky internal objects (/opt/kaspersky/kesl/).
Monitoring scope settings
Setting |
Description |
|---|---|
Scope name |
Monitoring scope name. |
Path |
Path to the directory that the application protects. |
Status |
The status indicates whether the application scans this scope. |
You can add, edit, delete, move up, and move down items in the table.
Kaspersky Endpoint Security scans objects in the specified scopes, in the order they appear in the list of scopes. If necessary, place the subdirectory higher in the list than its parent directory, to configure security settings for a subdirectory that are different from the security settings of the parent directory.
Page top
<New scan scope> window
In this window, you can add and configure monitoring scopes for the System Integrity Monitoring component.
Monitoring scope settings
Setting |
Description |
|---|---|
Scan scope name |
Field for entering the monitoring scope name. This name will be displayed in the table in the Scan scopes window. The entry field must not be blank. |
Use this scope |
This check box enables or disables scans of this scope by the application. If this check box is selected, the application controls this monitoring scope during the application's operation. If this check box is cleared, the application does not control this monitoring scope during the operation. You can later include this scope in the component settings by selecting the check box. The check box is selected by default. |
File system, access protocol, and path |
Entry field for the path to the local directory that you want to include in the monitoring scope. The field must not be blank. The default path is /opt/kaspersky/kesl. |
Masks |
The list contains name masks for the objects that the application scans. By default the list contains the * mask (all objects). |
Exclusion scopes window
The table contains monitoring exclusion scopes for the System Integrity Monitoring component. The application does not scan files and directories located at the paths specified in the table. By default, the table is empty.
Monitoring exclusion scope settings
Setting |
Description |
|---|---|
Exclusion scope name |
Exclusion scope name. |
Path |
Path to the directory excluded from monitoring. |
Status |
Indicates whether the application excludes this scope from monitoring during the component operation. |
You can add, edit, and delete items in the table.
Page top
<Exclusion scope name> window
In this window, you can add or configure the monitoring exclusion scope for the System Integrity Monitoring component.
Monitoring exclusion scope settings
Setting |
Description |
|---|---|
Exclusion scope name |
Field for entering the exclusion scope name. This name will be displayed in the table in the Exclusion scopes window. The entry field must not be blank. |
Use this scope |
The check box enables or disables the exclusion of the scope from monitoring when the application is running. If this check box is selected, the application excludes this scope from monitoring during the component operation. If this check box is cleared, the application monitors this scope during the component operation. You can later exclude this scope from monitoring by selecting the check box. The check box is selected by default. |
File system, access protocol, and path |
Entry field for the path to the local directory that you want to add to the exclusion scope. The field must not be blank. The / path is specified by default. The application excludes all directories of the local file system from scan. |
Masks |
The list contains name masks of the objects that the application excludes from the monitoring. By default the list contains the * mask (all objects). |
Exclusions by mask window
You can configure the exclusion of objects from monitoring based on name masks. The application does not scan the files with the names containing the specified masks. By default, the list of masks is empty.
You can add, edit, or delete masks.
Page top
Exclusion scopes section
Settings of scan exclusions
Group of settings |
Description |
|---|---|
Monitoring exclusions |
This group of settings contains the Configure button. Clicking this button opens the Exclusion scopes window. In this window, you can define the list of scopes to be excluded from monitoring. |
Exclusions by mask |
This group of settings contains the Configure button, which opens the Exclusions by mask window. In this window, you can configure the exclusion of objects from monitoring by name mask. |
Configuring integration with Kaspersky Managed Detection and Response
To configure integration between Kaspersky Endpoint Security and Kaspersky Managed Detection and Response (MDR), perform the following actions:
- Make sure that the File Threat Protection and Behavior Detection components are enabled in the Kaspersky Endpoint Security policy.
- In the Kaspersky Endpoint Security policy, select use of Kaspersky Security Network in extended mode.
- In the Kaspersky Endpoint Security policy, enable integration with Managed Detection and Response and upload a BLOB configuration file, which is located in the ZIP archive of the MDR configuration file (see the instructions below).
- In the Administration Console, configure Kaspersky Private Security Network for sending telemetry using a Kaspersky Security Network configuration file, which is located in the ZIP archive of the MDR configuration file (see the instructions below).
To configure Kaspersky Private Security Network for integration with Kaspersky Managed Detection and Response in Kaspersky Security Center:
- Open the Administration Console of Kaspersky Security Center.
- In the Administration Console tree, select the Administration Server.
- In the Administration Server context menu, select Properties.
- In the Administration Server properties window, in the KSN proxy server section, select the KSN proxy server settings sub-section.
- Select the Use Administration Server as a proxy server check box to enable the KSN proxy server service.
- Select the Configure Private KSN check box.
- In the window that opens and displays a warning about the specific aspects of using the KSN proxy server on the distribution points with the previous version of the Network Agent installed, click OK.
- Click the File with KSN proxy server settings button.
- Select the configuration file with the pkcs7 extension and click Open.
This configuration file is included in Kaspersky Managed Detection and Response distribution kit.
By downloading Kaspersky Managed Detection and Response configuration file, you agree to automatically transmit data from the device with Kaspersky Endpoint Security installed to Kaspersky for processing. Do not load the configuration file if you do not agree that the transmitted data will be processed. For detailed description of the transmitted data, refer to Kaspersky Managed Detection and Response documentation.
- Click Apply.
To load the BLOB configuration file using Kaspersky Security Center:
- Open the Administration Console of Kaspersky Security Center.
- In the Managed devices folder, open the folder with the name of the required administration group for which you want to configure the policy settings.
- In the workspace, select the Policies tab.
- Select the required policy and open the policy properties window in one of the following ways:
- Double click the policy name.
- In the context menu of the policy, select Properties.
- In the policy properties window, in the list on the left, select the Managed Detection and Response section in the General settings section.
- Select the Enable Managed Detection and Response check box.
- Click Download.
- In the window that opens, select the BLOB configuration file and click the Open button.
The BLOB configuration file is included in Kaspersky Managed Detection and Response distribution kit.
By downloading Kaspersky Managed Detection and Response configuration file, you agree to automatically transmit data from the device with Kaspersky Endpoint Security installed to Kaspersky for processing. Do not load the configuration file if you do not agree that the transmitted data will be processed. For detailed description of the transmitted data, refer to Kaspersky Managed Detection and Response documentation.
- Click Apply.
Configuring KESL container settings
Kaspersky Endpoint Security distribution kit contains files for creating a container application (KESL container) for embedding into external systems in order to scan container images from image repositories.
Interaction with the KESL container is implemented using the REST API. You can configure KESL container settings using the Administration Console.
For correct operation of KESL containers in Kaspersky Security Center, it is recommended to move the devices that correspond to the KESL containers to a separate administration group with its own policy. When the KESL container is stopped, these devices are automatically removed from the administration group, and the key that was used for these devices is released.
After deploying, activating and configuring the KESL container, it provides following functionalities in Kaspersky Security Center:
- File Threat Protection.
- Malware Scan.
- Critical Areas Scan.
- Container scan and Container Scan settings.
- Application Database Update.
- Rollback.
- Add Key.
- Storage settings.
Other application functions and settings can be configured, but their configuration does not affect KESL container operation.
If KESL container was activated during deployment and is connected to Kaspersky Security Center, where automatic key distribution to managed devices is configured, this key will not be applied to the KESL container.
Page top
Manually checking the connection with the Administration Server. Klnagchk utility
The Network Agent distribution kit includes the klnagchk utility, which is intended for checking connection to the Administration Server.
After installation of the Network Agent, the utility is located in the /opt/kaspersky/klnagent/bin directory in 32-bit operating systems and in the /opt/kaspersky/klnagent64/bin directory in 64-bit operating systems. Depending on the utilized keys, the Network Agent performs the following actions when started:
- Writes to the event log file or displays the values of the settings for connecting the Network Agent installed on the client device to the Administration Server.
- Writes to the event log file or displays the Network Agent statistics (since its last launch) and the results of running the utility.
- Attempts to establish a connection between Network Agent and the Administration Server.
- If the connection fails, the utility sends an ICMP packet to check the status of the device where the Administration Server is installed.
Utility syntax
klnagchk [-logfile <file name>] [-sp] [-savecert <path to certificate file>] [-restart]
Description of keys
-logfile <file name>: write to an event log file both the values of the settings for connecting Network Agent to the Administration Server and the results of running the utility. If this key is not used, the settings, results, and error messages are displayed on the screen.-sp: show the password for user authentication on the proxy server. This setting is used if the connection to the Administration Server is established via a proxy server.-savecert <file name>: save the certificate used to authenticate access to the Administration Server in the specified file.-restart: restart Network Agent.
Manually connecting to the Administration Server. Klmover utility
The Network Agent distribution kit includes the klmover utility, which is intended for managing the connection with the Administration Server.
After installation of the Network Agent, the utility is located in the /opt/kaspersky/klnagent/bin directory in 32-bit operating systems and in the /opt/kaspersky/klnagent64/bin directory in 64-bit operating systems. Depending on the utilized keys, the Network Agent performs the following actions when started:
- Connects Network Agent to the Administration Server with the specified settings.
- Writes to an event log file or displays the operation results.
Utility syntax
klmover [-logfile <file name>] {-address <server address>} [-pn <port number>] [-ps <SSL port number>] [-nossl] [-cert <path to the certificate file>] [-silent] [-dupfix]
Description of keys
-logfile <file name>– write the results of running the utility to the specified file. If this key is not used, the results and error messages are displayed in stdout.-address <server address>– address of the Administration Server used for the connection. This can be the IP address, NetBIOS, or DNS name of the device.-pn <port number>– number of the port over which a non-encrypted connection to the Administration Server is established. Port 14000 is used by default.-ps <SSL port number>– number of the SSL port over which the encrypted connection to the Administration Server is established using the SSL protocol. Port 13000 is used by default.-nossl– use a non-encrypted connection to the Administration Server. If this key is not specified, the Agent is connected to the Administration Server over the encrypted SSL protocol.-cert <path to certificate file>– use the specified certificate file for access authentication to the new Administration Server. If the key is not in use, Network Agent receives a certificate upon the first connection to the Administration Server.-silent– start the utility in non-interactive mode. Using this key may be useful if, for example, the utility is started from a startup script during user registration.-dupfix– this key is used if the Network Agent installation method differs from the installation within the distribution kit; for example, if the Network Agent was restored from a disk image.-cloningmode 1– switch to cloning mode.-cloningmode 0– switch from cloning mode.
Remote application administration using Kaspersky Security Center Web Console and Kaspersky Security Center Cloud Console
This section contains information about managing Kaspersky Endpoint Security using Kaspersky Security Center Cloud Console and Kaspersky Security Center Web Console.
This description is provided for Kaspersky Security Center 13.
The Kaspersky Security Center Cloud Console is the cloud version of Kaspersky Security Center. This means that the Administration Server and other components of Kaspersky Security Center are installed in the cloud infrastructure of Kaspersky. Kaspersky Security Center Cloud Console is managed using the cloud-based Administration Console called Kaspersky Security Center Cloud Console. Interface of this console is similar to Kaspersky Security Center Web Console interface. For detailed information about Kaspersky Security Center Cloud Console, refer to the Kaspersky Security Center Cloud Console documentation.
Kaspersky Security Center Web Console (hereinafter also referred to as "Web Console") is a web interface for managing a protection system based on Kaspersky applications. You can work in Kaspersky Security Center Web Console using a browser on any device that has access to the Administration Server. For detailed information about Kaspersky Security Center Web Console, refer to Kaspersky Security Center documentation.
Kaspersky Security Center Web Console lets you do the following:
- Monitor the status of your organization's security system.
- Install Kaspersky applications on devices within your network.
- Manage installed applications.
- View reports on the security system status.
Kaspersky Endpoint Security is managed using Kaspersky Security Center Cloud Console and Kaspersky Security Center Web Console by means of Kaspersky Endpoint Security administration web plug-in.
To manage Kaspersky Endpoint Security operation using Kaspersky Security Center Cloud Console or Kaspersky Security Center Web Console, assign the computers, on which Kaspersky Endpoint Security is installed, to administration groups. You can create administration groups in Kaspersky Security Center before Kaspersky Endpoint Security installation and configure rules to automatically move the computers to administration groups. You can also manually move the computers to the administration groups after installing Kaspersky Endpoint Security (for details, refer to Kaspersky Security Center documentation).
Logging in and out of the Web Console and Cloud Console
Kaspersky Security Center Web Console
To log in to the Web Console, you need to know the web address and the port number of the Administration Server specified during the Web Console installation (port 8080 is used by default). JavaScript must also be enabled in your browser.
To log in to Web Console:
- In your browser, go to the
<Administration Server web address>:<port number>address.The login page is displayed.
- Enter the user name and password for your account.
It is recommended to make sure that the password complexity and anti-bruteforce mechanisms ensure that the password cannot be guessed within 6 months.
- Click Log in.
If the Administration Server is not responding, or if you enter incorrect credentials, an error message is displayed.
After logging in, a dashboard is displayed with the last language and theme used.
For more details about the Web Console interface, refer to Kaspersky Security Center documentation.
To log out of Web Console:
select <Account name> → Exit in the lower left corner of the screen.
The Web Console is closed, and the login page is displayed.
Kaspersky Security Center Cloud Console
For the Kaspersky Security Center Cloud Console, use a web token to log in to your account on the Cloud Console portal.
For detailed information about Kaspersky Security Center Cloud Console, refer to the Kaspersky Security Center Cloud Console documentation.
Page top
Starting and stopping the application on a client device
After installing Kaspersky Endpoint Security to a user device, the application is started automatically. Subsequently, the application is launched by default immediately after the operating system starts.
You can monitor the application operation status by using the Protection status web widget in the Monitoring and reports / Dashboard window.
To start or stop the application remotely:
- In the main window of the Web Console, select Devices → Managed devices.
The list of managed devices opens.
- In the list, select the device on which you want to start or stop the application, and click the link with the device name to open the device properties window.
- Select the Applications tab.
- Select the Kaspersky Endpoint Security 11.2.0 for Linux check box.
- Click the Start or Stop button.
Updating application databases and modules
Updating the databases and application modules of Kaspersky Endpoint Security ensures up-to-date protection on your device. New viruses, malware, and other types of threats appear worldwide on a daily basis. Kaspersky Endpoint Security databases contain information about threats and ways of neutralizing them. To detect threats quickly, you are urged to regularly update the application databases and modules.
The following objects are updated on users' devices:
- Application databases. Application databases include databases of malware signatures, a description of network attacks, databases of malicious and phishing web addresses, databases of banners, spam databases, and other data.
- Application modules. Module updates are intended to eliminate vulnerabilities in the application and to improve methods of protecting devices. Module updates may change the behavior of application components and add new capabilities.
Kaspersky Endpoint Security supports the following scenarios for updating databases and application modules:
- Update from Kaspersky servers. Kaspersky update servers are located in different countries around the world, which ensures a high reliability of updates. If an update cannot be performed from one server, Kaspersky Endpoint Security switches over to the next server.
- Centralized update Centralized update reduces external Internet traffic, and provides for convenient monitoring of the update.
Centralized update consists of the following steps:
- Download the update package to a repository within the organization's network.
The update package is downloaded to the repository by the Download updates to Administration Server repository task of the Administration Server.
- Distribute the update package to client devices
The update package is distributed to the client devices by the Update task of Kaspersky Endpoint Security. You can create an unlimited number of update tasks for each administration group.
- Download the update package to a repository within the organization's network.
For the Web Console, by default, the list of update sources contains Kaspersky update servers and Kaspersky Security Center Administration Server. For the Kaspersky Security Center Cloud Console, the default list of update sources contains distribution points and Kaspersky update servers. For more details about distribution points, refer to Kaspersky Security Center Cloud Console documentation.
You can add other update sources to the list. You can specify FTP-, HTTP-, or HTTPS servers as update sources. If an update cannot be performed from an update source, Kaspersky Endpoint Security switches to the next update source.
Updates are downloaded from Kaspersky update servers or from other FTP, HTTP, or HTTPS servers over standard network protocols. If connection to a proxy server is required to access the update sources, specify the proxy server settings in the Kaspersky Endpoint Security policy settings.
Updating from a server repository
To save Internet traffic, you can configure updates of application databases and modules on devices on the organization's LAN from a server repository. For this purpose, configure the download of the update package from Kaspersky update servers to the Administration Server repository (FTP, HTTP, or HTTPS server, network, or local directory) in Kaspersky Security Center. Other devices on the organization's LAN will be able to receive the update package from the server repository.
Configuring application database and module updates from the server repository consists of the following steps:
- Configure the download of an update package to the Administration Server repository (the Download updates to the Administration Server repository task).
- Configure application database and module updates on the remaining devices of the organization's LAN from the specified server repository (the Update task).
To configure downloading an update package to the server storage:
- In the main window of Web Console, select Devices → Tasks.
The list of tasks opens.
- In the list of tasks, select the Download updates to the Administration Server repository task and click the link with the task name to open the task properties window.
The Download updates to the Administration Server repository task is created automatically by the Initial Configuration Wizard for the Web Console, and may only have one instance.
- In the task properties window, select the Application settings tab.
- In the Other settings section, click Configure.
- In the Folder for storing updates field, specify the address of FTP, HTTP, or HTTPS server, network directory or local directory where Kaspersky Security Center copies the update package received from Kaspersky update servers.
The following path format is used for update source:
- For an FTP or HTTP server, enter its web address or IP address.
For example,
http://dnl-01.geo.kaspersky.com/or93.191.13.103.For an FTP server, specify the authentication settings within the address in the following format: ftp://<user name>:<password>@<node>:<port>.
- For a network or local directory enter the full path to the directory.
- For an FTP or HTTP server, enter its web address or IP address.
- Click OK.
- Click Save.
To configure application updates from a specified server storage:
- In the main window of Web Console, select Devices → Tasks.
The list of tasks opens.
- In the list of tasks, select the Update task for Kaspersky Endpoint Security and click the link with the task name to open the task properties window.
The Update task is created automatically by the Web Console Quick Start Wizard. To create the Update task, install Kaspersky Endpoint Security web plug-in while running the Wizard.
- In the task properties window, select the Application settings tab.
- In the list on the left, select the Database update source section.
The task settings are displayed in the right part of the window.
- In the Database updates source section, select the Other sources on the local or global network option.
- In the table of update sources, click the Add button.
- In the Update source field, specify the address of the FTP, HTTP, or HTTPS server, or network or local directory where Kaspersky Security Center copies the update package received from Kaspersky update servers.
The address of the update source must match the address you specified in the Folder for storing updates field when configuring the download of updates to the server storage (see the instructions above).
- Select the Use this source check box and click OK.
- In the table, set the order of the update sources using the Up and Down buttons.
- Click Save.
If an update cannot be performed from the first update source, the application automatically switches to the next source.
Page top
Updating using Kaspersky Update Utility
To reduce Internet traffic, you can configure updates of application databases and modules on devices of the organization's LAN from a shared directory by using the Kaspersky Update Utility. For this purpose, one of the devices in the organization's LAN must receive update packages from the Kaspersky Security Center Administration Server or from Kaspersky update servers and use the utility to copy the received update packages to the shared directory. Other devices on the organization's LAN will be able to receive the update package from this shared directory.
Configuring application database and module updates from a shared directory consists of the following steps:
- Install Kaspersky Update Utility on one of the devices of the organization's LAN.
- Configure copying of the update package to the shared directory in the Kaspersky Update Utility settings.
- Configure application database and module updates from the specified shared directory to the remaining devices on the organization's LAN.
You can download the Kaspersky Update Utility distribution kit from the Kaspersky Technical Support website. After installing the utility, select the update source (for example, the Administration Server repository) and the shared directory to which the Kaspersky Update Utility will copy update packages. For detailed information about using Kaspersky Update Utility, refer to the Kaspersky Knowledge Base.
To configure updates from a shared directory:
- In the main window of Web Console, select Devices → Tasks.
The list of tasks opens.
- In the list of tasks, select the Update task for Kaspersky Endpoint Security and click the link with the task name to open the task properties window.
The Update task is created automatically by the Web Console Quick Start Wizard. To create the Update task, install Kaspersky Endpoint Security web plug-in while running the Wizard.
- In the task properties window, select the Application settings tab.
- In the list on the left, select the Database update source section.
The task settings are displayed in the right part of the window.
- In the Database updates source section, select the Other sources on the local or global network option.
- In the table of update sources, click the Add button.
- In the Update source field, specify the path to the shared directory.
The source address must match the address indicated in the Kaspersky Update Utility settings.
- Select the Use this source check box and click OK.
- In the table, set the order of the update sources using the Up and Down buttons.
- Click Save.
Using a proxy server for updates
You may be required to specify proxy server settings to download database and application module updates from the update source. If there are multiple update sources, proxy server settings are applied for all sources. If a proxy server is not needed for some update sources, you can disable the use of a proxy server in Kaspersky Endpoint Security policy settings. The application will also use a proxy server to access Kaspersky Security Network and activation servers.
To enable use of a proxy server for a specific administration group:
- In the main window of the Web Console, select the Devices → Policies and profiles tab.
- In the list of policies, select the Kaspersky Endpoint Security policy for the administration group on whose devices you want to disable the use of a proxy server. Click the link with the policy name to open the policy properties window.
- In the policy properties window, select the Application settings tab.
- Select the General settings → Proxy server settings section.
- In the Proxy server settings section, select the Use specified proxy server settings and specify the required proxy server settings.
- Click OK.
- Click Save.
Viewing the protection status of a device
To view the protection status of a device:
- In the main window of the Web Console, select Devices → Managed devices.
The list of managed devices opens.
- In the list, select the device for which you want to view information, and click the link with the device name to open the device properties window.
- On the General tab, select the Protection section.
The Protection section displays the following information about the selected device:
- Visible in the network is the visibility of the selected device in the network: Yes or No.
- Device status represents a current status of the selected device, such as OK, Critical, or Warning.
- Status description represents the reasons for changing the status of the device to Critical or Warning.
- Protection status represents a status of the File Threat Protection task, such as Running, Stopped, or Paused.
- Last full check represents date and time when the last full scan task was completed on the selected device.
- Viruses detected represents a total number of malicious objects detected on the selected device (detected threat counter) since Kaspersky Endpoint Security was installed.
- Objects that failed disinfection represents a number of infected objects that Kaspersky Endpoint Security was unable to disinfect.
Managing policies in the Web Console
A policy is a set of Kaspersky Endpoint Security operation settings applied to an administration group. You can use policies to apply identical Kaspersky Endpoint Security settings to all client devices within an administration group.
Multiple policies with different values of the settings can be configured for a single application. However, there can be only one active policy at a time for an application within an administration group. When you create a new policy, all other policies within an administration group become inactive. You can change the policy status later.
Policies have a hierarchy, similarly to administration groups. By default, a child policy inherits the settings from the parent policy. A child policy is a policy of a nested hierarchy level, that is, a policy for nested administration groups and secondary Administration Servers. You can enable inheritance of the settings from the parent policy.
You can locally modify the values of the settings specified by the policy for individual devices within the administration group, if modification of these settings is not prohibited by the policy.
Each policy setting has a "lock" attribute that indicates whether child policy settings and local application settings can be modified. The "lock" status of a setting within a policy determines whether or not an application setting on a client device can be edited:
- When a setting is "locked" (
 ), you cannot edit the setting locally. The setting value specified by the policy is used for all client devices within the administration group.
 - When a setting is "unlocked" (
 ), you can edit the setting locally. For all client devices in the administration group, the settings specified locally are used. The settings specified in the policy are not applied.
After the policy is applied for the first time, the application settings change in accordance with the policy settings.
You can perform the following operations with the policies:
- Create a policy.
- Edit policy settings.
If the user account which is used to access the Administration Server does not have permissions to edit the settings of certain functional scopes, the settings of these functional scopes are not available for editing. Configuration of some settings is not supported in the KESL container.
- Delete a policy.
- Change a policy status.
- Copy and move a policy.
- Export and import a policy.
- Compare policy versions in the Revision history section of the policy properties window.
You can also create policy profiles. A policy profile may contain settings that differ from the "base" policy settings and apply to client devices when the configured conditions (activation rules) are met. Using policy profiles allows you to flexibly configure operation settings for different devices. You can create and configure profiles in the Policy profiles section of the policy properties.
For general information on working with policies and policy profiles, refer to Kaspersky Security Center documentation.
Creating a policy
To create a policy:
- In the main window of the Web Console, select Devices → Policies and policy profiles.
The list of policies opens.
- Select the administration group containing client devices to which the policy should be applied. To do so, click the link in the Current path field in the upper part of the window and select an administration group in the window that opens.
The list displays only the policies configured for the selected administration group.
- Click Add.
The Policy Wizard starts.
- Select Kaspersky Endpoint Security 11.2.0 for Linux and click Next.
- Decide whether you want to participate in Kaspersky Security Network. Carefully read the Kaspersky Security Network Statement and do one of the following:
- If you agree with all the terms and conditions of the Statement and want the application to use Kaspersky Security Network, select I confirm that I have fully read, understand, and accept the terms and conditions of Kaspersky Security Network Statement.
- If you do not want to use Kaspersky Security Network, select I do not accept the terms and conditions of the Kaspersky Security Network Statement and confirm your decision in the window that opens.
Refusal to use Kaspersky Security Network does not interrupt the policy creation process. You can enable, disable, or change the Kaspersky Security Network mode for the managed devices in the policy settings at any time.
- Click Next.
The General tab of the new policy settings window opens.
- On the General tab, you can configure the following policy settings:
- Policy name.
- Policy status:
- Active. The policy that is currently applied to the device.
If this option is selected, this policy becomes active on the device upon the next device synchronization with the Administration Server. This option is selected by default.
- Inactive. The policy that is not currently applied to the device.
If this option is selected, the policy becomes inactive but remains in the Policies folder. You can activate the inactive policy later.
- Out-of-office. Policy that becomes active when the device leaves the corporate network.
If this option is selected, the policy becomes active when the device leaves the organization network.
- Policy settings inheritance:
- Inherit settings from parent policy. If this option is enabled, the policy settings values are inherited from the upper-level group policy and, therefore, are locked. The check toggle button is switched on by default.
- Enforce settings inheritance for child policies If this option is enabled, the settings values of the child policies are locked. The toggle button is switched off by default.
For general information about the policy settings, refer to Kaspersky Security Center documentation.
- On the Application settings tab you can modify the policy settings.
- Click Save.
The created policy will be displayed in the list of policies. You can change the policy settings later. For general information about managing policies, refer to Kaspersky Security Center documentation.
Page top
Editing policy settings
To edit policy settings:
- In the main window of the Web Console, select Devices → Policies and policy profiles.
The list of policies opens.
- Select the administration group to which the policy is applied. To do so, click the link in the Current path field in the upper part of the window and select an administration group in the window that opens.
The list displays only the policies configured for the selected administration group.
- Select the policy for which you want to modify the settings, and click the link with the policy name to open the policy properties window.
- Edit the policy settings.
- Click Save.
The policy is saved with the updated settings.
Page top
Changing policy status
To change the policy status:
- In the main window of the Web Console, select the Devices → Policies and profiles tab.
The list of policies opens.
- In the list, select the policy for which you want to modify the status, and click the link with the policy name to open the policy properties window.
- On the General tab, in the Policy status section, select the required status:
- Active. The policy that is currently applied to the device.
If this option is selected, this policy becomes active on the device upon the next device synchronization with the Administration Server. This option is selected by default.
- Inactive. The policy that is not currently applied to the device.
If this option is selected, the policy becomes inactive but remains in the Policies folder. You can activate the inactive policy later.
- Out-of-office. Policy that becomes active when the device leaves the corporate network.
If this option is selected, the policy becomes active when the device leaves the organization network.
- Click Save.
The policy status is changed.
Page top
Deleting a policy
To delete a policy:
- In the main window of the Web Console, select the Devices → Policies and profiles tab.
The list of policies opens.
- In the list of policies, select a check box next to the policy that you want to delete.
You can select several policies to delete them simultaneously.
- Click the Delete button above the list of policies.
- Confirm the deletion.
Policy settings
You can use the policy to configure Kaspersky Endpoint Security settings for all client devices included in the administration group.
The set and default values of the policy settings may differ depending on the license type.
Application settings tab
On the Application settings tab, you can select a section containing the settings you want to configure.
Sections
Section |
Subsections |
|---|---|
Essential Threat Protection |
|
Advanced Threat Protection |
|
Local Tasks |
|
General settings |
Proxy server settings |
File Threat Protection
File Threat Protection prevents infection of the computer's file system. File Threat Protection starts automatically with the default settings upon Kaspersky Endpoint Security start. It resides in the computer operating memory and scans all files that are opened, saved, and launched.
File Threat Protection settings
Setting |
Description |
|---|---|
File Threat Protection enabled / disabled |
This toggle button enables or disables File Threat Protection on all managed devices. The check toggle button is switched on by default. |
File Threat Protection mode |
In this drop-down list, you can select the File Threat Protection mode:
|
First action |
In this drop-down list, you can select the first action to be performed by the application on an infected object that has been detected:
|
Second action |
In this drop-down list, you can select the second action to be performed by the application on an infected object, in case the first action is unsuccessful:
|
Scan scopes |
Clicking the Configure scan scopes link opens the Scan scopes window. |
Scan archives |
This check box enables or disables scan of archives. If the check box is selected, the application scans archives. The application detects infected objects in archives, but does not disinfect them. To scan an archive, the application has to unpack it first, which may slow down scanning. You can reduce the archive scan duration by enabling and configuring the Skip object if scan takes longer than (sec) and Skip objects larger than (MB) settings. If the check box is cleared, the application does not scan archives. This check box is cleared by default. |
Scan SFX archives |
This check box enables or disables self-extracting archive scans. Self-extracting archives are archives that contain an executable extraction module. If the check box is selected, the application scans self-extracting archives. If the check box is cleared, the application does not scan self-extracting archives. This check box is available if the Scan archives check box is unchecked. This check box is cleared by default. |
Scan mail databases |
This check box enables or disables scan of mail databases of Microsoft Outlook, Outlook Express, The Bat!, and other mail applications. If the check box is selected, the application scans mail database files. If the check box is cleared, the application does not scan mail database files. This check box is cleared by default. |
Scan mail format files |
This check box enables or disables scan of files of plain-text email messages. If this check box is selected, the application scans plain-text messages. If this check box is cleared, the application does not scan plain-text messages. This check box is cleared by default. |
Skip object if scan takes longer than (sec) |
A field for specifying the maximum time to scan an object, in seconds. After the specified time, the application stops scanning the object. Available values: The default value is |
Skip objects larger than (MB) |
The field for specifying the maximum size of an archive to scan, in megabytes. Available values: The default value is |
Log clean objects |
This check box enables or disables logging of the ObjectProcessed event. If this check box is selected, the application logs the ObjectProcessed event for all scanned objects. If the check box is cleared, the application does not log the event. This check box is cleared by default. |
Log unprocessed objects |
This check box enables or disables logging of the ObjectNotProcessed event if a file cannot be processed during scan. If this check box is selected, the application logs the ObjectNotProcessed event. If the check box is cleared, the application does not log the event. This check box is cleared by default. |
Log packed objects |
This check box enables or disables logging of the PackedObjectDetected event for all packed objects that are detected. If this check box is selected, the application logs the PackedObjectDetected event. If the check box is cleared, the application does not log the event. This check box is cleared by default. |
Use iChecker technology |
This check box enables or disables scan of only new and modified since the last scan files. If the check box is selected, the application scans only new files or the files modified since the last scan. If the check box is cleared, the application scans files regardless of creation or modification date. The check box is selected by default. |
Use heuristic analysis |
This check box enables or disables heuristic analysis during an object scan. The check box is selected by default. |
Heuristic analysis level |
If the Use heuristic analysis check box is selected, you can select the heuristic analysis level in the drop-down list:
|
Scan scopes window
The table contains the scan scopes. The application will scan files and directories located in the paths specified in the table. By default, the table contains one scan scope that includes all directories of the local file system.
Scan scope settings
Setting |
Description |
|---|---|
Scope name |
Scan scope name. |
Path |
Path to the directory that the application scans. |
Status |
The status indicates whether the application scans this scope. |
You can add, edit, delete, move up, and move down items in the table.
Kaspersky Endpoint Security scans objects in the specified scopes in the order they appear in the list of scopes. If necessary, place the subdirectory higher in the list than its parent directory, to configure security settings for a subdirectory that are different from the security settings of the parent directory.
Page top
Add scan scope window
In this window, you can add and configure scan scopes.
Scan scope settings
Setting |
Description |
|---|---|
Scan scope name |
Field for entering the scan scope name. This name will be displayed in the table in the Scan scopes window. The entry field must not be blank. |
Use this scope |
This check box enables or disables scans of this scope by the application. If this check box is selected, the application processes this scan scope. If this check box is cleared, the application does not process this scan scope. You can later include this scope in the component settings by selecting the check box. The check box is selected by default. |
File system, access protocol, and path |
You can select the type of file system in the drop-down list:
|
Access protocol |
You can select the remote access protocol in the drop-down list:
This drop-down list is available if the Shared or Mounted type is selected in the drop-down list of file systems. |
Path |
This is the entry field for specifying the path to the directory that you want to include in the scan scope. The / path is specified by default – the application scans all directories of the local file system. This field is available if the Local type is selected in the drop-down list of file systems. If the Local type is selected in the drop-down list of file systems, and the path is not specified, the application scans all directories of the local file system. |
Name of shared resource |
The field for entering the name of the file system shared resource, where the directories that you want to add to the scan scope are located. The field is available if the Mounted type is selected in the File system drop-down list and the Custom item is selected in the Access protocol drop-down list. |
Masks |
The list contains name masks for the objects that the application scans. By default the list contains the * mask (all objects). |
Scan exclusions
Scan exclusion is a set of conditions that must be met for Kaspersky Endpoint Security not to scan an object for viruses and other threats. You can also exclude objects from scans by masks and threat names.
Settings of scan exclusions
Setting |
Description |
|---|---|
Exclusion scopes |
Clicking the Configure exclusions link opens the Exclusion scopes window. In this window, you can define the list of scan exclusions. |
Exclusions by mask |
Clicking the Configure exclusions by mask link opens the Exclusions by mask window. In this window, you can configure the exclusion of objects from scans by name mask. |
Exclusions by threat name |
Clicking the Configure exclusions by threat name link opens the Exclusions by threat name window. In this window, you can configure the exclusion of objects from scans based on threat name. |
Exclusion scopes window
This table contains scan exclusion scopes. The application does not scan files and directories located at the paths specified in the table. By default, the table is empty.
Exclusion scope settings
Setting |
Description |
|---|---|
Exclusion scope name |
Exclusion scope name. |
Path |
Path to the directory excluded from scan. |
Status |
The status indicates whether the application uses this exclusion. |
You can add, edit, and delete items in the table.
Page top
Add exclusion scope window
In this window, you can add and configure exclusion scopes.
Exclusion scope settings
Setting |
Description |
|---|---|
Exclusion scope name |
Field for entering the exclusion scope name. This name will be displayed in the table in the Exclusion scopes window. The entry field must not be blank. |
Use this scope |
This check box enables or disables the exclusion of the scope when the application is running. If the check box is selected, the application excludes this scope from scan or protection during its operation. If the check box is cleared, the application includes this scope in scan or protection during its operation. You can later exclude this scope from scan or protection by selecting the check box. The check box is selected by default. |
File system, access protocol, and path |
In this drop-down list, you can select the type of file system where the directories that you want to add to scan exclusions are located:
|
Access protocol |
You can select the remote access protocol in the drop-down list:
This drop-down list is available if the Mounted type is selected in the drop-down list of file systems. |
Path |
Entry field for the path to the directory that you want to add to the exclusion scope. The / path is specified by default. The application excludes all directories of the local file system from scan. This field is available if the Local type is selected in the drop-down list of file systems. |
Name of shared resource |
The field for entering the name of the file system shared resource, where the directories that you want to add to the exclusion scope are located. The field is available if the Mounted type is selected in the File system drop-down list and the Custom item is selected in the Access protocol drop-down list. |
Masks |
The list contains name masks of the objects that the application excludes from scan. Masks are only applied to objects in the directory specified in the Path field. By default the list contains the * mask (all objects). |
Exclusions by mask window
You can configure the exclusion of objects from scans based on name mask. The application will not scan files whose names contain the specified mask. By default, the list of masks is empty.
You can add, edit, or delete masks.
Page top
Exclusions by threat name window
You can configure the exclusion of objects from scans based on threat name. The application will not block the specified threats. By default, the list of threat names is empty.
You can add, edit, and delete threat names.
Page top
Firewall Management
The operating system's firewall protects personal data stored on the user's device by blocking most threats to the operating system when the device is connected to the Internet or local network.
The operating system's firewall can detect all network connections on the user's device and provide a list of their IP addresses. The Firewall Management task lets you set the status of these network connections by configuring network packet rules.
This feature is not supported in the KESL container.
Configuring network packet rules lets you specify the desired level of the device protection, from blocking Internet access for all applications to allowing unlimited access. All outbound connections are allowed by default, unless corresponding blocking rules for the Firewall Management task are specified.
It is recommended to disable other operating system firewall management tools before enabling the Firewall Management component.
Firewall Management settings
Setting |
Description |
|---|---|
Firewall Management enabled / disabled |
This toggle button enables or disables Firewall Management. The toggle button is switched off by default. |
Network packet rules |
Clicking the Configure network packet rules link opens the Network packet rules window. In this window, you can configure the list of network packet rules that are applied by the Firewall Management component when it detects the network connection attempt. |
Available networks |
Clicking the Configure available networks link opens the Available networks window. In this window, you can configure the list of networks that the Firewall Management component will monitor. |
Incoming connections |
In this drop-down list, you can select the action to be performed for incoming network connections:
|
Incoming packets |
In this drop-down list you can select the action to be performed for incoming packets:
|
Always add allowing rules for Network Agent ports |
This check box enables or disables automatic adding allowing rules for Network Agent ports. The check box is selected by default. |
Network packet rules window
The Network packet rules table contains network packet rules that the Firewall Management component uses for network activity monitoring. You can configure the settings described in the table below for network packet rules.
Network packet rules settings
Setting |
Description |
|---|---|
Name |
Network packet rule name |
Action |
Action to be performed by Firewall Management when it detects the network activity. |
Local address |
Network addresses of devices that have Kaspersky Endpoint Security installed and can send and/or receive network packets. |
Remote address |
Network addresses of remote devices that can send and/or receive network packets. |
Logging |
This column shows if the application logs actions of the network packet rule. If the value is Yes, the application logs the actions of the network packet rule. If the value is No, the application does not log the actions of the network packet rule. |
By default, the table of network packet rules is empty.
You can add, edit, delete, move up, and move down network packet rules in the table.
Page top
Network packet rule window
In this window, you can configure the network packet rule.
Network packet rule settings
Setting |
Description |
|---|---|
Rule name |
The field for entering the name of the network packet rule. |
Action |
In the drop-down list, you can select an action to be performed by the Firewall Management component when it detects network activity:
|
Protocol |
In the drop-down list, you can select the type of data transfer protocol for which you want to monitor network activity:
|
Specify ICMP type |
This check box lets you specify the ICMP type. The Firewall Management component monitors messages of the specified type sent by the host or gateway. If this check box is selected, the field for entering the ICMP type is displayed. This check box is displayed only if ICMP or ICMPv6 data transfer protocol is selected in the Protocol drop-down list. This check box is cleared by default. |
Specify ICMP code |
This check box lets you specify the ICMP code. The Firewall Management component monitors messages of the type specified (in the field under the Specify ICMP type check box) and the code specified (in the field under the Specify ICMP code check box), sent by a host or gateway. If this check box is selected, the field for entering the ICMP code is displayed. This check box is displayed only if ICMP or ICMPv6 data transfer protocol is selected in the Protocol drop-down list. It is available only if the Specify ICMP type check box is selected. This check box is cleared by default. |
Direction |
In this drop-down list, you can specify the direction of the monitored network activity:
|
Remote address |
In this drop-down list, you can specify network addresses of the remote devices that can send and receive network packets:
|
Specify remote ports |
This check box allows you to specify the port numbers of the remote devices between which the connection must be monitored. If this check box is selected, the field for entering port numbers is displayed. This check box is displayed only if TCP or UDP data transfer protocol is selected in the Protocol drop-down list. This check box is cleared by default. |
Local address |
In this drop-down list, you can specify the network addresses of the devices with Kaspersky Endpoint Security installed that can send and receive network packets:
|
Specify local ports |
This check box allows you to specify the port numbers of the local devices between which the connection must be monitored. If this check box is selected, the field for entering port numbers is displayed. This check box is displayed only if TCP or UDP data transfer protocol is selected in the Protocol drop-down list. This check box is cleared by default. |
Log events |
This check box lets you specify whether the actions of the network rule are recorded in the report. If the check box is selected, the application writes the actions of the network rule to the report. If the check box is cleared, the application does not write the actions of the network rule to the report. This check box is cleared by default. |
Available networks window
The Available networks table contains the networks controlled by the Firewall Management component. The table of available networks is empty by default.
Available networks settings
Setting |
Description |
|---|---|
IP address |
Network IP address. |
Network type |
Network type (Public network, Local network, or Trusted network). |
Network connection window
In this window, you can configure the network connection that the Firewall Management component will monitor.
Network connection
Setting |
Description |
|---|---|
IP address |
The field for entering IP address of the network. |
Network type |
You can select the type of the network:
|
Web Threat Protection
While the Web Threat Protection component is running, Kaspersky Endpoint Security scans inbound traffic and prevents downloads of malicious files from the Internet and also blocks phishing, adware, or other malicious websites. Web Threat Protection is started by default when the application starts.
This feature is not supported in the KESL container.
The application scans HTTP, HTTPS, and FTP traffic. Also, the application scans websites and IP addresses. You can specify the network ports or network port ranges to be monitored.
To monitor HTTPS traffic, enable encrypted connection scans. To monitor FTP traffic, select the Monitor all network ports check box.
Web Threat Protection settings
Setting |
Description |
|---|---|
Web Threat Protection enabled / disabled |
This toggle button enables or disables the Web Threat Protection component. The check toggle button is switched on by default. |
Action on threat detection |
In this section, you can specify the action that the application performs on the web resource where the dangerous object is detected:
|
Detect malicious objects |
This check box enables or disables checking of links against the databases of malicious web addresses. The check box is selected by default. |
Detect phishing links |
This check box enables or disables checking of links against the databases of phishing web addresses. The check box is selected by default. |
Use heuristic analysis for detecting phishing links |
This check box enables or disables the use of heuristic analysis for detecting phishing links. This check box is available if the Detect phishing links check box is selected, and is selected by default. |
Detect adware |
This check box enables or disables checking links against the databases of adware web addresses. This check box is cleared by default. |
Detect legitimate applications that may be used by a hacker to harm devices or data |
This check box enables or disables checking links against the databases of legitimate applications that can be used by hackers to harm devices or data. This check box is cleared by default. |
Trusted web addresses |
This table contains addresses of URLs and web pages whose content you consider trusted. You can only add HTTP/HTTPS web addresses to the list of trusted web addresses. Masks are not supported to specify IP addresses. By default, the table is empty. |
Web address window
In this window, you can add web addresses or web address masks to the list of trusted web addresses.
You can add only HTTP/HTTPS web addresses to the list of trusted web addresses. You can use masks to specify web addresses. Masks are not supported to specify IP addresses.
Page top
Network Threat Protection
While the Network Threat Protection component is running, the application scans inbound network traffic for activity that is typical for network attacks. Network Threat Protection is started by default when the application starts.
This feature is not supported in the KESL container.
The application receives the numbers of the TCP ports from the current application databases and scans incoming traffic for these ports. Upon detecting an attempted network attack that targets your computer, the application blocks network activity from the attacking computer and logs a respective event.
To scan network traffic, the Network Threat Protection task receives port numbers from the application databases and accepts connections via all these ports. During the network scan process, it may look like an open port on the device, even if no application on the system is listening to this port. It is recommended to close unused ports by means of a firewall.
Network Threat Protection settings
Setting |
Description |
|---|---|
Network Threat Protection enabled / disabled |
This toggle button enables or disables Network Threat Protection. The check toggle button is switched on by default. |
Blocking attacking devices enabled / disabled |
This toggle button enables or disables blocking network activity when a network attack attempt is detected. The check toggle button is switched on by default. |
Block the attacking host for (min) |
In this field you can specify the duration an attacking device is blocked in minutes. After the specified time, Kaspersky Endpoint Security allows network activity from this device. Available values: integer from The default value is |
Exclusions |
The table contains a list of IP addresses. Network attacks from these addresses will not be blocked. By default, the list is empty. |
IP address window
In this window, you can add and edit IP addresses. Network attacks from these IP addresses will not be blocked by Kaspersky Endpoint Security.
IP addresses
Setting |
Description |
|---|---|
Specify an IP address (IPv4 or IPv6) |
Entry field for an IP address. You can specify IP addresses of IPv4 and IPv6 versions. |
Kaspersky Security Network
Kaspersky Security Network (KSN) is an infrastructure of cloud services providing access to Kaspersky's online knowledge base with information about the reputation of files, web resources, and software. The use of data from Kaspersky Security Network ensures faster responses by Kaspersky Endpoint Security to various threats, improves the performance of some protection components, and reduces the likelihood of false positives.
Depending on the location of the infrastructure, there are two types of KSN:
- Global KSN – the infrastructure is hosted by Kaspersky servers.
- Private KSN– the infrastructure is hosted by third-party servers, for example in the network of the Internet service provider.
After changing the license, submit the details of the new key to the service provider in order to be able to use Private KSN. Otherwise, data exchange with Private KSN will be impossible due to an authentication error.
Thanks to users who participate in Kaspersky Security Network, Kaspersky is able to develop solutions for neutralizing threats and minimize the number of false alarms displayed by Kaspersky Endpoint Security components. Participation in Kaspersky Security Network is voluntary. The application invites the user to participate in Kaspersky Security Network during installation.
The application provides two ways to participate in Kaspersky Security Network:
- Kaspersky Security Network with statistics: you can obtain information from the knowledge base. The application automatically sends statistics generated during operation of the application to KSN. The application can also send to Kaspersky for additional scanning certain files (or parts of files) that intruders can use to harm the device or data.
- Kaspersky Security Network without statistics: you can obtain information from the knowledge base, but the application does not send anonymous statistics and information about the types and sources of threats.
You can start or stop using Kaspersky Security Network at any time. You can also select another Kaspersky Security Network participation option.
No personal data is collected, processed, or stored. Detailed information about the storage, and destruction, and/or submission to Kaspersky of statistical information generated during participation in KSN is available in the Kaspersky Security Network Statement and on Kaspersky website.
You can read the text of the Kaspersky Security Network Statement in the Kaspersky Security Network Statement window, which can be opened by clicking the Text of the Kaspersky Security Network Statement link.
Kaspersky Security Network settings
Setting |
Description |
|---|---|
Do not participate in Kaspersky Security Network |
By selecting this option, you decline to participate in Kaspersky Security Network. |
Kaspersky Security Network with statistics |
By selecting this option, you accept the terms of participation in Kaspersky Security Network. You will be able to receive information from Kaspersky online knowledge base about the reputation of files, web resources, and software. Also, anonymous statistics and information about the types and sources of various threats will be sent to improve Kaspersky Security Network. |
Kaspersky Security Network without statistics |
By selecting this option, you accept the terms of participation in Kaspersky Security Network. You will be able to receive information from Kaspersky online knowledge base about the reputation of files, web resources, and software. |
Text of the Kaspersky Security Network Statement |
Clicking this link opens the Kaspersky Security Network Statement window. In this window, you can read the text of the Kaspersky Security Network Statement. |
Kaspersky Security Network Statement
In this window, you can read the text of the Kaspersky Security Network Statement and accept its terms and conditions.
Kaspersky Security Network settings
Setting |
Description |
|---|---|
I confirm that I have fully read, understand, and accept the terms and conditions of the Kaspersky Security Network Statement |
By selecting this option, you confirm that you want to participate in the Kaspersky Security Network, and you have fully read, understood, and accept the terms and conditions of the Kaspersky Security Network Statement that is displayed. |
I do not agree to use Kaspersky Security Network |
By selecting this option, you confirm that you do not want to participate in the Kaspersky Security Network. |
Anti-Cryptor
Anti-Cryptor allows you to protect your files in local directories with network access by SMB/NFS protocols from remote malicious encryption.
While the Anti-Cryptor component is running, Kaspersky Endpoint Security scans remote devices calls to access the files located in the shared network directories of the protected device. If the application considers a remote device actions on network file resources to be malicious encrypting, this device is added to a list of untrusted devices and loses access to the shared network directories. The application does not consider activity to be malicious encryption if it is detected in the directories excluded from the protection scope of the Anti-Cryptor component.
This feature is not supported in the KESL container.
To use the component, a license that includes the corresponding function is required.
For the Anti-Cryptor component to operate correctly, at least one of the services (Samba or NFS) must be installed in the operating system. For the NFS service, the rpcbind package must be installed.
Anti-Cryptor operates correctly with the SMB1, SMB2, SMB3, NFS3, TCP/UDP, and IP/IPv6 protocols. Working with NFS2 and NFS4 protocols is not supported. It is recommended to configure your server settings so that the NFS2 and NFS4 protocols cannot be used to mount resources.
Anti-Cryptor does not block access to network file resources until the device activity is identified as malicious. So, at least one file will be encrypted before the application detects malicious activity.
Anti-Cryptor settings
Setting |
Description |
|---|---|
Anti-Cryptor protection enabled / disabled |
This toggle button enables or disables protection of files in the local directories with network access by SMB/NFS protocols from remote malicious encryption. The toggle button is switched off by default. |
Protection scopes |
Clicking the Configure protection scope link opens the Protection scopes window. |
Untrusted hosts blocking enabled / disabled |
This toggle button enables or disables untrusted hosts blocking. The check toggle button is switched on by default. |
Block untrusted host for (min) |
In this field you can specify the untrusted device blocking duration in minutes. After the specified time, Kaspersky Endpoint Security removes the untrusted devices from the list of blocked devices. The access of the host to network file resources is restored automatically, after it is deleted from the list of untrusted hosts. If a compromised host is blocked and you change this setting value, the blocking time for this host will not change. The blocking time is not a dynamic value, and it is calculated at the moment of blocking. Available values: integer from 1 to 4294967295. Default value: 30. |
Exclusions |
Clicking the Configure exclusions link opens the Exclusion scopes window. |
Exclusions by mask |
Clicking the Configure exclusions by mask link opens the Exclusions by mask window. |
Protection scopes window
The table contains protection scopes of the Anti-Cryptor component. The application will scan files and directories located in the paths specified in the table. By default, the table contains one scan scope that includes all directories of the local file system.
Protection scope settings
Setting |
Description |
|---|---|
Scope name |
Protection scope name. |
Path |
Path to the directory that the application protects. |
Status |
The status indicates whether the application scans this scope. |
You can add, edit, delete, move up, and move down items in the table.
Kaspersky Endpoint Security protects objects in the specified scopes in the order they appear in the list of scopes. If necessary, place the subdirectory higher in the list than its parent directory, to configure security settings for a subdirectory that are different from the security settings of the parent directory.
Page top
Add scan scope window
In this window, you can add or configure protection scope for the Anti-Cryptor component.
Protection scope settings
Setting |
Description |
|---|---|
Scan scope name |
Field for entering the protection scope name. This name will be displayed in the table in the Protection scopes window. The entry field must not be blank. |
Use this scope |
This check box enables or disables scans of this scope by the application. If this check box is selected, the application processes this protection scope during the component operation. If this check box is cleared, the application does not process this protection scope during the component operation. You can later include this scope in the component operation settings by selecting the check box. The check box is selected by default. |
File system, access protocol, and path |
You can select the type of file system in the drop-down list:
|
Access protocol |
You can select the remote access protocol in the drop-down list:
This drop-down list is available if the Shared option is selected in the drop-down list of file systems. |
Path |
The entry field for specifying the path to the directory that you want to include in the protection scope. You can use masks to specify the path. This field is available if the Local type is selected in the drop-down list of file systems. The field must not be blank. By default, the / path is specified (root directory). |
Masks |
This list contains name masks of the objects that the application scans during operation of the Anti-Cryptor component. By default the list contains the * mask (all objects). |
Exclusion scopes window
This table contains scan exclusion scopes. The application does not scan files and directories located at the paths specified in the table. By default, the table is empty.
Exclusion scope settings
Setting |
Description |
|---|---|
Exclusion scope name |
Exclusion scope name. |
Path |
Path to the directory excluded from scan. |
Status |
The status indicates whether the application uses this exclusion. |
You can add, edit, and delete items in the table.
Page top
Add exclusion scope window
In this window, you can add and configure exclusion scopes.
Exclusion scope settings
Setting |
Description |
|---|---|
Exclusion scope name |
Field for entering the exclusion scope name. This name will be displayed in the table in the Exclusion scopes window. The entry field must not be blank. |
Use this scope |
This check box enables or disables the exclusion of the scope when the application is running. If the check box is selected, the application excludes this scope from scan or protection during its operation. If the check box is cleared, the application includes this scope in scan or protection during its operation. You can later exclude this scope from scan or protection by selecting the check box. The check box is selected by default. |
File system, access protocol, and path |
In this drop-down list, you can select the type of file system where the directories that you want to add to scan exclusions are located:
|
Access protocol |
You can select the remote access protocol in the drop-down list:
This drop-down list is available if the Mounted type is selected in the drop-down list of file systems. |
Path |
Entry field for the path to the directory that you want to add to the exclusion scope. The / path is specified by default. The application excludes all directories of the local file system from scan. This field is available if the Local type is selected in the drop-down list of file systems. |
Name of shared resource |
The field for entering the name of the file system shared resource, where the directories that you want to add to the exclusion scope are located. The field is available if the Mounted type is selected in the File system drop-down list and the Custom item is selected in the Access protocol drop-down list. |
Masks |
The list contains name masks of the objects that the application excludes from scan. Masks are only applied to objects in the directory specified in the Path field. By default the list contains the * mask (all objects). |
Exclusions by mask window
You can configure the exclusion of objects from scans based on name mask. The application will not scan files whose names contain the specified mask. By default, the list of masks is empty.
You can add, edit, or delete masks.
Page top
System Integrity Monitoring
System Integrity Monitoring is designed to track the actions performed on files and directories in the monitoring scope specified in the component operation settings. You can use System Integrity Monitoring to track the file changes that may indicate a security breach on a protected device.
To use the component, a license that includes the corresponding function is required.
This feature is not supported in the KESL container.
System Integrity Monitoring settings
Setting |
Description |
|---|---|
System Integrity Monitoring enabled / disabled |
This toggle button enables or disables System Integrity Monitoring. The toggle button is switched off by default. |
Monitoring scopes |
Clicking the Configure monitoring scopes link opens the Monitoring scopes window. |
Monitoring exclusions |
Clicking the Configure monitoring exclusion scopes link opens the Exclusion scopes window. |
Exclusions by mask |
Clicking the Configure exclusions by mask link opens the Exclusions by mask window. |
Monitoring scopes window
The table contains monitoring scopes for the System Integrity Monitoring component. The application monitors files and directories located in the paths specified in the table. By default, the table contains the Kaspersky internal objects (/opt/kaspersky/kesl/) monitoring scope.
Monitoring scope settings for System Integrity Monitoring
Setting |
Description |
|---|---|
Scope name |
Monitoring scope name. |
Path |
Path to the directory that the application protects. |
Status |
The status indicates whether the application scans this scope. |
You can add, edit, delete, move up, and move down items in the table.
Kaspersky Endpoint Security scans objects in the specified scopes, in the order they appear in the list of scopes. If necessary, place the subdirectory higher in the list than its parent directory, to configure security settings for a subdirectory that are different from the security settings of the parent directory.
Add monitoring scope window
In this window, you can add and configure monitoring scope for the System Integrity Monitoring component.
Monitoring scope settings
Setting |
Description |
|---|---|
Scan scope name |
Field for entering the monitoring scope name. This name will be displayed in the table in the Monitoring scopes window. The entry field must not be blank. |
Use this scope |
This check box enables or disables scans of this scope by the application. If this check box is selected, the application controls this monitoring scope during the operation. If this check box is cleared, the application does not control this monitoring scope during the operation. You can later include this scope in the component settings by selecting the check box. The check box is selected by default. |
File system, access protocol, and path |
Entry field for the path to the local directory that you want to include in the monitoring scope. You can use masks to specify the path. The field must not be blank. The / path is specified by default – the application scans all directories of the local file system. |
Masks |
The list contains name masks for the objects that the application scans. By default the list contains the * mask (all objects). |
Exclusion scopes window
The table contains monitoring exclusion scopes for the System Integrity Monitoring component. The application does not scan files and directories located at the paths specified in the table. By default, the table is empty.
Monitoring exclusion scope settings
Setting |
Description |
|---|---|
Exclusion scope name |
Exclusion scope name. |
Path |
Path to the directory excluded from monitoring. |
Status |
Indicates whether the application excludes this scope from monitoring during the component operation. |
You can add, edit, and delete items in the table.
Page top
Add exclusion scope window
In this window, you can add or configure the monitoring exclusion scope for the System Integrity Monitoring component.
Monitoring exclusion scope settings
Setting |
Description |
|---|---|
Exclusion scope name |
Field for entering the exclusion scope name. This name will be displayed in the table in the Exclusion scopes window. The entry field must not be blank. |
Use this scope |
The check box enables or disables the exclusion of the scope from monitoring when the application is running. If this check box is selected, the application excludes this scope from monitoring during the component operation. If this check box is cleared, the application monitors this scope during the component operation. You can later exclude this scope from monitoring by selecting the check box. The check box is selected by default. |
File system, access protocol, and path |
Entry field for the path to the local directory that you want to add to the exclusion scope. You can use masks to specify the path. The field must not be blank. The / path is specified by default. The application excludes all directories of the local file system from scan. |
Masks |
The list contains name masks of the objects that the application excludes from the monitoring. By default the list contains the * mask (all objects). |
Exclusions by mask window
You can configure the exclusion of objects from monitoring based on name masks. The application does not scan the files with the names containing the specified masks. By default, the list of masks is empty.
You can add, edit, or delete masks.
Page top
Application Control
During operation of the Application Control component, Kaspersky Endpoint Security controls launches of applications on the user computers. This helps reduce the risk of computer infection by restricting access to applications. Application launching is regulated by application control rules.
To use the component, a license that includes the corresponding function is required.
This feature is not supported in the KESL container.
Application Control can operate in two modes:
- Denylist. In this mode Kaspersky Endpoint Security allows all users to launch any applications that are not specified in the application control rules. This is the default operation mode of the Application Control task.
- Allowlist. In this mode Kaspersky Endpoint Security prevents all users from launching any applications that are not specified in the application control rules.
Thus, if the application control rules are created to the fullest extent possible, Kaspersky Endpoint Security prohibits the launching of all new applications that are not verified by the administrator of the organization's local network, but ensures the performance of the operating system and verified applications that users need to perform their job duties.
For each Application Control operation mode, separate rules can be created and the action can be specified: apply the rule or test the rule. Kaspersky Endpoint Security performs this action when it detects an attempt to start an application.
The Application Control settings are described in the following table.
Application Control settings
Setting |
Description |
|---|---|
Application Control enabled / disabled |
This toggle button enables or disables Application Control. The toggle button is switched off by default. |
Application Control action |
You can select the action to be performed by Application Control upon detection of an attempt to start the application that matches the configured rules:
|
Application Control mode |
You can select the mode of the Application Control component operation:
|
Application Control rules |
Clicking the Configure rules link opens the Application Control rules window. |
Application Control rules window
The Application Control rules table has the tabs with the rules for each operation mode: Denylist (active) and Allowlist. Both tabs of the Application Control rules table are empty by default.
Application Control rules settings
Setting |
Description |
|---|---|
Category |
The name of the application category that is used by the rule. |
Status |
Operation status of the application control rule:
|
Application Control rule window
In this window, you can configure the settings for the Application Control rule.
Configuring Application Control rule
Setting |
Description |
|---|---|
Rule description |
Description of the application control rule. |
Status |
You can select the operation status of the Application Control rule:
|
Category |
Clicking the Configure category link opens the Application Control categories window. |
Access control list |
The table contains a list of users or user groups to which the application control rule applies, and the types of access assigned to them, and consists of the following columns:
|
Application Control categories window
In this window, you can add a new category or configure the category settings for an Application Control rule.
KL categories usage is not supported in Kaspersky Security Center.
Application Control categories
Setting |
Description |
|---|---|
Category name |
List to search for the added Application Control categories. |
Add |
Clicking this button launches the Kaspersky Security Center Category Creation Wizard. Follow the instructions of the Wizard. |
Edit |
Clicking this button opens the category properties window, where you can change the category settings. |
Select user or group window
In this window, you can specify the name of a local or domain user or user group for which you want to configure an access rule.
You can use the search box to enter the search criteria.
Page top
Device Control
When the Device Control component is enabled, Kaspersky Endpoint Security manages user access to devices that are installed or connected to the computer (for example, hard drives, smart card readers, or Wi-Fi modules). This lets you protect the computer from infection when such devices are connected, and prevent data loss or leaks. Device Control manages user access to devices using the access rules.
This feature is not supported in the KESL container.
When a device blocked by Device Control is connected to the computer, the application blocks user access to this device and shows a notification.
Device Control settings
Setting |
Description |
|---|---|
Device Control enabled / disabled |
This toggle button enables or disables Device Control. The check toggle button is switched on by default. |
Configure trusted devices |
Clicking this link opens the Trusted devices window. In this window, you can add devices to a list of trusted devices by ID or by selecting them from the list of existing devices. |
Configure settings for device types |
Clicking this link opens the Device types window. In this window, you can configure access rules for various types of devices. |
Configure settings for connection buses |
Clicking this link opens the Connection buses window. In this window, you can configure access rules for connection buses. |
Trusted devices window
The table contains a list of trusted devices. The table is empty by default.
Trusted device settings
Setting |
Description |
|---|---|
Device ID |
ID of a trusted device. |
Device name |
Name of a trusted device. |
Device type |
Trusted device type (for example, Hard drive or Smart card reader). |
Host name |
Name of the trusted device's host. |
Comment |
Comment related to a trusted device. |
You can add a device to the list of trusted devices by device ID or by selecting the required device from the list of devices existing on the computer.
You can edit and delete trusted devices in the table.
Page top
Trusted device (Device ID) window
In this window, you can add a device to the list of trusted devices by its identifier.
Adding device by ID
Setting |
Description |
|---|---|
Device ID |
Entry field for a device ID. You can manually specify the device ID or copy the required device ID from the Map devices to hosts list. |
Comment |
Entry field for a comment (optional). This field is available after you enter the device ID, and click the Next button. |
Trusted device (Devices on host) window
In this window you can add a device to the list of trusted devices by selecting it in the list of existing devices.
Information about existing devices is available only if there is an active policy and there has been synchronization with the Network Agent (performs within the limits specified in the Network Agent policy, 15 minutes by default). If you create a new policy and there are no other active ones, the list will be empty.
Adding device from list
Setting |
Description |
|---|---|
Device type |
In this drop-down list, you can select type of devices to be displayed in the Devices on host table. |
Device ID mask |
Entry field for a device ID mask. |
Comment |
Entry field for a comment (optional). This field is available after you select the devices, and click the Next button. |
Clicking the Filter button opens the window, where you can set up the filtering of displayed information about devices.
Page top
Device types window
In this window, you can configure access rules for various types of devices.
Access rules for device types
Setting |
Description |
|---|---|
Access to data storage devices |
The table contains the following columns:
|
Access to removable drives |
The table contains the following columns:
|
Device access rules window
In this window, you can configure access rules and schedules for the selected device type.
Device access rules and schedules
Setting |
Description |
|---|---|
Access to device |
Access rule for devices of the selected type:
|
Users and/or groups of users |
This table contains access schedules for users and user groups. It consists of the following columns:
|
Device access rules window
In this window, you can configure the device access rule.
Device access rule
Setting |
Description |
|---|---|
Access to device |
Access rule for devices of the selected type:
|
Users and/or groups of users |
The table contains the list of local and domain users and groups for which you can configure an access schedule. By default, the table contains the \Everyone item (all users). |
Schedule for access to devices |
List of available schedules. You can edit the schedule settings. |
Select user or group window
In this window, you can specify the name of a local or domain user or user group for which you want to configure an access rule.
You can use the search box to enter the search criteria.
Page top
Schedules window
In this window, you can specify the schedule for the selected device access rule.
You can add, edit, and delete an access schedule.
You cannot delete the Default schedule.
Schedule for access to devices window
In this window, you can configure the device access schedule. You can configure schedules only for hard drives, removable drives, floppy disks, and CD/DVD drives.
In the General settings->Application settings section, if the Block access to files during scans check box is cleared, then it is not possible to block access to devices using a device access schedule.
Schedule for access to devices
Setting |
Description |
|---|---|
Name |
Entry field for the access schedule name. |
Time intervals |
The table where you can select time intervals for the schedule (days and hours). Intervals highlighted in green are included to the schedule. To exclude an interval from the schedule, click the corresponding cells. Intervals excluded from the schedule are highlighted in gray. By default, all intervals (24/7) are included to the schedule. |
Connection buses window
In this window, you can configure access rules for connection buses.
Connection rules for buses
Setting |
Description |
|---|---|
Connection bus |
Connection bus used to connect devices to the client device:
|
Access |
This toggle button enables or disables access to devices that use this connection bus:
|
Behavior Detection
By default, the Behavior Detection component starts when Kaspersky Endpoint Security starts and monitors malicious activity in the operating system. If malicious activity is detected, Kaspersky Endpoint Security terminates that process.
This feature is not supported in the KESL container.
Behavior Detection component settings
Setting |
Description |
|---|---|
Behavior Detection enabled / disabled |
This toggle button enables or disables the Behavior Detection component. The check toggle button is switched on by default. |
Task management
You can configure the ability to view and manage Kaspersky Endpoint Security tasks on managed devices.
Task management settings
Setting |
Description |
|---|---|
Allow users to view and manage local tasks |
This check box allows or prohibits users from viewing local tasks created in the Web Console and managing these tasks on the managed devices. This check box is cleared by default. |
Allow users to view and manage group tasks |
This check box allows or prohibits users from viewing the tasks created in the Web Console and managing these tasks on the managed devices. This check box is cleared by default. |
Removable Drives Scan
When the Removable Drives Scan task is running, the application scans the removable device and its boot sectors for viruses and other malware. The following removable drives are scanned: CDs, DVDs, Blu-ray discs, flash drives (including USB modems), external hard drives, and floppy disks.
This feature is not supported in the KESL container.
Removable Drives Scan task settings
Setting |
Description |
|---|---|
Removable drives scan enabled / disabled |
This option enables or disables the scan of removable drives when they are connected to the user device. The toggle button is switched off by default. |
Action when a removable drive connects |
In the drop-down list, you can select an action to be performed by the application upon connection of removable drives to the user device:
|
Action on a CD / DVD drive connection |
In the drop-down list, you can select an action to be performed by the application upon connection of CD/DVD drives and Blu-ray discs to the user device:
|
Block access to the removable drive while scanning |
This check box enables or disables blocking of files on the connected drive during execution of the Removable Drives Scan task. This check box is cleared by default. |
Proxy server settings
You can configure proxy server settings if the users of the client devices use a proxy server to connect to the internet. Kaspersky Endpoint Security may use a proxy server to connect to Kaspersky servers, for example, when updating application databases and modules or when communicating with Kaspersky Security Network and Kaspersky Endpoint Detection and Response (KATA).
Proxy server settings
Setting |
Description |
|---|---|
Do not use proxy server |
If this option is selected, Kaspersky Endpoint Security does not use a proxy server. |
Use specified proxy server settings |
If this option is selected, Kaspersky Endpoint Security uses the specified proxy server settings. |
Address and port |
Fields for entering the proxy server's IP address or domain name as well as its port. Default port: 3128. The fields are available if the Use specified proxy server settings option is selected. |
Use user name and password |
This check box enables or disables proxy server authentication using a user name and password. This check box is available if the Use specified proxy server settings option is selected. This check box is cleared by default. When connecting via an HTTP proxy, we recommend to use a separate account that is not used to sign in to other systems. An HTTP proxy uses an insecure connection, and the account may be compromised. |
User name |
Entry field for the user name used for proxy server authentication. This entry field is available if the Use user name and password check box is selected. |
Password |
Entry field for entering the user password for proxy server authentication. It is recommended to make sure that the password complexity and anti-bruteforce mechanisms ensure that the password cannot be guessed within 6 months. Clicking the Show button causes the user's password to be displayed in clear text in the Password field. By default, the user password is hidden and is displayed as asterisks. The entry field and button are available if the Use user name and password check box is selected. |
Use Kaspersky Security Center as a proxy server for the application activation |
This check box enables or disables use of Kaspersky Security Center as a proxy server for application activation. If this check box is selected, Kaspersky Endpoint Security uses Kaspersky Security Center as a proxy server for the application activation. This check box is cleared by default. |
Application settings
You can configure the general settings of Kaspersky Endpoint Security.
General application settings
Setting |
Description |
|---|---|
Detect legitimate applications that may be used by a hacker to harm devices or data |
This check box enables or disables the detection of legitimate software that could be used by hackers to harm computers or data of users. This check box is cleared by default. |
Event notifications |
Clicking the Configure event notifications link opens the Notification settings window. In this window, you can select the events for which the application logs notifications to the operating system log (syslog). Select the check box next to each type of event for which you want to send notifications. You can also select the check box next to the importance level of events (Critical events, Informational messages, Functional failure, and Warnings). In this case, the check boxes will be automatically selected next to each type of event that belongs to the group of the selected importance level. All check boxes are cleared by default. |
Block files during scan |
This check box enables or disables blocking of files in which threats were detected during scans performed by the File Threat Protection and Anti-Cryptor components and the Removable Drives Scan task. The check box is selected by default. |
Container Scan settings
You can configure the settings for namespace and container scan by Kaspersky Endpoint Security.
The application does not scan namespaces and containers unless components for working with containers and namespaces are installed in the operating system. Moreover, in the device properties in the Applications section, in the application properties in the Components section for container scans, the Stopped status is displayed.
Container Scan settings
Setting |
Description |
|---|---|
Namespace and container scan enabled / disabled |
This toggle button enables or disables namespace and container scans. The check toggle button is switched on by default. |
Action with container upon threat detection |
You can select the action that the application performs on a container when it detects an infected object:
This setting is available when using the application under a license that supports this function. |
Use Docker |
This check box enables or disables the use of the Docker environment. The check box is selected by default. |
Docker socket path |
Entry field for the path or URI (Uniform Resource Identifier) of the Docker socket. The default value is /var/run/docker.sock. |
Use CRI-O |
The check box enables or disables the use of the CRI-O environment. The check box is selected by default. |
File path |
Entry field for the path to CRI-O configuration file. Default value: /etc/crio/crio.conf. |
Use Podman |
The check box enables or disables the use of the Podman utility. The check box is selected by default. |
File path |
Entry field for the path to the Podman utility executable file. Default value: /usr/bin/podman. |
Root folder |
Entry field for the path to the root directory of the container storage. Default value: /var/lib/containers/storage. |
Use runc |
The check box enables or disables the use of the runc utility. The check box is selected by default. |
File path |
Entry field for the path to the runc utility executable file. Default value: /usr/bin/runc. |
Root folder |
Entry field for the path to the root directory of the container state storage. Default value: /run/runc-ctrs. |
Managed Detection and Response
Integration between Kaspersky Endpoint Security and Kaspersky Managed Detection and Response enables continuous search, detection and elimination of threats aimed at your organization.
When interacting with Kaspersky Managed Detection and Response, Kaspersky Endpoint Security allows you to perform the following actions:
- Send telemetry data to Kaspersky Managed Detection and Response for threat detection.
- Carry out Kaspersky Managed Detection and Response commands for providing security features.
Managed Detection and Response settings
Setting
Description
Managed Detection and Response enabled / disabled
This toggle button enables or disables integration between Kaspersky Endpoint Security and Kaspersky Managed Detection and Response.
The toggle button is switched off by default.
Download
Clicking this button opens a standard Microsoft Windows window, where you can select the BLOB configuration file.
Network settings
You can configure the settings of encrypted connection scans. These settings apply to the Web Threat Protection and Network Threat Protection components.
Network settings
Setting |
Description |
|---|---|
Encrypted connections scan enabled / disabled |
This toggle button enables or disables scanning of encrypted connections. The check toggle button is switched on by default. |
Action when an untrusted certificate is encountered |
You can select an action to be performed by the application upon detection of an untrusted certificate:
|
Action on errors during an encrypted connections scan |
You can select an action to be performed by the application when an error occurs during encrypted connection scan:
|
Certificate verification policy |
You can select how the application verifies certificates:
|
Exclusions |
In this section, you can configure a list of trusted domain names. Clicking the Configure exclusions link opens the Exclusions window. By default, a list of trusted domain names is empty. |
Network ports |
Clicking the Configure network port settings link opens the Network ports window, where you can specify the ports to be scanned by the application. |
Monitor all network ports |
If this option is selected, the application monitors all network ports. |
Monitor specified ports only |
If this option is selected, the application monitors only the network ports specified in the Network ports window. This option is selected by default. |
Exclusions window
This list contains the domain names and domain name masks that will be excluded from encrypted connection scans. By default, the list is empty.
You can add, edit and remove domains from the list of trusted domains.
Page top
Network ports window
This table contains the network ports monitored by the application if the Monitor specified ports only option is selected in the Network settings window.
The table contains two columns:
- Port – monitored port.
- Description – description of the monitored port.
By default, the table displays a list of network ports that are usually used for the transmission of mail and network traffic. The list of network ports is included in the application package.
You can add, edit, and delete items in the table.
Page top
Global exclusions
The table contains mount points that will be excluded from the scan scope for the application components that use the file operation interceptor (File Threat Protection and Anti-Cryptor).
The Path column displays the paths to the excluded mount points. The table is empty by default.
You can add, edit, and delete items in the table.
Page top
Adding a mount point exclusion window
Mount point settings
Setting |
Description |
|---|---|
File system, access protocol, and path |
In this drop-down list, you can select the type of file system where the directories that you want to add to scan exclusions are located:
|
Access protocol |
You can select the remote access protocol in the drop-down list:
This drop-down list is available if the Mounted type is selected in the drop-down list of file systems. |
Path |
Field for entering the path to the mount point that you want to exclude from file operation interception. You can use masks to specify the path. This field is available if the Local type is selected in the drop-down list of file systems. |
Name of shared resource |
The field for entering the name of the file system shared resource, where the directories that you want to add to the file operation interception exclusions are located. The field is available if the Mounted type is selected in the File system drop-down list and the Custom item is selected in the Access protocol drop-down list. |
Storage settings
The Storage is a list of backup copies of files that have been deleted or modified during the disinfection process. Backup copy is a file copy created at the first attempt to disinfect or delete this file. Backup copies of files are stored in a special format and do not pose a threat. By default, the Storage is located in the /var/opt/kaspersky/kesl/common/objects-backup/ directory. Files in the Storage may contain personal data. Root privileges are required to access files in the Storage.
Storage settings
Setting |
Description |
|---|---|
Informing about unprocessed files enabled / disabled |
This toggle button enables or disables sending notifications about the files, that cannot be processed during the scan, to the Administration Server. The check toggle button is switched on by default. |
Informing about installed devices enabled / disabled |
This toggle button enables or disables sending information about the devices installed on the managed client device to the Administration Server. The check toggle button is switched on by default. |
Informing about files in Storage enabled / disabled |
This toggle button enables or disables sending of notifications about files in the Storage to the Administration Server. The check toggle button is switched on by default. |
Store objects no longer than (days) |
The entry field to specify the period for storing objects in the Storage. Available values: 0–3653. Default value: 90. If 0 is specified, the period for storing objects in the Storage is unlimited. |
Maximum size of Storage (MB) |
The entry field to specify the maximum size of the Storage (MB). Available values: 0–999999. Default value: 0 (the size of Storage is unlimited). |
Managing tasks in the Web Console
You can create the following tasks for managing Kaspersky Endpoint Security using the Web Console:
- Local tasks that are configured for an individual device
- Group tasks that are configured for devices within administration groups
- Tasks for sets of devices that do not belong to administration groups
The tasks for the sets of devices are performed only on the devices that are specified in the task settings. If new devices are added to the device selection for which the task is created, this task is not applied to the new devices. To apply the task to these computers, you must create a new task or edit the settings of the existing task.
You can create any number of local tasks, group tasks, and tasks for device sets.
The tasks are executed only if Kaspersky Endpoint Security is running on the devices.
You can perform the following actions with tasks:
- Create a task.
- Edit task settings.
Configuration of some settings is not supported in the KESL container.
- Manage the start and stop of a task.
- Export and import a task.
- Delete a task.
For general information about the tasks in the Web Console, refer to Kaspersky Security Center documentation.
Creating a new task
To create a task:
- In the main window of Web Console, select Devices → Tasks.
The list of tasks opens.
- Click Add.
The Task Wizard starts.
- In the New task window, configure the task settings:
- In the Application drop-down list, select Kaspersky Endpoint Security 11.2.0 for Linux.
- In the Task type drop-down list, select the type of task that you want to create.
- In the Task name field, enter a brief description, for example,
Update the application for Accounting. - In the Select devices to which the task will be assigned section, select a method for specifying devices.
- Click Next.
- In the Task scope window, select the devices and click Next.
- Complete the wizard.
A new task will be displayed in the list of tasks. The task will have the default settings. To configure the task settings, go to the task properties window. To run a task, select the check box next to the task and click the Start button.
In the list of tasks, you can monitor the task execution results, which include the task status and the statistics for task performance on the devices. You can also create a selection of events to monitor the task execution (Monitoring and reports → Event selections). For details on event selection, refer to Kaspersky Security Center documentation.
Task execution results are also saved locally and in Kaspersky Security Center reports.
Page top
Editing task settings
To edit task settings:
- In the main window of Web Console, select Devices → Tasks.
The list of tasks opens.
- In the list, select the task for which you want to modify the settings, and click the link with the task name to open the task properties window.
- Edit the task settings.
- Click Save.
The task is saved with the updated settings.
Page top
Actions on tasks
To start, pause, resume, stop, delete, copy, or move a task:
- In the main window of Web Console, select Devices → Tasks.
The list of tasks opens.
- In the list of tasks, select the task that you want to start, pause, resume, stop, delete, copy, or move and click the corresponding button (if available).
Task settings
The tasks are executed only if Kaspersky Endpoint Security is running on the devices.
The following types of tasks are provided for managing Kaspersky Endpoint Security by means of the Web Console:
- Virus Scan. During the task execution, the application scans the device areas that are specified in the task settings for viruses and other malware.
- Add Key. During the task execution, the application adds a key, including a reserve one, to activate the application.
- Inventory Scan. During the task execution, the application receives information about all executable files stored on the devices.
- Update. During the task execution, the application updates the databases in accordance with the configured update settings.
- Rollback. During the task execution, the application rolls back the last database update.
- Critical Areas Scan. During the task execution, the application scans boot sectors, startup objects, process memory, and kernel memory.
- Container Scan. During the task execution, the application scans containers and images for viruses and other malware.
- System Integrity Check. During the task execution, the application determines changes of each object by comparing the current state of the monitored object to its original state, which was previously established as a baseline.
The set and default values of the task settings may differ depending on the application license type.
Virus Scan. Scan settings section
Virus Scan is a one-time full or custom scan of files on the computer performed by the application. The application can perform several virus scan tasks at the same time.
By default, the application creates one standard virus scan task – full scan. The application scans all objects located on local drives of the computer, as well as all mounted and shared objects that are accessed via the Samba and NFS protocols with the recommended security settings.
During a full disk scan, the computer processor will be busy. It is recommended to run the full scan task when the business is idle.
You can also create virus scan user tasks.
Virus Scan task settings
Setting |
Description |
|---|---|
Task priority |
In this group of settings you can select the task priority:
|
Scan archives |
This check box enables or disables scan of archives. If the check box is selected, the application scans archives. To scan an archive, the application has to unpack it first, which may slow down scanning. You can reduce the archive scan time by configuring the Skip object if scan takes longer than (sec) and Skip objects larger than (MB) settings in the General scan settings section. If the check box is cleared, the application does not scan archives. The check box is selected by default. |
Scan SFX archives |
This check box enables or disables self-extracting archive scans. Self-extracting archives are archives that contain an executable extraction module. If the check box is selected, the application scans self-extracting archives. If the check box is cleared, the application does not scan self-extracting archives. This check box is available if the Scan archives check box is unchecked. The check box is selected by default. |
Scan mail databases |
This check box enables or disables scan of mail databases of Microsoft Outlook, Outlook Express, The Bat!, and other mail applications. If the check box is selected, the application scans mail database files. If the check box is cleared, the application does not scan mail database files. This check box is cleared by default. |
Scan mail format files |
This check box enables or disables scan of files of plain-text email messages. If this check box is selected, the application scans plain-text messages. If this check box is cleared, the application does not scan plain-text messages. This check box is cleared by default. |
Skip object if scan takes longer than (sec) |
A field for specifying the maximum time to scan an object, in seconds. After the specified time, the application stops scanning the object. Available values: The default value is |
Skip objects larger than (MB) |
The field for specifying the maximum size of an archive to scan, in megabytes. Available values: The default value is |
Log clean objects |
This check box enables or disables the logging of ObjectProcessed type events. If this check box is selected, the application logs events of the ObjectProcessed type for all scanned objects. If this check box is cleared, the application does not log events of the ObjectProcessed type for any scanned object. This check box is cleared by default. |
Log unprocessed objects |
This check box enables or disables the logging ObjectNotProcessed type events if a file cannot be processed during a scan. If this check box is selected, the application logs events of the ObjectNotProcessed type. If this check box is cleared, the application does not log events of the ObjectNotProcessed type. This check box is cleared by default. |
Log packed objects |
This check box enables or disables the logging of PackedObjectDetected type events for all packed objects that are detected. If this check box is selected, the application logs events of the PackedObjectDetected type. If this check box is cleared, the application does not log events of the PackedObjectDetected type. This check box is cleared by default. |
Use iChecker technology |
This check box enables or disables scan of only new and modified since the last scan files. If the check box is selected, the application scans only new files or the files modified since the last scan. If the check box is cleared, the application scans files regardless of creation or modification date. The check box is selected by default. |
Use heuristic analysis |
This check box enables or disables heuristic analysis during file scans. The check box is selected by default. |
Heuristic analysis level |
If the Use heuristic analysis check box is selected, you can select the heuristic analysis level in the drop-down list:
|
First action |
In this drop-down list, you can select the first action to be performed by the application on an infected object that has been detected:
|
Second action |
In this drop-down list, you can select the second action to be performed by the application on an infected object, in case the first action is unsuccessful:
|
Scan scopes |
The table that contains the scopes scanned by the task. By default, the table contains one scan scope that includes all directories of the local file system. You can add, configure, delete, move up, or move down scan scopes in the table. |
Add scan scope window
In this window, you can add and configure scan scopes.
Scan scope settings
Setting |
Description |
|---|---|
Scan scope name |
Field for entering the scan scope name. This name will be displayed in the table in the Scan scopes window. The entry field must not be blank. |
Use this scope |
This check box enables or disables scans of this scope by the application. If this check box is selected, the application processes this scan scope. If this check box is cleared, the application does not process this scan scope. You can later include this scope in the component settings by selecting the check box. The check box is selected by default. |
File system, access protocol, and path |
You can select the type of file system in the drop-down list:
|
Access protocol |
You can select the remote access protocol in the drop-down list:
This drop-down list is available if the Shared or Mounted type is selected in the drop-down list of file systems. |
Path |
This is the entry field for specifying the path to the directory that you want to include in the scan scope. The / path is specified by default – the application scans all directories of the local file system. This field is available if the Local type is selected in the drop-down list of file systems. If the Local type is selected in the drop-down list of file systems, and the path is not specified, the application scans all directories of the local file system. |
Name of shared resource |
The field for entering the name of the file system shared resource, where the directories that you want to add to the scan scope are located. The field is available if the Mounted type is selected in the File system drop-down list and the Custom item is selected in the Access protocol drop-down list. |
Masks |
The list contains name masks for the objects that the application scans. By default the list contains the * mask (all objects). |
Virus Scan. Scan scopes section
You can configure scan scope settings for the Virus Scan task. The application allows you to scan files, boot sectors, computer memory and startup objects.
Scan scope settings for the Virus Scan task
Setting |
Description |
|---|---|
Scan files |
This check box enables or disables file scans. If the check box is selected, the application scans the files. If the check box is cleared, the application does not scan the files. The check box is selected by default. |
Scan boot sectors |
This check box enables or disables boot sector scans. If the check box is selected, the application scans the boot sectors. If the check box is cleared, the application does not scan the boot sectors. This check box is cleared by default. |
Scan computer memory |
This check box enables or disables computer memory scans. If this check box is selected, the application scans process memory and kernel memory. If this check box is cleared, the application does not scan process memory and kernel memory. This check box is cleared by default. |
Scan startup objects |
This check box enables or disables startup object scans. If the check box is selected, the application scans startup objects. If the check box is cleared, the application does not scan startup objects. This check box is cleared by default. |
Devices to scan |
Clicking the Configure device masks link opens the Scan scopes window, where you can specify the devices whose boot sectors will be scanned. |
Scan scopes window
The table contains name masks of the devices, whose boot sectors the application must scan. By default, the table contains the /** device name mask (all devices).
You can add, edit, and delete items in the table.
Page top
Virus Scan. Exclusion scopes section
In the Exclusion scopes section, you can configure exclusion scopes as well as exclusions by mask and by the threat name for the Virus Scan task.
Page top
Critical Areas Scan. Scan settings section
The Critical Areas Scan task allows you to scan boot sectors, startup objects, process memory, and kernel memory.
Critical Areas Scan task settings
Setting |
Description |
|---|---|
Task priority |
In this group of settings you can select the task priority:
|
Scan archives |
This check box enables or disables scan of archives. If the check box is selected, the application scans archives. To scan an archive, the application has to unpack it first, which may slow down scanning. You can reduce the archive scan time by configuring the Skip object if scan takes longer than (sec) and Skip objects larger than (MB) settings in the General scan settings section. If the check box is cleared, the application does not scan archives. The check box is selected by default. |
Scan SFX archives |
This check box enables or disables self-extracting archive scans. Self-extracting archives are archives that contain an executable extraction module. If the check box is selected, the application scans self-extracting archives. If the check box is cleared, the application does not scan self-extracting archives. This check box is available if the Scan archives check box is unchecked. The check box is selected by default. |
Scan mail databases |
This check box enables or disables scan of mail databases of Microsoft Outlook, Outlook Express, The Bat!, and other mail applications. If the check box is selected, the application scans mail database files. If the check box is cleared, the application does not scan mail database files. This check box is cleared by default. |
Scan mail format files |
This check box enables or disables scan of files of plain-text email messages. If this check box is selected, the application scans plain-text messages. If this check box is cleared, the application does not scan plain-text messages. This check box is cleared by default. |
Skip object if scan takes longer than (sec) |
A field for specifying the maximum time to scan an object, in seconds. After the specified time, the application stops scanning the object. Available values: The default value is |
Skip objects larger than (MB) |
The field for specifying the maximum size of an archive to scan, in megabytes. Available values: The default value is |
Log clean objects |
This check box enables or disables the logging of ObjectProcessed type events. If this check box is selected, the application logs events of the ObjectProcessed type for all scanned objects. If this check box is cleared, the application does not log events of the ObjectProcessed type for any scanned object. This check box is cleared by default. |
Notify about unprocessed files |
This check box enables or disables the logging ObjectNotProcessed type events if a file cannot be processed during a scan. If this check box is selected, the application logs events of the ObjectNotProcessed type. If this check box is cleared, the application does not log events of the ObjectNotProcessed type. This check box is cleared by default. |
Log packed objects |
This check box enables or disables the logging of PackedObjectDetected type events for all packed objects that are detected. If this check box is selected, the application logs events of the PackedObjectDetected type. If this check box is cleared, the application does not log events of the PackedObjectDetected type. This check box is cleared by default. |
Use iChecker technology |
This check box enables or disables scan of only new and modified since the last scan files. If the check box is selected, the application scans only new files or the files modified since the last scan. If the check box is cleared, the application scans files regardless of creation or modification date. The check box is selected by default. |
Use heuristic analysis |
This check box enables or disables heuristic analysis during file scans. The check box is selected by default. |
Heuristic analysis level |
If the Use heuristic analysis check box is selected, you can select the heuristic analysis level in the drop-down list:
|
First action |
In this drop-down list, you can select the first action to be performed by the application on an infected object that has been detected:
|
Second action |
In this drop-down list, you can select the second action to be performed by the application on an infected object, in case the first action is unsuccessful:
|
Scan scopes |
The table that contains the scopes scanned by the task. By default, the table contains one scan scope that includes all directories of the local file system. You can add, configure, delete, move up, or move down scan scopes in the table. |
Add scan scope window
In this window, you can add and configure scan scopes.
Scan scope settings
Setting |
Description |
|---|---|
Scan scope name |
Field for entering the scan scope name. This name will be displayed in the table in the Scan scopes window. The entry field must not be blank. |
Use this scope |
This check box enables or disables scans of this scope by the application. If this check box is selected, the application processes this scan scope. If this check box is cleared, the application does not process this scan scope. You can later include this scope in the component settings by selecting the check box. The check box is selected by default. |
File system, access protocol, and path |
You can select the type of file system in the drop-down list:
|
Access protocol |
You can select the remote access protocol in the drop-down list:
This drop-down list is available if the Shared or Mounted type is selected in the drop-down list of file systems. |
Path |
This is the entry field for specifying the path to the directory that you want to include in the scan scope. The / path is specified by default – the application scans all directories of the local file system. This field is available if the Local type is selected in the drop-down list of file systems. If the Local type is selected in the drop-down list of file systems, and the path is not specified, the application scans all directories of the local file system. |
Name of shared resource |
The field for entering the name of the file system shared resource, where the directories that you want to add to the scan scope are located. The field is available if the Mounted type is selected in the File system drop-down list and the Custom item is selected in the Access protocol drop-down list. |
Masks |
The list contains name masks for the objects that the application scans. By default the list contains the * mask (all objects). |
Critical Areas Scan. Scan scopes section
You can configure scan scope settings for the Critical Areas Scan task. The application allows you to scan files, boot sectors, computer memory and startup objects.
Scan scope settings for the Critical area scan task
Setting |
Description |
|---|---|
Scan files |
This check box enables or disables file scans. If the check box is selected, the application scans the files. If the check box is cleared, the application does not scan the files. This check box is cleared by default. |
Scan boot sectors |
This check box enables or disables boot sector scans. If the check box is selected, the application scans the boot sectors. If the check box is cleared, the application does not scan the boot sectors. The check box is selected by default. |
Scan computer memory |
This check box enables or disables computer memory scans. If this check box is selected, the application scans process memory and kernel memory. If this check box is cleared, the application does not scan process memory and kernel memory. The check box is selected by default. |
Scan startup objects |
This check box enables or disables startup object scans. If the check box is selected, the application scans startup objects. If the check box is cleared, the application does not scan startup objects. The check box is selected by default. |
Devices to scan |
Clicking the Configure device masks link opens the Scan scopes window, where you can specify the devices whose boot sectors will be scanned. |
Scan scopes window
The table contains name masks of the devices, whose boot sectors the application must scan. By default, the table contains the /** device name mask (all devices).
You can add, edit, and delete items in the table.
Page top
Critical Areas Scan. Exclusion scopes section
In the Exclusion scope section, you can configure exclusion scopes as well as exclusions by mask and by the threat name for the Critical Areas Scan task.
Page top
System Integrity Check. Scan settings section
While the System Integrity Check (ODFIM) task is running, each object change is determined by comparing the current state of the monitored objects with its original state, which was previously established as a baseline.
This feature is not supported in the KESL container.
The baseline is established during the first run of the ODFIM task on the computer. You can create several ODFIM tasks. For each ODFIM task, a separate baseline is created. The task is performed only if the baseline corresponds to the monitoring scope. If the baseline does not match the monitoring scope, Kaspersky Endpoint Security generates a system integrity violation event.
The baseline is rebuilt after an ODFIM task has finished. You can rebuild a baseline for a task using the corresponding setting. Also, a baseline is rebuilt when the settings of a task change, for example, if a new monitoring scope is added. The baseline will be rebuilt during the next task run. You can delete a baseline by deleting the corresponding ODFIM task.
The ODFIM task creates storage for baselines on a computer that has the System Integrity Monitoring component installed.
System Integrity Check task settings
Setting |
Description |
|---|---|
Rebuild baseline on each task start |
This check box enables or disables the reestablishment of a system baseline upon every start of the System Integrity Check task. This check box is cleared by default. |
Use hash for monitoring (SHA-256) |
This check box enables or disables use of the SHA-256 hash for the System Integrity Check task. SHA-256 is a cryptographic hash function that produces a 256-bit hash value. The 256-bit hash value is represented as a sequence of 64 hexadecimal digits. This check box is cleared by default. |
Track directories in monitoring scopes |
This check box enables or disables the monitoring of the specified directories while the System Integrity Check task is running. This check box is cleared by default. |
Track last file access time |
This check box enables or disables tracking the file access time while the System Integrity Check task runs. This check box is cleared by default. |
Monitoring scopes |
The table that contains the monitoring scopes scanned by the task. By default, the table contains the Kaspersky internal objects (/opt/kaspersky/kesl/) monitoring scope. You can add, configure, delete, move up, or move down monitoring scopes in the table. |
Add scan scope window
In this window, you can add or configure monitoring scopes for the System Integrity Check task.
Monitoring scope settings
Setting |
Description |
|---|---|
Scan scope name |
Field for entering the monitoring scope name. This name will be displayed in the table in the Scan settings section. The entry field must not be blank. |
Use this scope |
This check box enables or disables scans of this scope by the application. If this check box is selected, the application controls this monitoring scope during the application's operation. If this check box is cleared, the application does not control this monitoring scope during the operation. You can later include this scope in the component settings by selecting the check box. The check box is selected by default. |
File system, access protocol, and path |
Entry field for the path to the local directory that you want to include in the monitoring scope. You can use masks to specify the path. The field must not be blank. The / path is specified by default – the application scans all directories of the local file system. |
Masks |
The list contains name masks for the objects that the application scans. By default the list contains the * mask (all objects). |
System Integrity Check. Exclusion scopes section
In the Exclusion scopes section, you can configure monitoring exclusions and exclusions by mask for the System Integrity Monitoring task.
Page top
Exclusion scopes window
The table contains monitoring exclusion scopes for the System Integrity Monitoring component. The application does not scan files and directories located at the paths specified in the table. By default, the table is empty.
Monitoring exclusion scope settings
Setting |
Description |
|---|---|
Exclusion scope name |
Exclusion scope name. |
Path |
Path to the directory excluded from monitoring. |
Status |
Indicates whether the application excludes this scope from monitoring during the component operation. |
You can add, edit, and delete items in the table.
Page top
Add exclusion scope window
In this window, you can add or configure the monitoring exclusion scope for the System Integrity Monitoring component.
Monitoring exclusion scope settings
Setting |
Description |
|---|---|
Exclusion scope name |
Field for entering the exclusion scope name. This name will be displayed in the table in the Exclusion scopes window. The entry field must not be blank. |
Use this scope |
The check box enables or disables the exclusion of the scope from monitoring when the application is running. If this check box is selected, the application excludes this scope from monitoring during the component operation. If this check box is cleared, the application monitors this scope during the component operation. You can later exclude this scope from monitoring by selecting the check box. The check box is selected by default. |
File system, access protocol, and path |
Entry field for the path to the local directory that you want to add to the exclusion scope. You can use masks to specify the path. The field must not be blank. The / path is specified by default. The application excludes all directories of the local file system from scan. |
Masks |
The list contains name masks of the objects that the application excludes from the monitoring. By default the list contains the * mask (all objects). |
Exclusions by mask window
You can configure the exclusion of objects from monitoring based on name masks. The application does not scan the files with the names containing the specified masks. By default, the list of masks is empty.
You can add, edit, or delete masks.
Page top
Container Scan. Scan settings section
When the Container Scan task is running, the application scans containers and images for viruses and other malware. You can run multiple Container Scan tasks simultaneously.
To use the task, a license that includes the corresponding function is required.
Container scan task settings
Setting |
Description |
|---|---|
Task priority |
In this group of settings you can select the task priority:
|
Scan archives |
This check box enables or disables scan of archives. If the check box is selected, the application scans archives. To scan an archive, the application has to unpack it first, which may slow down scanning. You can reduce the archive scan time by configuring the Skip object if scan takes longer than (sec) and Skip objects larger than (MB) settings in the General scan settings section. If the check box is cleared, the application does not scan archives. The check box is selected by default. |
Scan SFX archives |
This check box enables or disables self-extracting archive scans. Self-extracting archives are archives that contain an executable extraction module. If the check box is selected, the application scans self-extracting archives. If the check box is cleared, the application does not scan self-extracting archives. This check box is available if the Scan archives check box is unchecked. The check box is selected by default. |
Scan mail databases |
This check box enables or disables scan of mail databases of Microsoft Outlook, Outlook Express, The Bat!, and other mail applications. If the check box is selected, the application scans mail database files. If the check box is cleared, the application does not scan mail database files. This check box is cleared by default. |
Scan mail format files |
This check box enables or disables scan of files of plain-text email messages. If this check box is selected, the application scans plain-text messages. If this check box is cleared, the application does not scan plain-text messages. This check box is cleared by default. |
Skip object if scan takes longer than (sec) |
A field for specifying the maximum time to scan an object, in seconds. After the specified time, the application stops scanning the object. Available values: The default value is |
Skip objects larger than (MB) |
The field for specifying the maximum size of an archive to scan, in megabytes. Available values: The default value is |
Log clean objects |
This check box enables or disables the logging of ObjectProcessed type events. If this check box is selected, the application logs events of the ObjectProcessed type for all scanned objects. If this check box is cleared, the application does not log events of the ObjectProcessed type for any scanned object. This check box is cleared by default. |
Log unprocessed objects |
This check box enables or disables the logging ObjectNotProcessed type events if a file cannot be processed during a scan. If this check box is selected, the application logs events of the ObjectNotProcessed type. If this check box is cleared, the application does not log events of the ObjectNotProcessed type. This check box is cleared by default. |
Log packed objects |
This check box enables or disables the logging of PackedObjectDetected type events for all packed objects that are detected. If this check box is selected, the application logs events of the PackedObjectDetected type. If this check box is cleared, the application does not log events of the PackedObjectDetected type. This check box is cleared by default. |
Use iChecker technology |
This check box enables or disables scan of only new and modified since the last scan files. If the check box is selected, the application scans only new files or the files modified since the last scan. If the check box is cleared, the application scans files regardless of creation or modification date. The check box is selected by default. |
Use heuristic analysis |
This check box enables or disables heuristic analysis during an object scan. The check box is selected by default. |
Heuristic analysis level |
If the Use heuristic analysis check box is selected, you can select the heuristic analysis level in the drop-down list:
|
First action |
In this drop-down list, you can select the first action to be performed by the application on an infected object that has been detected:
|
Second action |
In this drop-down list, you can select the second action to be performed by the application on an infected object, in case the first action is unsuccessful:
|
Scan containers |
This check box enables or disables container scans. If the check box is selected, you can specify a name or a name mask for containers to be scanned. The check box is selected by default. |
Name mask |
Entry field for a name or a name mask for containers to be scanned. By default, the * mask is specified – all containers will be scanned. |
Action on threat detection |
You can select the action to be performed on a container when an infected object is detected:
|
Scan images |
This check box enables or disables the image scan. If the check box is selected, you can specify a name or a name mask for images to be scanned. The check box is selected by default. |
Name mask |
Entry field for a name or a name mask for images to be scanned. By default, the * mask is specified (all images are scanned). |
Action on threat detection |
You can select the action to be performed on an image when an infected object is detected:
|
Scan each layer |
This check box enables or disables the scanning of all layers of images and running containers. This check box is cleared by default. |
Container Scan. Exclusion scopes section
In the Exclusion scopes section, you can configure exclusions by mask and by threat name for the Container scan task.
Page top
Add Key
Using the Add Key task, you can add a key to activate Kaspersky Endpoint Security.
Add a key task settings
Setting |
Description |
|---|---|
Use as a reserve key |
This check box enables or disables the usage of the key as a reserve key. If this check box is selected, the application uses the key as a reserve key. If this check box is cleared, the application uses the key as an active key. This check box is cleared by default. The check box is unavailable if you are adding a trial license key or a subscription key. A trial license key and a subscription key cannot be added as a reserve key. |
License information |
This section contains information about the key and the license corresponding to this key:
|
Add |
Clicking this button opens the Kaspersky Security Center key storage window. In this window, you can select keys added to Kaspersky Security Center key storage and add keys to Kaspersky Security Center key storage. |
Kaspersky Security Center key storage window
In this window, you can select keys added to Kaspersky Security Center key storage and add keys to Kaspersky Security Center key storage.
Settings in the Kaspersky Security Center key storage window
Setting |
Description |
|---|---|
Key table |
The table contains the keys added to Kaspersky Security Center key storage and consists of the following columns:
|
Add a key |
Clicking this button launches the Add license key wizard. The key will be added to Kaspersky Security Center key storage. After adding a key, information about it will be displayed in the key table. |
Update. Database update source section
Updating the databases and application modules of Kaspersky Endpoint Security ensures up-to-date protection on your computer. New viruses and other types of malware appear worldwide on a daily basis. The application databases contain information about threats and ways of neutralizing them. To detect threats quickly, you are urged to regularly update the databases and application modules.
An update source is a resource that contains updates for Kaspersky Endpoint Security databases and application modules. Update sources can be FTP, HTTP, or HTTPS servers (such as Kaspersky Security Center and Kaspersky update servers), as well as local or network directories mounted by the user.
Update source settings for the Update task
Setting |
Description |
|---|---|
Database update source |
In this section, you can select the source of updates:
|
Use Kaspersky update servers if other update sources are not available |
The check box enables or disables usage Kaspersky update servers as the update source, if the selected update sources are not available. This check box is available if the Other sources on the local or global network or the Kaspersky Security Center Administration Server option is selected. The check box is selected by default. |
Custom update sources |
This table contains a list of custom sources of database updates. During the update process, the application accesses update sources in the order they appear in the table. The table contains the following columns:
|
Update. Settings section
In the Settings section, you can specify the response timeout and the application update download settings.
Update task settings
Setting |
Description |
|---|---|
Maximum time to wait for a response from the update source (sec) |
The maximum period of time that the application waits for a response from the selected update source. When no response has arrived by this time, an event involving a loss of communication with the update source is logged in the task log. Available values: The default value is |
Application update download mode |
In the drop-down list, you can select the application database update mode:
This feature is not supported in the KESL container. |
Rollback
After the application databases are updated for the first time, the rollback of the application databases to their previous versions becomes available.
Every time a user starts the update process, Kaspersky Endpoint Security creates a backup copy of the current application databases. This allows you to roll back the application databases to a previous version if needed.
Rolling back the last database update may be useful, for example, if the new application database version contains invalid signatures, which causes Kaspersky Endpoint Security to block safe applications.
The rollback task does not have any settings.
Page top
Inventory. Scan settings section
The Inventory Scan task provides information about all applications executable files stored on the client devices. Obtaining information about the applications installed on the computers can be useful, for example, for creating application control rules.
This feature is not supported in the KESL container.
To use the task, a license that includes the corresponding function is required.
The Kaspersky Security Center database can store information about up to 150,000 processed files. When this number of records is reached, new files will not be processed. To resume the Inventory Scan task, it is necessary to delete the files registered in the Kaspersky Security Center database as a result of previous inventories from the computer on which Kaspersky Endpoint Security is installed.
Inventory Scan task settings
Setting |
Description |
|---|---|
Task priority |
In this group of settings you can select the task priority:
|
Create golden image |
This check box enables or disables the creation of the "Golden Image" category of applications based on the list of applications detected on the device by the Inventory Scan task. If the check box is selected, the "Golden Image" application category can be used in the application control rules. This check box is cleared by default. |
Scan all executables |
This check box enables or disables of executable file scans. The check box is selected by default. |
Scan binaries |
This check box enables or disables of binary file scans (with extensions elf, java, and pyc). The check box is selected by default. |
Scan scripts |
This check box enables or disables script scans. The check box is selected by default. |
Inventory scopes |
The table contains the inventory scopes scanned by the task. By default, the table contains one scan scope – /usr/bin. You can add, configure, delete, move up, or move down inventory scopes in the table. |
Add scan scope window
In this window, you can add and configure scan scope for the Inventory Scan task.
Inventory scope settings
Setting |
Description |
|---|---|
Scan scope name |
Field for entering the inventory scope name. This name will be displayed in the table in the Scan settings section. The entry field must not be blank. |
Use this scope |
This check box enables or disables the scan of this scope when the task is performed. If this check box is selected, the application processes this inventory scope while running the task. If this check box is cleared, the application does not process this inventory scope while running the task. You can later include this scope in task settings by selecting the check box. The check box is selected by default. |
File system, access protocol, and path |
Entry field for the path to the local directory that you want to include in the inventory scope. You can use masks to specify the path. The field must not be blank. The / path is specified by default – the application scans all directories of the local file system. |
Masks |
This list contains name masks of the objects that the application scans while running the task. By default the list contains the * mask (all objects). |
Inventory. Exclusion scopes section
In the Exclusion scopes section for the Inventory Scan task, you can configure the scopes to be excluded from scans.
Page top
Exclusion scopes window
This table contains scan exclusion scopes. The application does not scan files and directories located at the paths specified in the table. By default, the table is empty.
Exclusion scope settings
Setting |
Description |
|---|---|
Exclusion scope name |
Exclusion scope name. |
Path |
Path to the directory excluded from scan. |
Status |
The status indicates whether the application uses this exclusion. |
You can add, edit, and delete items in the table.
Page top
Add exclusion scope window
In this window, you can add and configure scan exclusion scope for the Inventory Scan task.
Exclusion scope settings
Setting |
Description |
|---|---|
Exclusion scope name |
Field for entering the exclusion scope name. This name will be displayed in the table in the Exclusion scopes window. The entry field must not be blank. |
Use this scope |
This check box enables or disables the exclusion of the scope when the task is executed. If this check box is selected, the application excludes this scope during task execution. If this check box is cleared, the application includes this scope during task execution. You can later exclude this scope from scanning by selecting the check box. The check box is selected by default. |
File system, access protocol, and path |
Entry field for the path to the local directory that you want to exclude from the inventory. You can use masks to specify the path. The field must not be blank. |
Masks |
The list contains name masks of the objects that the application excludes from scan. |
Configuring integration with Kaspersky Managed Detection and Response
To configure integration between Kaspersky Endpoint Security and Kaspersky Managed Detection and Response (MDR), perform the following actions:
- Make sure that the File Threat Protection and Behavior Detection components are enabled in the Kaspersky Endpoint Security policy.
- In the Kaspersky Endpoint Security policy in the Web Console, select participation in Kaspersky Security Network and statistics.
- In the Kaspersky Endpoint Security policy in the Web Console, enable integration with Managed Detection and Response and upload a BLOB configuration file, which is located in the ZIP archive of the MDR configuration file (see the instructions below).
- In the Web Console, configure Private KSN for sending telemetry using a Kaspersky Security Network configuration file, which is located in the ZIP archive of the MDR configuration file (see the instructions below).
To configure Private KSN for integrating the application with Kaspersky Managed Detection and Response in the Web Console:
- In the main Web Console window, click
 next to the name of the Administration Server.
The Administration Server properties window opens.
- In the list on the left, select the KSN proxy server settings section.
- Switch on the Enable KSN proxy server on the Administration Server as a proxy server toggle button to enable the KSN proxy server service.
- Switch the Use Kaspersky Private Security Network toggle button.
- In the window that opens and displays a warning about the specific aspects of using the KSN proxy server on the distribution points with the previous version of the Network Agent installed, click OK.
- Click the Select file with KSN proxy server settings button.
- Select the configuration file with the pkcs7 extension and click Open.
This configuration file is included in Kaspersky Managed Detection and Response distribution kit.
By downloading Kaspersky Managed Detection and Response configuration file, you agree to automatically transmit data from the device with Kaspersky Endpoint Security installed to Kaspersky for processing. Do not load the configuration file if you do not agree that the transmitted data will be processed. For detailed description of the transmitted data, refer to Kaspersky Managed Detection and Response documentation.
- Click Save.
To load the BLOB configuration file using the Web Console:
- In the main window of the Web Console, select Devices → Policies and policy profiles.
The list of policies opens.
- In the list of policies, select the required policy and open the policy properties window by clicking the link with the policy name.
- On the Application settings tab, in the list on the left, select the General settings section, and on the right, select the Managed Detection and Response section.
- Enable the Managed Detection and Response toggle button.
- Click Download.
- In the window that opens, select the BLOB configuration file and click the Open button.
The BLOB configuration file is included in Kaspersky Managed Detection and Response distribution kit.
By downloading Kaspersky Managed Detection and Response configuration file, you agree to automatically transmit data from the device with Kaspersky Endpoint Security installed to Kaspersky for processing. Do not load the configuration file if you do not agree that the transmitted data will be processed. For detailed description of the transmitted data, refer to Kaspersky Managed Detection and Response documentation.
- Click OK.
Configuring KESL container settings
Kaspersky Endpoint Security distribution kit contains files for creating a container application (KESL container) for embedding into external systems in order to scan container images from image repositories.
Interaction with the KESL container is implemented using the REST API. You can configure KESL container settings using the Web Console.
For correct operation of KESL containers in the Web Console, it is recommended to move the devices that correspond to the KESL containers to a separate administration group with its own policy. When the KESL container is stopped, these devices are automatically removed from the administration group, and the key that was used on these devices is released.
After deploying, activating and configuring the KESL container, it provides following functionalities in the Web Console:
- Add Key.
- File Threat Protection.
- Update.
- Rollback.
- Malware Scan.
- Critical Areas Scan.
- Container scan and container scan settings.
- Storage settings.
Other application functions and settings can be configured, but their configuration does not affect KESL container operation.
If KESL container was activated during deployment and is connected to Kaspersky Security Center, where automatic key distribution to managed devices is configured, this key will not be applied to the KESL container.
Page top
Managing application using graphical user interface
You can manage Kaspersky Endpoint Security operation using the graphical user interface.
Application interface
Application icon in the notification area
After Kaspersky Endpoint Security graphical user interface package is installed, the application icon appears on the right, in the taskbar notification area.
The application icon acts as a shortcut to the context menu and the main application window. You can open the context menu of the application icon by right-clicking the icon.
The context menu of the application icon contains the following items:
- Kaspersky Endpoint Security 11.2.0 for Linux. Opens the main application window, which displays the protection status of your device and contains interface elements that provide access to the application functions.
- Exit. Exits the application graphical user interface.
Main application window
The main application window is divided into several parts:
- The central part of the main application window displays the protection status of your device. Clicking this part of the window opens the Protection Center window. This window displays information about the protection status of your device and recommendations on the actions to be performed to fix protection problems (if any).
- The Scan button displays the virus scan task status and the number of detected threats. Clicking this button opens the Scan window. In this window, you can start and stop the Virus Scan, Critical Areas Scan and Container scan tasks. Also, you can view reports for these tasks.
- The Update button displays the status of the Update task. Clicking this button opens the Update window. In this window, you can start the Update and Rollback tasks. Also, you can view reports for these tasks.
- The lower part of the main application window contains the following elements:
- Reports button. Clicking this button opens the Reports window, where you can view task statistics and various reports.
- Storage button. Clicking this button opens the Storage window, which contains information about objects in the Storage.
- Setting button. Clicking this button opens the Settings window, where you can enable or disable application monitoring tasks, as well as Kaspersky Security Network usage.
- Support button. Clicking this button opens the Support window, which contains information about the current application version, license key, application database status, operating system, as well as the links to Kaspersky information resources.
- The lower part of the main application window displays information about the license and the key, as well as about licensing problems (if any). Clicking this part of the window opens the License window. This window also displays detailed information about the license. You can also open this window from the Support window using the link with the license key.
To open the main application window, perform one of the following actions:
- Right-click or double-click the application icon in the notification area of the taskbar.
- Select the application name in the application menu of the operating system window manager.
Task management
The application graphical user interface allows you to enable or disable the following application monitoring tasks:
- File Threat Protection.
- System Integrity Monitoring.
- Firewall Management.
- Anti-Cryptor.
- Web Threat Protection.
- Device Control.
- Removable Drives Scan.
- Network Threat Protection.
- Behavior Detection.
- Application control.
The application graphical user interface also allows you to run the following tasks on demand:
- Virus Scan.
- Custom Scan (can be started by clicking a file or directory that you want to scan).
- Critical Areas Scan.
- System Integrity Check.
- Container scan.
- Update.
- Rollback.
You can also manage the using Kaspersky Security Network.
Page top
Enabling and disabling application monitoring tasks
You can enable or disable the monitoring tasks of the application. If the task is enabled, the Disable button is available. By default, the following tasks are enabled: File Threat Protection, Web Threat Protection, Device Control, and Behavior Detection.
If a task is disabled, the Enable button is available.
To enable or disable an application monitoring task:
- Open the main application window.
- In the lower part of the main application window, click the Settings button.
The Settings window opens.
- Do one of the following for the required task:
- Click Enable to enable the task.
- Click Disable to disable the task.
Starting and stopping scan tasks
Using the application graphical user interface, you can start and stop the Virus Scan, Critical Areas Scan and Container Scan tasks.
To start or stop a scan task:
- Open the main application window.
- In the main application window, select the Scan section.
The Scan window will open.
- Do one of the following:
- To start a scan task, click the Start button under the scan task that you want to start.
The progress of the running scan task is displayed.
- To stop a scan task, click the Stop button under the scan task that you want to stop.
The scan task stops, and information about the scanned objects and detected threats is displayed.
- To start a scan task, click the Start button under the scan task that you want to start.
- To view the report on the scan task, click the Show report button.
When an infected object is detected or the scan task is completed, a pop-up window appears in the notification area near the application icon on the right side of the taskbar.
The Scan window also displays the progress and the results of the temporary Scan_Boot_Sectors_ {ID} and Scan_File_ {ID} tasks. You can hide information about temporary tasks that are already completed by clicking the cross or closing the Scan window (when switching to the main window or when exiting the application).
Page top
Start and stop the Update tasks
Using the application graphical user interface, you can run the Update and Rollback.
To start or stop an update task:
- Open the main application window.
- In the main application window, select the Update section.
The Update window opens.
- Do one of the following:
- To start a task, click the Start button under the task that you want to start.
The progress of the running update task is displayed.
If the Update task finishes successfully, the Roll back update link becomes available, and you can roll back the last successful database update.
- To stop a task, click the Stop button under the scan task that you want to stop.
The Update task stops.
- To start a task, click the Start button under the task that you want to start.
- To view the report on the task, click the Show report button.
To start a rollback task:
- Open the main application window.
- In the main application window, select the Update section.
The Update window opens.
- Run the Rollback task by clicking the Roll back update link.
Configuring Kaspersky Security Network
Using the graphical user interface, you can enable or disable Kaspersky Security Network usage.
To enable use of Kaspersky Security Network:
- Open the main application window.
- In the lower part of the main application window, click the Settings button.
The Settings window opens.
- Select one of the following options:
- Kaspersky Security Network with statistics — to use Kaspersky Security Network, obtain information from the knowledge base, and send anonymous statistics and information about the types and sources of threats.
- Kaspersky Security Network without statistics — to use Kaspersky Security Network, obtain information from the knowledge base, but not to send anonymous statistics and information about the types and sources of threats.
- Click the Enable button.
- In the Use of Kaspersky Security Network window, carefully read the Kaspersky Security Network Statement, and select one of the following options:
- I confirm that I have fully read, understand, and accept the terms and conditions of the Kaspersky Security Network Statement, to use Kaspersky Security Network.
- I do not accept the terms and conditions of the Kaspersky Security Network Statement, to disable usage of Kaspersky Security Network.
- Click OK.
The OK button is not available if none of the options are selected in the Using Kaspersky Security Network window.
To disable use of Kaspersky Security Network:
- Open the main application window.
- In the lower part of the main application window, click the Settings button.
The Settings window opens.
- Click Enable.
- In the window that opens, do one of the following:
- Click Yes to stop using Kaspersky Security Network.
- Click Cancel to continue using Kaspersky Security Network.
Viewing reports
Information about operation of the application tasks is recorded to the application reports.
Report data is presented as a table that contains a list of events. Each line in the table contains information about a separate event. Event attributes are displayed in the table columns. Events logged during the performance of various tasks have different sets of attributes.
The following event importance levels are used in reports:
- Critical – events with the critical importance level that need your attention as they indicate problems in the application operation or vulnerabilities in the device protection
- High
- Medium
- Low
- Information
- Error
The application provides the following reports listed in the left part of the Reports window:
- Statistics. This report contains statistical information about the File Threat Protection task and scan tasks. You can update the displayed report by clicking the Reload button.
- System audit. This report contains information about events that occur during the application operation and during the user interaction with the application.
- Threat protection. This report contains information about the events that are logged while the following application monitoring tasks were running:
- Anti-Cryptor.
- System Integrity Monitoring.
- Firewall Management.
- Web Threat Protection.
- Application Control.
- Device Control.
- Removable Drives Scan.
- Network Threat Protection.
- Behavior Detection.
- File Threat Protection.
- On-demand tasks. This report contains information about the events that are logged while the following application tasks were running:
- Scan tasks.
- Update.
- System Integrity Check.
To view the report:
- Open the main application window.
- In the lower part of the main application window, click the Reports button.
The Reports window will open.
- In the left part of the Reports window, select the required report type.
A report containing a list of events is displayed in the right part of the window.
By default, events are sorted in ascending order by the values in the Date column.
- To view detailed information about an event displayed in a separate section of the report, select this event in the report.
The section that contains the attributes of this event is displayed at the bottom of the window.
For convenient processing of reports, you can modify the presentation of data on the screen in the following ways:
- Filter the list of events by occurrence time.
- Use the search function to find a specific event.
- View the selected event in a separate section.
Viewing objects in the Storage
To view objects in Storage:
- Open the main application window.
- In the lower part of the main application window, click the Storage button.
The Storage window opens.
In this window the following information about the objects in Storage is displayed:
- Object name.
- Full path to an object.
- Date when the object was added to the Storage.
- Date when the object was removed from the Storage (this field is displayed if the
DaysToLivesetting is specified). - Object size.
You can restore objects from the Storage to their original directories. You can also delete objects from the Storage. Deleted objects cannot be restored in the future. Information about these actions is recorded in the event log.
Page top
Viewing licensing information
To view license information:
- Open the main application window.
- Do one of the following:
- In the lower part of the main application window, click the area, which displays information about the license and the key.
- In the lower part of the main application window, click the Support button and in the Support window that opens, open the License window using the link with a unique alphanumeric sequence, which is displayed in the Key field.
The License window opens.
This window displays the following information about the license:
- Active key – unique alphanumeric sequence.
- Key status – the status of the key or a message about the problems associated with the key (if any).
- Valid from – date when the application was activated by adding this key.
- License expires – the number of days before the license expires and the license expiration date in UTC format.
- A summary of your license or information about any licensing issues and recommendations on how to resolve the issues, if any.
Clicking the Details link displays the following information:
- Application name – name of the application for which the license associated with the key is intended.
- Protection – Information about the available application functions and a list of available application components (availability of application functions and components depends on the license associated with the key).
Creating a trace file
To create a trace file:
- Open the main application window.
- In the lower part of the main application window, click the Support button.
The Support window opens.
- Click the Tracing link to open the Tracing window
- In the Level drop-down list, select the level of detail for the trace file.
You are advised to clarify the required level of detail with a Kaspersky Technical Support specialist. The default value is Diagnostic (300).
- Click the Enable button to start tracing.
- Reproduce the situation which caused the problem.
- Click the Disable button to stop tracing.
Created trace files are stored in /var/log/kaspersky/kesl/ directory. Trace files contain information about the operating system, and may also contain personal data.
Page top
Contact Technical Support
This section describes how to get technical support and the terms on which it is available.
How to get technical support
If you do not find a solution to your problem in the documentation or other sources of information about Kaspersky Endpoint Security, it is recommended to contact Technical Support. Technical Support specialists will answer any of your questions about installing and using Kaspersky Endpoint Security.
Kaspersky provides support for Kaspersky Endpoint Security during its life cycle (see the Application life cycle page). Before contacting Technical Support, please read the support rules.
You can contact Technical Support in one of the following ways:
- Visit Technical Support website.
- Submit a request to Kaspersky Technical Support from the Kaspersky CompanyAccount portal.
Technical Support via Kaspersky CompanyAccount
Kaspersky CompanyAccount is a portal for companies that use Kaspersky applications. The Kaspersky CompanyAccount portal is designed to facilitate interaction between users and Kaspersky specialists through online requests. The Kaspersky CompanyAccount portal lets you monitor the progress of electronic request processing by Kaspersky specialists and store a history of electronic requests.
You can register all of your organization's employees under a single account on Kaspersky CompanyAccount. A single account lets you centrally manage electronic requests from registered employees to Kaspersky and also manage the privileges of these employees via Kaspersky CompanyAccount.
The Kaspersky CompanyAccount portal is available in the following languages:
- English
- Spanish
- Italian
- German
- Polish
- Portuguese
- Russian
- French
- Japanese
To learn more about Kaspersky CompanyAccount, visit the Technical Support website.
Page top
Contents and storage of trace files
A trace file lets you track the step-by-step execution of application commands and detect the stage at which an application error occurs.
Trace files are stored on the device as long as the application is in use, and are deleted permanently when the application is removed. Trace files are not sent to Kaspersky automatically.
Trace files are saved in a human-readable format. It is recommended to protect information from unauthorized access before sending it to Kaspersky.
By default, trace files are stored in the directory /var/log/kaspersky/kesl/. Root privileges are required to access the default trace files directory.
All trace files contain the following general data:
- Event time.
- Number of the thread of execution.
- Application component that caused the event.
- Degree of event severity (informational event, warning, critical event, error).
- A description of the event involving command execution by a component of the application and the result of execution of this command.
Trace files may store the following information in addition to general data:
- The statuses of the application components and their operational data.
- Data on user activity in the application.
- Data on the hardware installed on the device.
- Data about all operating system objects and events, including information about user activity.
- Data contained in the objects of the operating system (for example, the contents of files that may contain any user personal data).
- Network traffic data (for example, the contents of the entry fields on a website, which may include bank card information or any other sensitive data).
- Data received from Kaspersky servers (such as the version of the application databases).
Contents and storage of dump files
Dump files are generated if the application fails and include all the data that the working memory of Kaspersky Endpoint Security process contained at the time a dump file is created. If necessary, you can disable the creation of dump files.
Dump files are stored on the computer as long as the application is in use, and are deleted permanently when the application is removed. Dump files are not sent to Kaspersky automatically.
Dump files may contain personal data. It is recommended to protect information from unauthorized access before sending it to Kaspersky.
Dump files are stored in the /var/opt/kaspersky/kesl/common/dumps and /var/opt/kaspersky/kesl/common/dumps-user directories. Root privileges are required to access dump files.
To disable creation of dump files:
- Stop Kaspersky Endpoint Security.
- Open the /var/opt/kaspersky/kesl/common/kesl.ini file for editing.
- Add the following setting to the [General] section:
CoreDumps=no - Start Kaspersky Endpoint Security.
Appendix 1. Resource consumption optimization
When scanning objects, Kaspersky Endpoint Security uses the processor resources, disk subsystem input/output, and operating system.
To view the resource consumption by the application, execute the following command:
top -bn1|grep kesl
The command must be executed when the system is loaded.
The command output shows the amount of used memory and processor time:
651 root 20 0 3014172 2.302g 154360 S 120.0 30.0 0:32.80 kesl
Column 6 displays the amount of resident memory – 2.302g.
Column 9 displays the percentage of the processor cores usage – 120.0, where each core is represented by 100 percent. Thus, 120% means that one core is fully used, and the other is used at 20%.
If Kaspersky Endpoint Security operation while scanning objects critically slows down the system, the application must be configured to optimize consumption of system resources.
Determining the task that consumes resources
In order to determine which application tasks are consuming the system resources, it is necessary to distinguish the resource consumption of File Threat Protection tasks (OAS type) and On-demand Scan tasks (ODS and ContainerScan types).
If the application is managed by Kaspersky Security Center policy, it is required to allow local task management for the period of the study.
File Threat Protection task operation analysis
To analyze the operation of the File Threat Protection task:
- Stop all scan and monitoring tasks.
- Make sure that the on-demand scan tasks will not run during the scan or have no schedule. You can do it using Kaspersky Security Center or locally by doing the following steps:
- Get the list of all application tasks by executing the following command:
kesl-control --get-task-list - Get the schedule settings for the Virus Scan task by executing the following command:
kesl-control --get-schedule <task ID>If the command output is
RuleType=Manual, the task can only be started manually. - Get the schedule settings for all your anti-virus scan tasks, if any, and set them to start manually by executing the following command:
kesl-control --set-schedule <task ID> RuleType=Manual
- Get the list of all application tasks by executing the following command:
- Enable generation of application trace files with a high level of details by executing the following command:
kesl-control --set-app-settings TraceLevel=Detailed - Start the File Threat Protection task if it has not been started by executing the following command:
kesl-control --start-task 1 - Load the system in the mode that caused the performance problems; a few hours is enough.
While being loaded, the application writes a lot of information to the trace files; however only 5 files of 500 MB are stored by default, so the old information will be overwritten. If the problems with performance and resource consumption stop occurring, then they are most likely caused by on-demand scan tasks and you can proceed to analyzing the operation of ContainerScan and ODS scan tasks.
- Disable creation of the application trace files by executing the following command:
kesl-control --set-app-settings TraceLevel=None - Determine the list of objects that have been scanned the most times by running the following command:
fgrep 'AVP ENTER' /var/log/kaspersky/kesl/kesl.* | awk '{print $8}' | sort | uniq -c | sort -k1 -n -r|lessThe result is loaded into less, a text viewer utility, where the objects that have been scanned the most times are displayed first.
- Determine whether the objects scanned the most number of times are dangerous. In case of any difficulties, contact Technical Support.
For example, directories and log files can be considered safe if a trusted process writes to them, database files can also be considered safe.
- Write down the paths to the objects that are safe, in your opinion; the paths will be required to configure exclusions from the scan scope.
- If various services frequently write data to files in the system, such files are scanned again in the pending queue. Determine the list of paths that have been scanned the most times in the pending queue by running the following command:
fgrep 'SYSCALL' /var/log/kaspersky/kesl/kesl.* | fgrep 'KLIF_ACTION_CLOSE_MODIFY' | awk '{print $9}' | sort | uniq -c | sort -k1 -n -rThe files that were scanned the most times will appear at the beginning of the list.
- If the counter for a file exceeds several thousands in a few hours, you should check whether you can trust this file in order to exclude it from scan.
The logic of to determine it is the same as for the previous study (see step 8): log files can be considered safe, since they cannot be launched.
- Even if some files are excluded from scan by the Real-time protection task, they can still be intercepted by the application. If excluding certain files from Real-time protection does not result in significant increase of performance, you can completely exclude the mount point where these files are located from the interception scope of the application. To do so, do the following:
- Run the following command to get the list of files intercepted by the application:
grep 'FACACHE.*needs' /var/log/kaspersky/kesl/kesl.* | awk '{print $7}' | sort | uniq -c | sort -k1 -n -r - Using this list, determine the paths used for most of the file operation interceptions and configure interception exceptions.
- Run the following command to get the list of files intercepted by the application:
On-demand Scan tasks operation analysis
Tasks of the ODS and ContainerScan types can also cause significant resource consumption. Follow these recommendations for the tasks of ODS type:
- Make sure that several on-demand scan tasks are not running at the same time. The application allows for operation in this mode, but resource consumption can significantly increase. Check the schedule of all tasks of the ODS and ContainerScan types locally (as described for the File Threat Protection task) or using Kaspersky Security Center.
- Run the scan during the minimum server load.
- Make sure that there are no mounted remote resources (SMB/NFS) at the specified scan path. If a remote resource scan task cannot be performed directly on the server that provides the resource, do not perform the resource scan on servers with critical services, as execution of this task can take a long time (depending on the connection speed and the number of files).
- Optimize the settings of the on-demand scan task before start.
Configuring the File Threat Protection task
If, after analysis of the File Threat Protection task's operation, you have created a list of directories and files that can be excluded from the scan scope, you need to add them to the exclusions.
Virus Scan exclusions
To exclude the /tmp/logs directory and all subdirectories and files recursively, execute the following command:
kesl-control --set-settings 1 --add-exclusion /tmp/logs
To exclude a specific file or files by mask in the /tmp/logs directory, execute the following command:
kesl-control --set-settings 1 --add-exclusion /tmp/logs/*.log
To exclude all files with the .log extension in the /tmp/ directory and subdirectories using a recursive mask, execute the following command:
kesl-control --set-settings 1 --add-exclusion /tmp/**/*.log
Interception exclusions
If you want to exclude files in a certain directory not only from scan, but also from interception, you can exclude the entire mount point.
To exclude an entire mount point:
- If the directory is not a mount point, create a mount point from it. For example, to create a mount point from the /tmp directory, execute the following command:
mount --bind /tmp/ /tmp - To keep the mount point after the server reboot, add the following line to the /etc/fstab file:
/tmp /tmp none defaults,bind 0 0 - Add the /tmp directory to the global exceptions by executing the following command:
kesl-control --set-app-settings ExcludedMountPoint.item_0000=/tmp - If you want to add several directories, increase the item_0000 counter by one (item_0001, item_0002, and so on).
It is also recommended to exclude mount points that are mounted remote resources with unstable or slow connection.
Changing scan type
By default, the File Threat Protection task can scan files when they are opened or closed. If analysis of the File Threats Protection task's operation shows that too many files are being written, you can change the file interceptor mode so that it works only when the files are opened by executing the following command:
kesl-control --set-set 1 ScanByAccessType=Open
In this operation mode, changes made to the file after it is opened are not scanned until the next opening of the file.
Configuring the On-demand Scan task
On-demand ODS and ContainerScan tasks are configured in the same way as configuring scan exclusions for the File Threat Protection task. However, the setting for excluding mount points does not apply to on-demand ODS and ContainerScan tasks.
Scan exclusion settings for one scan task do not affect other scan tasks. Exclusions must be configured separately for each scan task.
Configuring priority
The on-demand scan tasks have the ScanPriority setting, which allows you to specify how the application allocates system resources for running tasks.
Available values:
Idle– no more than 10% load on one processor (regardless of whether it is busy or not).Normal– 50% load on all available processors.High– without limitations.
Limitations on the processor load also reduce resource consumption by the disk subsystem input/output.
To specify the Idle priority for a task, execute the following command:
kesl-control --set-settings <task ID> ScanPriority=Idle
Setting the memory usage limits when unpacking archives
The on-demand scan task uses RAM to unpack archives when scanning the archives recursively. By default, the application's limit is 40% of all available RAM, but not less than 2 GB. Therefore, if the system has more than 5 GB of RAM, you can manually set the memory usage limit. This is especially useful for the servers that have hundreds of gigabytes of RAM.
To specify a limit on memory use when scanning:
- Stop Kaspersky Endpoint Security.
- Open the /var/opt/kaspersky/kesl/common/kesl.ini file for editing.
- Add the
ScanMemoryLimitsetting with the required value (for example, 8192) to the[General]section:ScanMemoryLimit=8192 - Start Kaspersky Endpoint Security.
The ScanMemoryLimit setting limits the amount of memory used when scanning files, but not the total amount of memory used by the application. So, the total amount of memory can be greater than the value specified by this setting.
Appendix 2. Default task configuration files
This section contains information about the default configuration files for application tasks.
You can change the values of the settings in configuration files at any time. You can also change the setting values from the command line.
Rules for editing application task configuration files
When editing a configuration file, adhere to the following rules:
- Specify all mandatory settings in the configuration file. You can specify individual task settings without a file using the command line.
- If a setting belongs to a certain section, specify it only in this section. You can specify the settings in any order within the one section.
- Enclose the names of sections in square brackets [ ].
- Enter the values of settings in the format
<setting name>=<setting value>(spaces between the a setting name and its value are not processed).Example:
[ScanScope.item_0000]AreaDesc=HomeAreaMask.item_0000=*docPath=/homeSpace and tab characters are ignored before the first quotation mark and after the last quotation mark of a string value, and at the beginning and end of a string value that is not enclosed in quotation marks.
- If you need to specify several values for a setting, repeat the setting the same number of times as the number of values that you want to specify.
Example:
AreaMask.item_0000=*xmlAreaMask.item_0001=*doc - Be case-sensitive when entering values for the following types of settings:
- Names (masks) of scanned objects and excluded objects.
- Names (masks) of threats.
The remaining setting values are not case-sensitive.
- Specify Boolean setting values as follows:
Yes/No. - Use quotation marks to enclose string values containing a space character (for example, names of files and directories and their paths, expressions containing the date and time in the format "YYYY-MM-DD HH:MM:SS").
You can enter the remaining values with or without quotation marks.
Example:
AreaDesc="Scanning of email databases"A single quotation mark in the beginning or end of a string is considered an error.
File Threat Protection task configuration file
ScanArchived=No
ScanSfxArchived=No
ScanMailBases=No
ScanPlainMail=No
SkipPlainTextFiles=No
TimeLimit=60
SizeLimit=0
FirstAction=Recommended
SecondAction=Block
UseExcludeMasks=No
UseExcludeThreats=No
ReportCleanObjects=No
ReportPackedObjects=No
ReportUnprocessedObjects=No
UseAnalyzer=Yes
HeuristicLevel=Recommended
UseIChecker=Yes
ScanByAccessType=SmartCheck
[ScanScope.item_0000]
AreaDesc=All objects
UseScanArea=Yes
Path=/
AreaMask.item_0000=*
Virus Scan task configuration file
ScanFiles=Yes
ScanBootSectors=Yes
ScanComputerMemory=Yes
ScanStartupObjects=Yes
ScanArchived=Yes
ScanSfxArchived=Yes
ScanMailBases=No
ScanPlainMail=No
TimeLimit=0
SizeLimit=0
FirstAction=Recommended
SecondAction=Skip
UseExcludeMasks=No
UseExcludeThreats=No
ReportCleanObjects=No
ReportPackedObjects=No
ReportUnprocessedObjects=No
UseAnalyzer=Yes
HeuristicLevel=Recommended
UseIChecker=Yes
ScanPriority=Normal
DeviceNameMasks.item_0000=/**
[ScanScope.item_0000]
AreaDesc=All objects
UseScanArea=Yes
Path=/
AreaMask.item_0000=*
Custom Scan task configuration file
ScanFiles=Yes
ScanBootSectors=No
ScanComputerMemory=No
ScanStartupObjects=No
ScanArchived=Yes
ScanSfxArchived=Yes
ScanMailBases=No
ScanPlainMail=No
TimeLimit=0
SizeLimit=0
FirstAction=Recommended
SecondAction=Skip
UseExcludeMasks=No
UseExcludeThreats=No
ReportCleanObjects=No
ReportPackedObjects=No
ReportUnprocessedObjects=No
UseAnalyzer=Yes
HeuristicLevel=Recommended
UseIChecker=Yes
ScanPriority=High
DeviceNameMasks.item_0000=/**
[ScanScope.item_0000]
AreaDesc=All objects
UseScanArea=Yes
Path=/
AreaMask.item_0000=*
Critical Areas Scan task configuration file
ScanFiles=No
ScanBootSectors=Yes
ScanComputerMemory=Yes
ScanStartupObjects=Yes
ScanArchived=Yes
ScanSfxArchived=Yes
ScanMailBases=No
ScanPlainMail=No
TimeLimit=0
SizeLimit=0
FirstAction=Recommended
SecondAction=Skip
UseExcludeMasks=No
UseExcludeThreats=No
ReportCleanObjects=No
ReportPackedObjects=No
ReportUnprocessedObjects=No
UseAnalyzer=Yes
HeuristicLevel=Recommended
UseIChecker=Yes
ScanPriority=Normal
DeviceNameMasks.item_0000=/**
[ScanScope.item_0000]
AreaDesc=All objects
UseScanArea=Yes
Path=/
AreaMask.item_0000=*
Update task configuration file
SourceType="KLServers"
UseKLServersWhenUnavailable=Yes
ApplicationUpdateMode=DownloadOnly
ConnectionTimeout=10
Storage management task configuration file
DaysToLive=90
BackupSizeLimit=0
BackupFolder=/var/opt/kaspersky/kesl/common/objects-backup/
System Integrity Monitoring task configuration file
UseExcludeMasks=No
[ScanScope.item_0000]
AreaDesc=Kaspersky internal objects
UseScanArea=Yes
Path=/opt/kaspersky/kesl/
AreaMask.item_0000=*
Firewall Management task configuration file
DefaultIncomingAction=Allow
DefaultIncomingPacketAction=Allow
OpenNagentPorts=Yes
[NetworkZonesTrusted]
[NetworkZonesLocal]
[NetworkZonesPublic]
Anti-Cryptor task configuration file
UseHostBlocker=Yes
BlockTime=30
UseExcludeMasks=No
[ScanScope.item_0000]
AreaDesc=All shared directories
UseScanArea=Yes
Path=AllShared
AreaMask.item_0000=*
Web Threat Protection task configuration file
UseTrustedAddresses=Yes
ActionOnDetect=Block
CheckMalicious=Yes
CheckPhishing=Yes
UseHeuristicForPhishing=Yes
CheckAdware=No
CheckOther=No
Device Control task configuration file
[DeviceClass]
HardDrive=DependsOnBus
RemovableDrive=DependsOnBus
Printer=DependsOnBus
FloppyDrive=DependsOnBus
OpticalDrive=DependsOnBus
Modem=DependsOnBus
TapeDrive=DependsOnBus
MultifuncDevice=DependsOnBus
SmartCardReader=DependsOnBus
PortableDevice=DependsOnBus
WiFiAdapter=DependsOnBus
NetworkAdapter=DependsOnBus
BluetoothDevice=DependsOnBus
ImagingDevice=DependsOnBus
SerialPortDevice=DependsOnBus
ParallelPortDevice=DependsOnBus
InputDevice=DependsOnBus
SoundAdapter=DependsOnBus
[DeviceBus]
USB=Allow
FireWire=Allow
Removable Drives Scan task configuration file
ScanRemovableDrives=NoScan
ScanOpticalDrives=NoScan
BlockDuringScan=No
Network Threat Protection task configuration file
BlockAttackingHosts=Yes
BlockDurationMinutes=60
UseExcludeIPs=No
Container Scan task configuration file
ScanArchived=Yes
ScanSfxArchived=Yes
ScanMailBases=No
ScanPlainMail=No
TimeLimit=0
SizeLimit=0
FirstAction=Recommended
SecondAction=Skip
UseExcludeMasks=No
UseExcludeThreats=No
ReportCleanObjects=No
ReportPackedObjects=No
ReportUnprocessedObjects=No
UseAnalyzer=Yes
HeuristicLevel=Recommended
UseIChecker=Yes
ScanContainers=Yes
ContainerNameMask=*
ScanImages=Yes
ImageNameMask=*
DeepScan=No
ScanPriority=Normal
ContainerScanAction=StopContainerIfFailed
ImageAction=Skip
You can also use the settings in this configuration file for the Custom Container Scan task, except for the ScanPriority=Normal setting. For the Custom scan task, set the value of this setting to ScanPriority=High.
Inventory Scan task configuration file
ScanScripts=Yes
ScanBinaries=Yes
ScanAllExecutable=Yes
ScanPriority=Normal
CreateGoldenImage=No
[ScanScope.item_0000]
AreaDesc=All objects
UseScanArea=Yes
Path=/usr/bin
AreaMask.item_0000=*
Application Control task configuration file
AppControlMode=DenyList
AppControlRulesAction=ApplyRules
Appendix 3. Command line return codes
Kaspersky Endpoint Security has the following command line return codes:
0 – command/task completed successfully.
1 – general error in command arguments.
2 – error in passed application settings.
64 – Kaspersky Endpoint Security is not running.
66 – anti-virus databases are not downloaded (used only by the kesl-control --app-info command).
67 – activation 2.0 ended with an error due to network problems.
68 – the command cannot be executed because the application is running under a policy.
70 – an attempt to start a running task, delete a running task, change the settings of a running task, stop a stopped task, pause a suspended task, or resume a running task.
71 – Kaspersky Security Network Statement has not been accepted.
72 – threats were detected during execution of the Custom Scan or Custom Container Scan task.
73 – an attempt to specify the Application Control task settings that affect the application operation without confirming these settings using the --accept flag.
74 – Kaspersky Endpoint Security must be restarted after an update.
75 – the computer must be restarted.
128 – unknown error.
65 – all other errors.
Page top
Appendix 4. Managing KESL container using REST API
Interaction with the KESL container is implemented using the REST API.
Using the REST API, you can submit the following requests:
- Scan request (POST)
- Request for information on scan sessions (GET)
- Request for adding a registry certificate without reloading the container
Scan request
Purpose
Scan of the object specified in the request body.
The following objects can be scanned:
- One file
- Multiple files
- One or multiple Docker images located in a specific repository
- One or multiple Docker images located in a specific repository with additional settings
Path
http://<server>:<port>/scans[?wait=1]
Settings
The optional wait setting specifies the type of the scan session.
If the setting value is 1, synchronous scan is performed and the application sends a report when scan finishes.
If the setting value is 0, asynchronous scan is performed, and the response is as follows:
{
"id"="7d27e9b4-a4d7-469b-bdcf-ebfe953498e4",
"location"="/scans/7d27e9b4-a4d7-469b-bdcf-ebfe953498e4"
}
where:
- id – unique identifier of the scan session.
- location – path for requesting information on this section: http://<server>:<port>/scans/<location>.
Request headers
The request can contain the following headers:
- Content-Type
Defines the type of the object submitted for scan.
Supported values:
- application/octet-stream – one file
- multipart/form-data – multiple files
- text/plain – one or multiple Docker images located in a specific repository
- application/json – one or multiple Docker images located in a specific repository with additional settings
- x-api-key (optional)
API key specified in the KRAS4D_XAPIKEY environment variable or the xapikey variable in the configuration file.
Possible errors
If an unsupported value is specified in the Content-Type header, the application returns the following error:
{
"error"={
"code"="NOT_SUPPORTED_CONTENT_TYPE",
"details"="<content type>",
"message"="Not supported Content-Type"
},
"status"="error"
}
Scan file request
Content-Type
application/octet-stream
Request body
File.
Response example:
|
Request to scan multiple files
Content-Type
multipart/form-data
Request body
Multiple files.
Response example:
|
Request to scan Docker images
Content-Type
text/plain
Request body
Link to the Docker images to scan.
The following values are available:
- Path to an image in the repository (for example, https://index.docker.io/jerbi/eicar:latest).
- Path mask for multiple images (for example, https://index.docker.io/<name mask>:<tag mask>). You can use the ? and * symbols to indicate a mask.
Response example:
|
Possible errors
A request using the Docker REST API is used to get a list of images by mask.
However, on many public servers it is disabled for security reasons. An attempt to scan images by mask on such servers results in an error.
Error example:
|
Request to scan Docker images with additional settings
Content-Type
application/json
Request body
JSON of the following type:
{
"source": "https://index.docker.io/jerbi/eicar:latest",
"params": {
"destination": "https://fake",
"skipimageifexists": true,
"custom_callbacks": {
"on_detect": {
"uri": "http://10.16.42.75:5050",
"content-type": "application/json",
"body": {
"session_id": "100",
"session_init": "20201105T072403+0300",
"infected_items": "$infected"
}
},
"on_complete": {
"body": {
"session_id": "100",
},
"uri": "http://10.16.42.75:5050/on_complete",
}
}
}
}
Additional request settings
The params section can contain the following settings:
destination(optional) – the server to which the scanned image will be copied.skipimageifexists(optional) – do not scan or copy the image if the destination server already has an image with the same name and SHA256 hash. This setting can only be specified if thedestinationsetting is specified.custom_callbacks(optional) – describes the requests that should be sent when scan finishes:- on_detect – the request is sent if a threat is detected.
- on_complete – the request is always sent when scan finishes.
In the description of the request body, you can specify the $infected substitution variable. The list of infected objects is substituted instead of this variable.
Response example:
|
Request for information on scan sessions (GET)
Purpose
Obtaining information about the scan sessions.
Path
http://<server>:<port>/scans[?force] – request for a list of sessions.
http://<server>:<port>/scans/<unique scan session identifier>[?force] – request for information on a specific session.
Settings
The KESL container stores data about scan sessions in the memory and writes them to the scan results database.
The optional ?force setting initiates reading information from the database if several KESL container instances are working with the same database. If this setting is missing, information will be displayed only about the sessions that were initiated by a specific KESL container instance.
Request for the list of scan sessions
Path
http://<server>:<port>/scans[?force]
Response example:
|
Request for information on a specific session
Path
http://<server>:<port>/scans/<unique scan session identifier>[?force]
Response example:
|
Request for adding a registry certificate (POST)
Purpose
Adding a registry certificate without reloading the KESL container.
Path
http://<server>:<port>/addcert
Request headers
The request contains a Content-Type header.
Supported values:
- application/octet-stream – one certificate file
- multipart/form-data – multiple certificate files
Appendix 5. Configuring interaction with Kaspersky Anti-Virus for Linux Mail Server
To configure joint operation of Kaspersky Endpoint Security and Kaspersky Anti-Virus for Linux Mail Server:
- Save the File Threat Protection task settings in the configuration file using the following command:
kesl-control --get-settings 1 --file <full path to file> - Open the created configuration file for editing.
- Add the following section to the created file:
[ExcludedFromScanScope.item_<item number>]Path=/var/opt/kaspersky/klms - Repeat the section specified above for all mail agents integrated with Kaspersky Anti-Virus for Linux Mail Server.
- To exclude the temporary directory of filters and services of Kaspersky Anti-Virus for Linux Mail Server from scanning, add the following section to the created file:
[ExcludedFromScanScope.item_<item number>]Path=/tmp/klmstmp - Save the changes in the configuration file.
- Import settings from the configuration file to the File Threat Protection task by using the following command:
kesl-control --set-settings 1 --file <full path to file>
Sources of information about the application
Kaspersky Endpoint Security page on the Kaspersky website
On the Kaspersky Endpoint Security page, you can view general information about the application, its functions, and its features.
The Kaspersky Endpoint Security page contains a link to the online store. Here you can purchase the application or renew the right to use the application.
Kaspersky Endpoint Security page in the Knowledge Base
The Knowledge Base is a section of the Kaspersky Technical Support website.
On the Kaspersky Endpoint Security page in the Knowledge Base, you can read articles that provide useful information, recommendations, and answers to frequently asked questions on how to purchase, install, and use the application.
Articles in the Knowledge Base may provide answers to questions that relate both to Kaspersky Endpoint Security as well as to other Kaspersky applications. Articles in the Knowledge Base may also contain Technical Support news.
Discuss Kaspersky applications on the forum
If your question does not require an immediate answer, you can discuss it with Kaspersky experts and other users on the Forum.
The Forum lets you view discussion topics, post comments, and create new discussion topics.
Page topGlossary
Active key
A key that is currently used by the application.
Active policy
Policy currently used by the application to control data leaks. The application can use several policies at the same time.
Administration group
A set of devices combined in Kaspersky Security Center in accordance with the functions they perform and the set of Kaspersky applications installed on them. Devices are grouped to simplify administration as the group of devices can be managed as a single entity. An administration group can include other groups. For each application installed in the administration group, group policies and group tasks can be created.
Administration Server
A component of Kaspersky Security Center that centrally stores information about all Kaspersky applications installed within the corporate network. It can also be used to manage these applications.
Application activation
Switching the application to the fully functional mode. Application activation is performed during or after the installation of the application. You need an activation code or a key file to activate the application.
Application databases
Databases that contain information about computer security threats known to Kaspersky as of when the databases are released. Application databases are created by Kaspersky experts and updated hourly.
Application settings
Application settings that are common to all types of tasks and govern the overall operation of the application, such as application performance settings, reporting settings, and backup settings.
Backup
A special storage for backup copies of files, which are created before disinfection or deletion is attempted.
Database of malicious web addresses
A list of web resources whose content may be considered as dangerous. The list is created by Kaspersky experts; it is regularly updated and is included in the distribution kit of Kaspersky applications.
Database of phishing web addresses
A list of web resource addresses that are identified by Kaspersky experts as phishing. The database is regularly updated and is included in the distribution kit of Kaspersky applications.
Exclusion
Exclusion is an object excluded from the Kaspersky application scan. You can exclude from scan files of certain formats, file masks, a certain area (for example, a folder or an application), application processes, or objects by name, according to the Virus Encyclopedia classification. Each task can be assigned a set of exclusions.
False positive
A situation when a Kaspersky application considers a non-infected object to be infected because the object's code is similar to that of a virus.
File mask
Representation of a file name using wildcards. The standard wildcards used in file masks are * and ?, where * is any number of any characters, and ? is any single character.
Group policy
see Policy.
Group task
A task assigned to an administration group and performed on all managed devices included in this administration group.
Infected object
An object which includes a portion of code that completely matches the part of a known malware code. Kaspersky experts do not recommend accessing such objects.
Kaspersky update servers
Kaspersky HTTP and FTP servers from which Kaspersky applications download database and application module updates.
License
A time-limited right to use the application, granted under the End User License Agreement.
License certificate
A document that you receive from Kaspersky along with the key file or activation code. This document contains information about the license provided.
Object disinfection
A method of processing infected objects that results in full or partial recovery of data. Not all infected objects can be disinfected.
Policy
A policy determines the application settings and manages the access to configuration of an application installed on devices within an administration group. An individual policy must be created for each application. You can create an unlimited number of various policies for applications installed on the devices in each administration group, but only one policy can be applied to each application at a time within an administration group.
Proxy server
A computer network service which allows users to make indirect requests to other network services. First, a user connects to a proxy server and requests a resource (e.g., a file) located on another server. Then the proxy server either connects to the specified server and obtains the resource from it or returns the resource from its own cache (if the proxy has its own cache). In some cases, a user's request or a server's response can be modified by the proxy server for certain purposes.
Reserve key
A key that certifies the right to use the application but is not currently being used.
Startup objects
A set of applications needed for the operating system and software that is installed on the computer to start and operate correctly. These objects are executed every time the operating system is started. There are viruses capable of infecting such objects specifically, which may lead, for example, to blocking of operating system startup.
Subscription
Enables use of the application with the selected settings (expiration date and the number of devices). You can pause or resume your subscription, renew it automatically, or cancel it.
Trusted device
Windows device that can be fully accessed at any time by the users listed under the trusted device settings.
Trusted zone
A user-defined list of objects (files and folders) that Kaspersky Endpoint Security does not scan or control.
Page top
Information about third-party code
Information about third-party code is contained in the file legal_notices.txt located in the application installation folder.
Page top
Trademark notices
Registered trademarks and service marks are the property of their respective owners.
Amazon is a trademark of Amazon.com, Inc. or its affiliates.
FireWire is a trademark of Apple Inc.
The Bluetooth word, mark and logos are owned by Bluetooth SIG, Inc.
FreeBSD is a registered trademark of The FreeBSD Foundation.
EulerOS is a trademark of Huawei Technologies Co., Ltd.
Core is a trademark of Intel Corporation in the U.S. and/or other countries.
Linux is the registered trademark of Linus Torvalds in the U.S. and other countries.
Microsoft, Active Directory, Outlook, and Windows are trademarks of the Microsoft group of companies.
Oracle and JavaScript are registered trademarks of Oracle and/or its affiliates.
Red Hat and Red Hat Enterprise Linux are trademarks or registered trademarks of Red Hat, Inc. or its subsidiaries in the United States and other countries.
CentOS is a trademark or registered trademark of Red Hat, Inc. or its subsidiaries in the United States and other countries.
Debian is a registered trademark of Software in the Public Interest, Inc.
SUSE is a registered trademark of SUSE LLC in the United States and other countries.
UNIX is a registered trademark in the United States and other countries, licensed exclusively through X/Open Company Limited.
Page top